Buttons and Statusbar in Odoo15
In Odoo, various operations and functions are carried out. And each will have the corresponding status from the new state to the completed state. The status of a process in odoo changes based on an action applied and are generally defined using buttons. In simple words, we will add buttons and some action behind it to process. This makes the Odoo user-friendly and uncomplicated. With this statusbar, a user can understand the outline of an operation that is carried out.
For example consider the sale module, where we create a quotation and we can see that it has three states quotation, quotation send, and finally the sale order state. This change of state occurs based on an action applied.
So let us look at how we can add these kinds of buttons, different states in the header part of our custom module. There is already a student onboarding record created in the custom module.
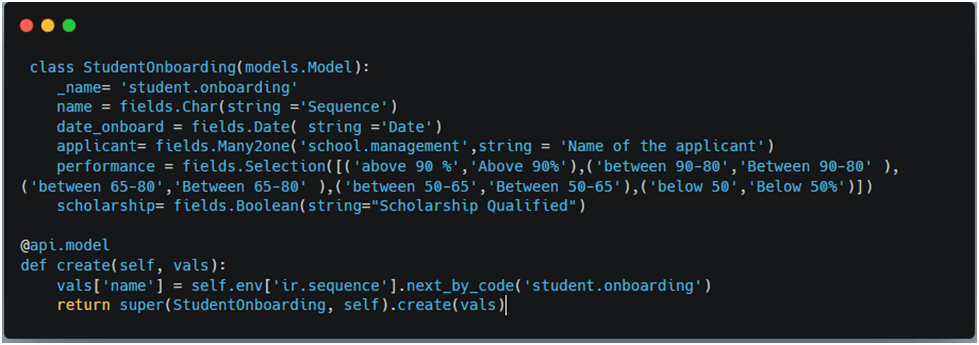
The fields are defined as above and a corresponding view is also created.
After adding this xml to __manifest__.py and model to the __init__.py file and run the server. We can see as that-
Now we are going to add statusbar to the above record. So the first step is to define a field state.

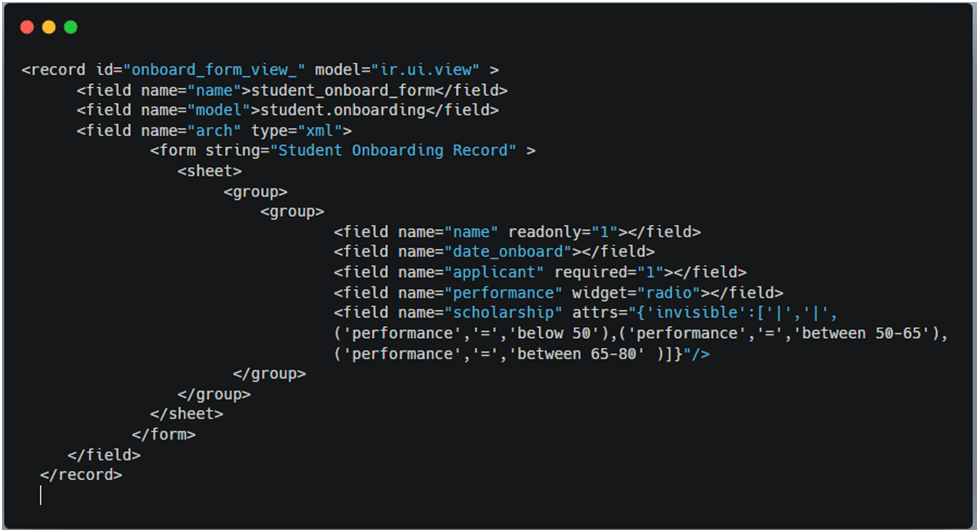
As we have defined states we need to add this to the statusbar in the header for that,

Here we provided the field with the statusbar as widget. Also, defined which all states the button should be visible and we can see that cancelled state is not mentioned. Upgrade the module and look at how this has been reflected.
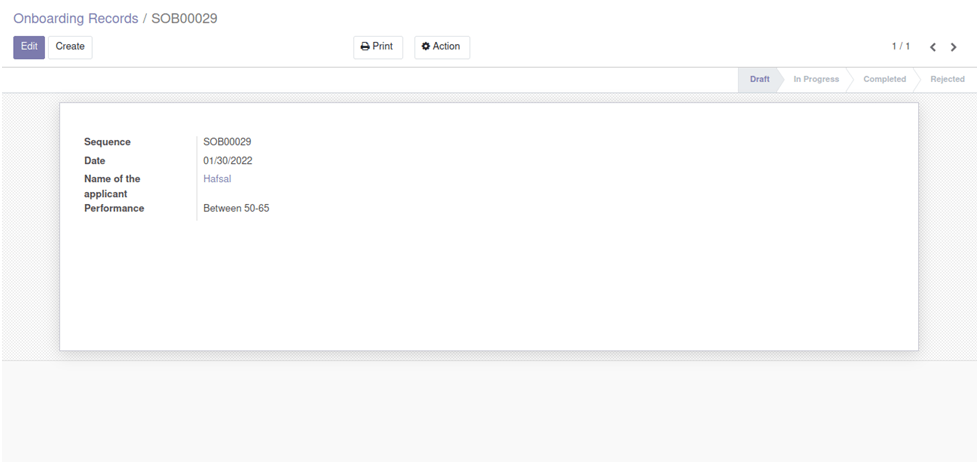
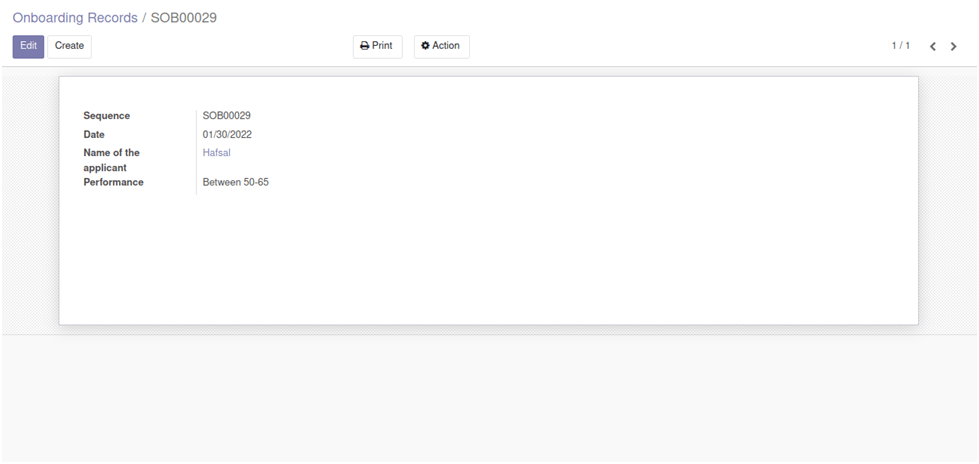
We can see that the states defined have been displayed on the header and is at draft state as defined in the model. Cancelled state is hidden here.
So let us look how we can change the state by adding on some functions to it. So we are creating buttons in the header. As the record is by default at draft state, we need to change the state to ‘In progress’, for that we will add a button.

We can see that the name of the button, id, string are given. Also, the state in which the button should be shown is mentioned. We have to define an action ‘ action_confirm’. The type is given as object so that a method in python will be executed. There is another type –action, where an action record will be called.
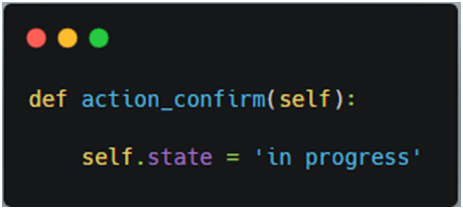
This function when called will automatically change to ‘in progress‘. If we want to add some additional conditions we can add them here according to our purpose. So let us see how this button works –
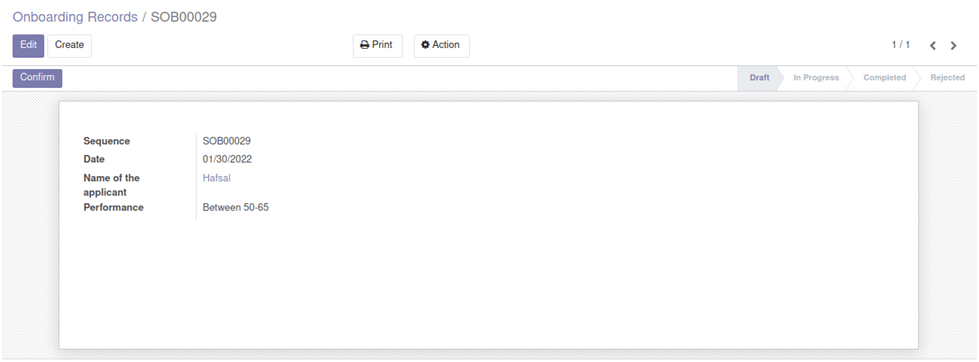
We can see the button confirm on the top left of the header and let us see what happens when the button is clicked.
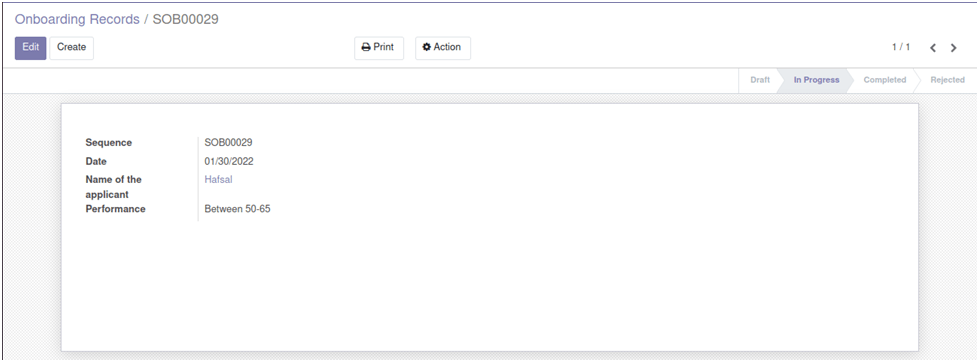
The state has changed from draft to in progress state. Similarly, we can add more button and their corresponding functions to the record.
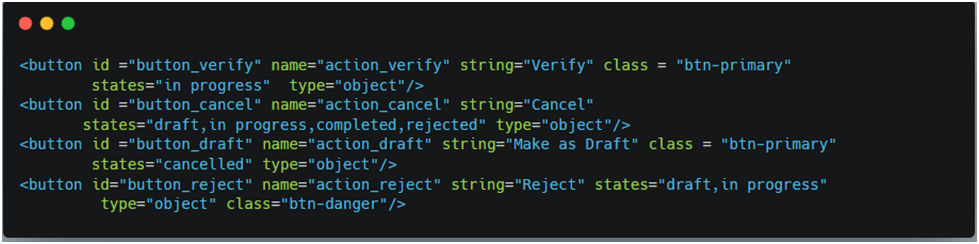
We have added 4 more buttons and the state in which the button should be shown is also mentioned.
So we are currently in ‘in progress’ state and we can see the buttons Verify, Cancel and Reject are said to be displayed in this state.

We can see three buttons. One can verify, cancel or reject from here itself. We have to define methods for these buttons with the name as mentioned while creating the button.
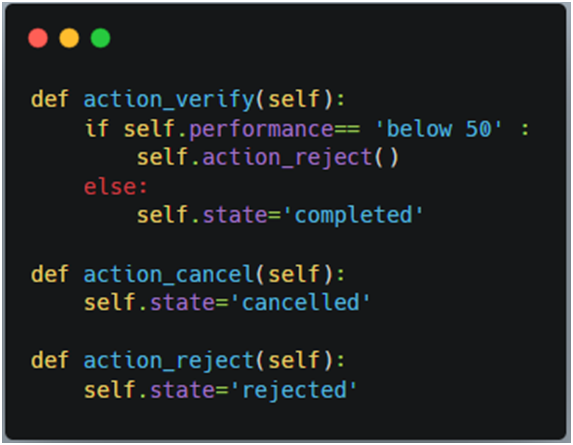
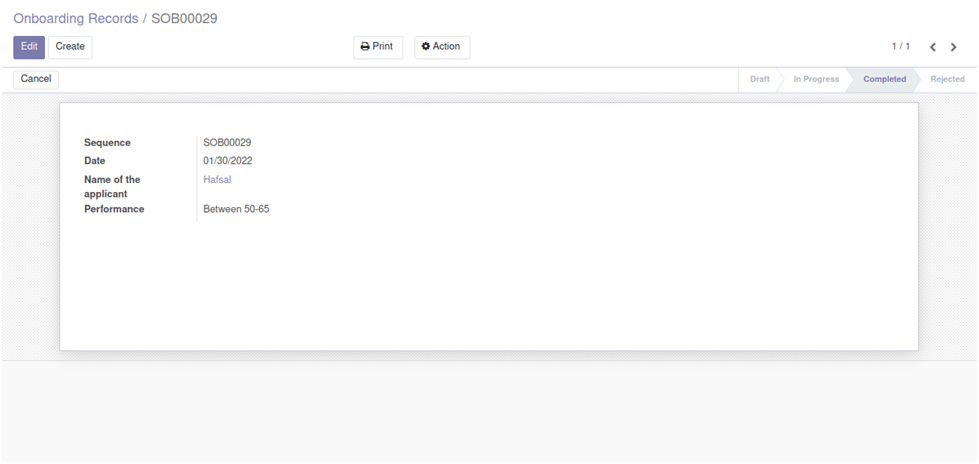
So when verify button is clicked it checks whether the performance of the student is below 50 and if is found to be true, then action_reject is called. Where the method in turn changes the state to rejected. And if it finds to be false the onboarding state is changed to completed. From the above image, we can see that performance is between 50 and 65 and not less than 50. So obviously, it goes to the completed state.
Similarly, we can cancel the onboard by clicking or reject from this state itself. Whatever the case, if the Complete button or Reject is clicked the corresponding method will be called.
In case we directly want to reject this due to any other reason, we can do it just by clicking the Reject Button without having to go for the verification.
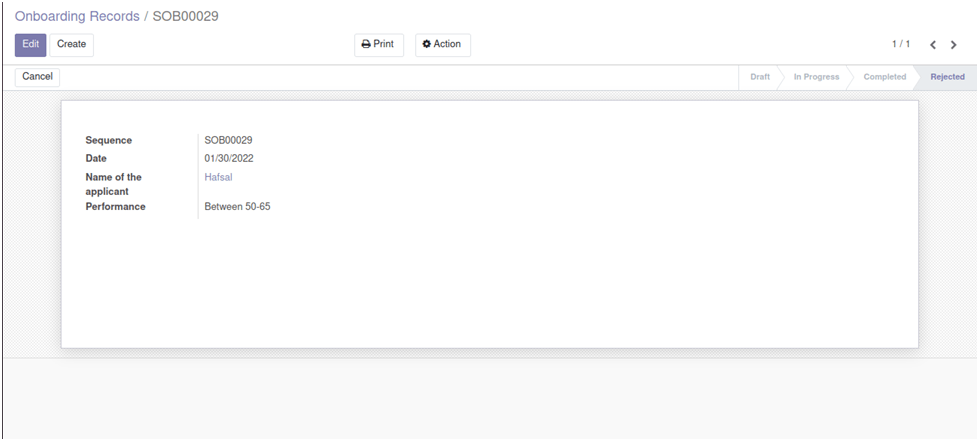
When the status is rejected, only the cancel button is seen, which was already mentioned while defining the buttons. Similarly cancelling can be done and it goes to the cancelled state and that state will be visible in statusbar when the function is called, i.e. when the button is clicked.
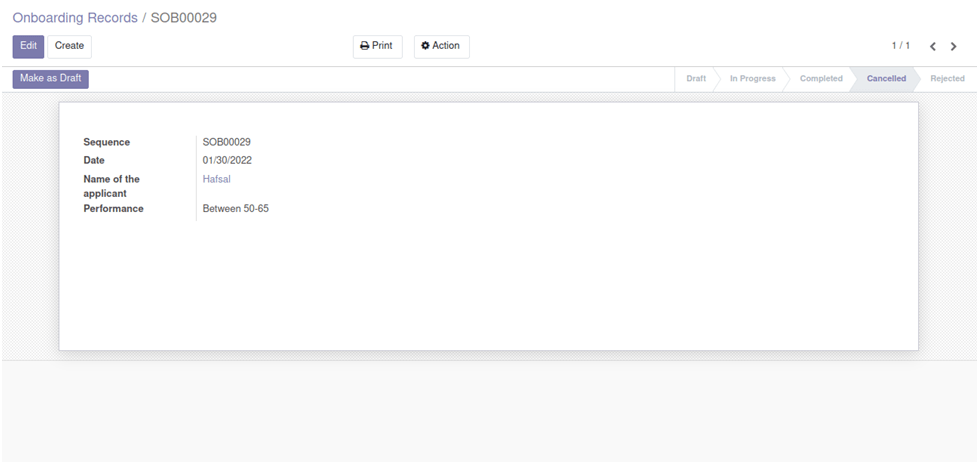
Here make as the draft button is shown which when clicked will call the function which changes the state from cancelled to draft.
This is how we add buttons and a statusbar to our custom model. From the above, it is clear how the buttons are defined, their corresponding methods, and the way it reflects the record. We can also add wizard actions to the buttons based on our requirements. An example is in CRM, where we new quotation is going to be created, a pop up appears,
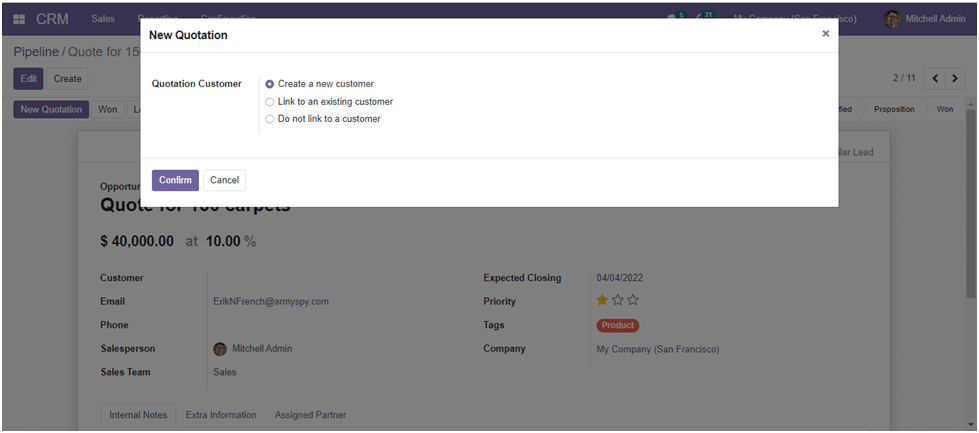
This is a wizard and the button has the same functionality as mentioned above. It calls the function defined in the button and changes the state as mentioned above. Wizard creation will discussed in further blogs.
If you are having queries or need any assistance in Odoo, don’t hesitate to ask. You can reach out to us on our website www.infintor.com