How to create Refunds in Odoo 16 Accounting
Application?
Refunds contribute to customer satisfaction by addressing issues such as product defects, service failures, or unmet expectations. Satisfied customers are more likely to become repeat customers and advocates for your brand. Refund requests often come with valuable feedback that can be used to identify areas for improvement. Organizations can use this feedback to enhance products, services, or internal processes. Refunding can also be a tool for conflict resolution, helping to appease dissatisfied customers and resolve disputes. It can turn a negative customer experience into a positive one, demonstrating the organization’s commitment to customer service.
In the Accounting Module of Odoo 16, a business can manage their refund operation seamlessly. Many alternatives are available for refunds in Odoo 16, including manual refund, invoice-based refund, credit-based refund, and payment-based refund.
To create a refund, follow the path below:
Accounting application => Vendors menu => Refunds => New
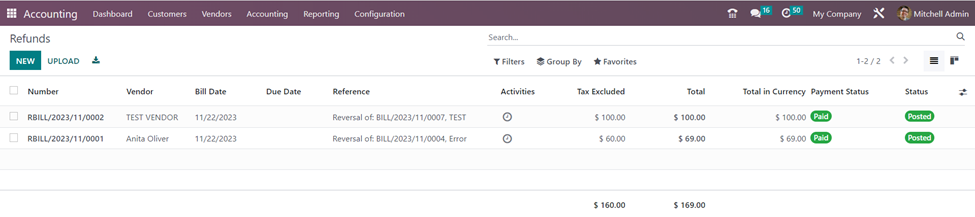
The page shows essential details such as the Refund number, Vendor, Bill date, Due date, Reference of bill, Activities, Tax excluded, Total, Total in currency, Payment status and Status.
We can select the ‘New’ button to create a new refund.
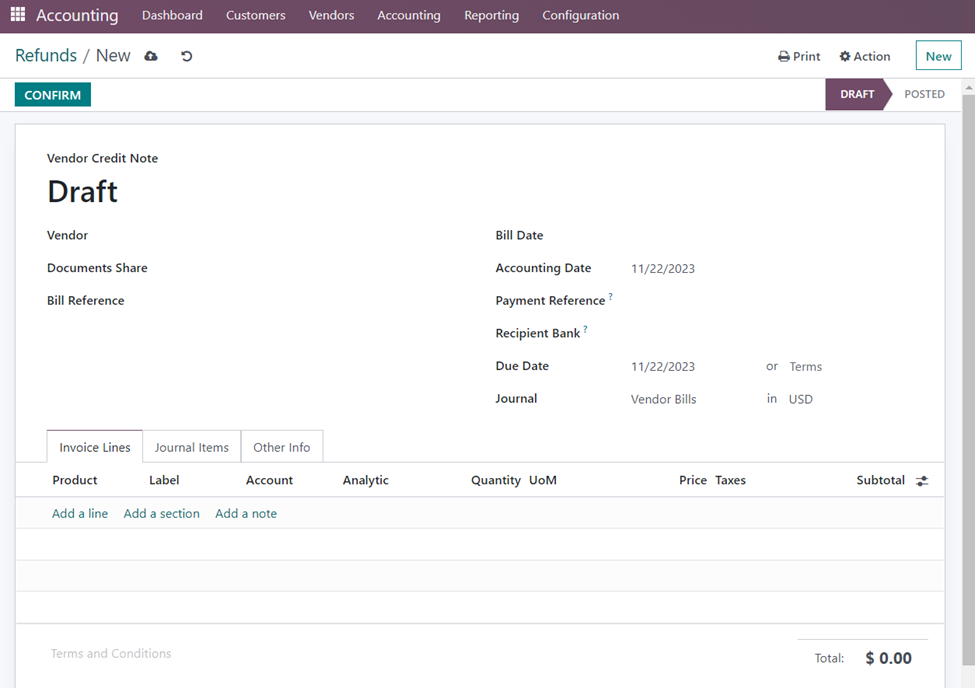
You can fill in the designated spaces on this creation page with the vendor credit note, vendor name, and bill reference. The vendor date, accounting date, recipient bank, payment reference, due date, and journal can now be added, in that order. As seen in the above figure, the tabs containing invoice lines, journal entries, and other information are located beneath that. You can put the product name, label, account, analytic, quantity, UoM, price, taxes, and subtotal in the spaces provided beneath the ‘Invoice Lines’. You can also use the Add a Line, Add a Section, and Add a Note choices that are located under that.
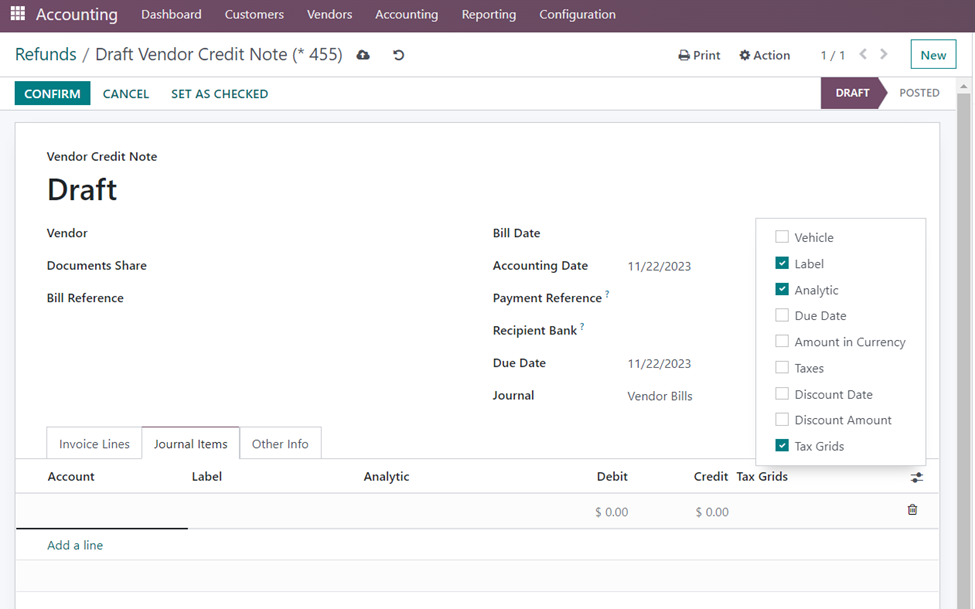
In the ‘Journal Items’ tab, we can enter the Account, Label, Analytic account, Debit, Credit and Tax Grids. We can also select additional columns such as Vehicle, Due date, Amount in currency, Taxes, Discount date and Discount amount by selecting the required fields in the additional fields option as shown above.
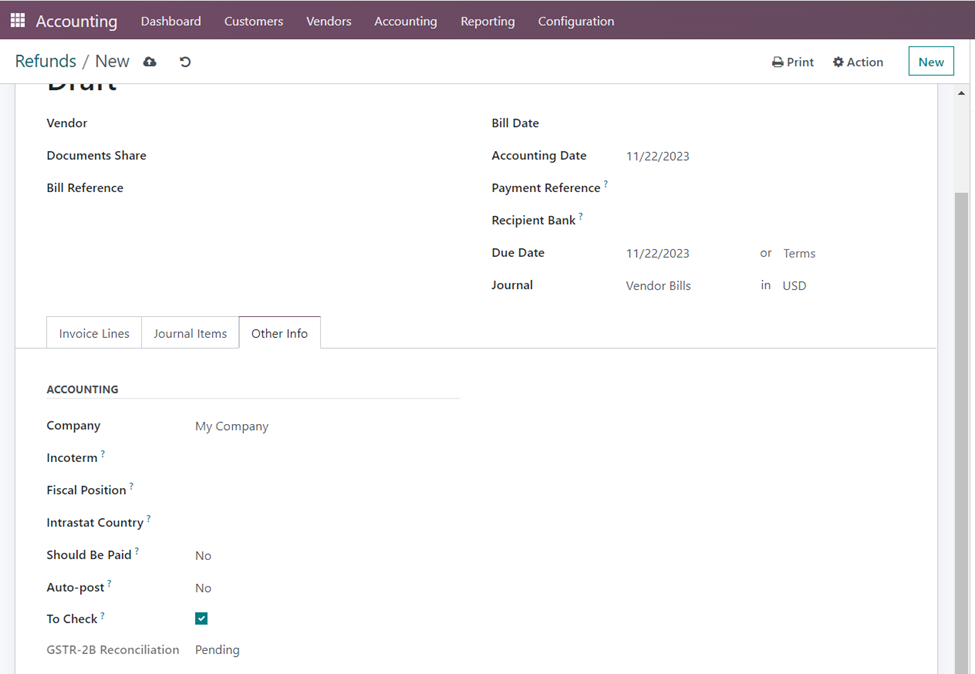
You can enter details such the company name, incoterm, fiscal position, and auto post option in the ‘Other info’ tab. You can also tick the option to activate, as shown in the image below.
After giving all the details, let’s ‘Save’ the created refund. On ‘Confirming’ the refund, the status changes from ‘Draft’ to ‘Posted’.
Issuing refunds is not just a reactive measure to address customer complaints; it’s a proactive strategy to ensure customer satisfaction, uphold ethical standards, and foster a positive relationship between the organization and its customers. Thus, Infintor Solutions your trusted Odoo ERP Partners helps in maintaining a customer-centric and successful business.