How to Manage Employee Expenses in Odoo 16?
To manage expenses effectively requires an organized way of financial management practices. Some of the main steps to be followed for managing our expenses in an organization include:
=> Keeping a detailed record of all expenses. Use accounting software or tools to simplify this process.
=> Regularly reviewing and reconciling our expenses against the budget to identify any discrepancies.
=> Establishing clear approval processes for expenses, especially for significant or non-routine expenditures.
=> Ensuring that there is a system in place for obtaining approval before incurring expenses.
=> Defining spending limits for different categories or departments to prevent overspending.
=> Requiring employees to submit receipts and documentation for all expenses.
=> Maintaining a systematic record-keeping process for easy reference and auditing.
As an employee of an organization, we will incur expenses for company purposes which can be reimbursed after submitting the required bills and getting approval from our manager. This process is simplified in the Expenses Module in Odoo 16.
To create and view our Expenses, we need to navigate to the Odoo 16 Expenses Module.
Expenses Module => My Expenses
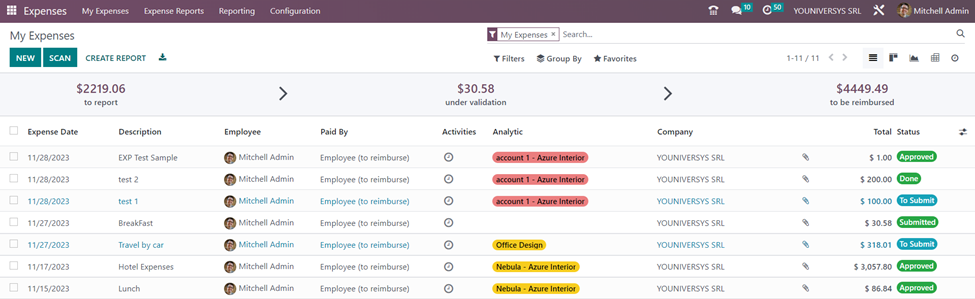
My Expenses window shows details such as Expense date, Description, Employee, Paid By, Activities, Analytic account, Company, Total amount, and Status in the list view.
Expense Category
In Odoo, we can categorize expenses related to a common ground such as accommodation, gifts, travel, food, and so on. These expense categories can be configured in the system so that a certain expense category is selectable by users.
Creating an Expense Category
Expenses module => Configuration menu => Expense Categories => New
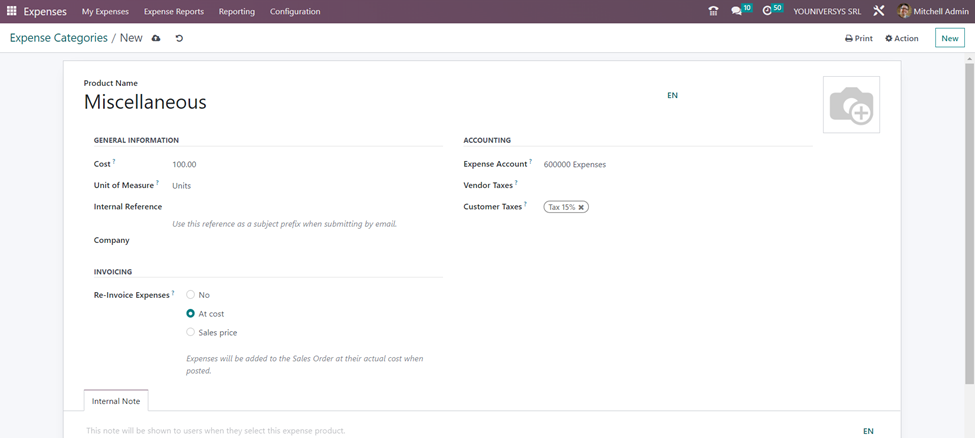
In the new Expense category form, enter the details such as the expense or the product name, cost, unit of measure, internal reference, and company in the General Information section. In the Accounting section, we have the fields to enter Expense account, Vendor taxes, and Customer taxes. Additional notes can be added in the ‘Internal Note’ tab.
The employee won’t be allowed to alter the expenditure amount at the time of expense creation if the user adds a cost price greater than zero while the reinvoicing expense is based on cost in the Invoicing section. Only the expense product’s quantity can be altered by the employees. If we select ‘No’ in the Re-Invoice Expenses field, no reimbursement is done for the expense category.
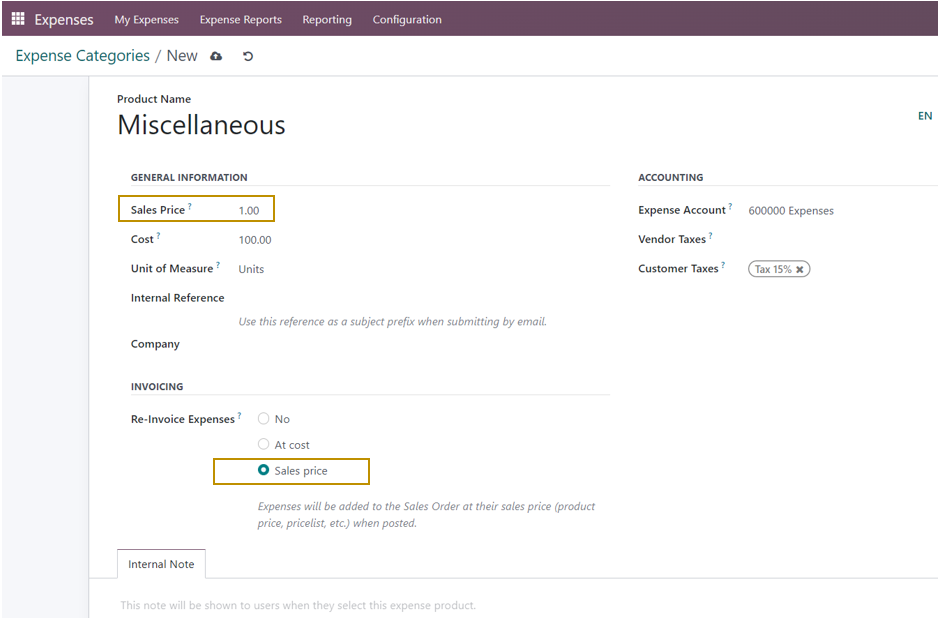
On selecting the ‘Sales price’ option, the sales price column will be supplemented by a new field to the general information. The cost will be billed to the client again on the increased sales price. In the case of ‘Miscellaneous’ expenses, we are going to re-invoice expenses based on sales price.
Now the Expense Category is created and defined in the Odoo database. We can see how this expense category can be used for the expense of employees.
Creating a New Expense
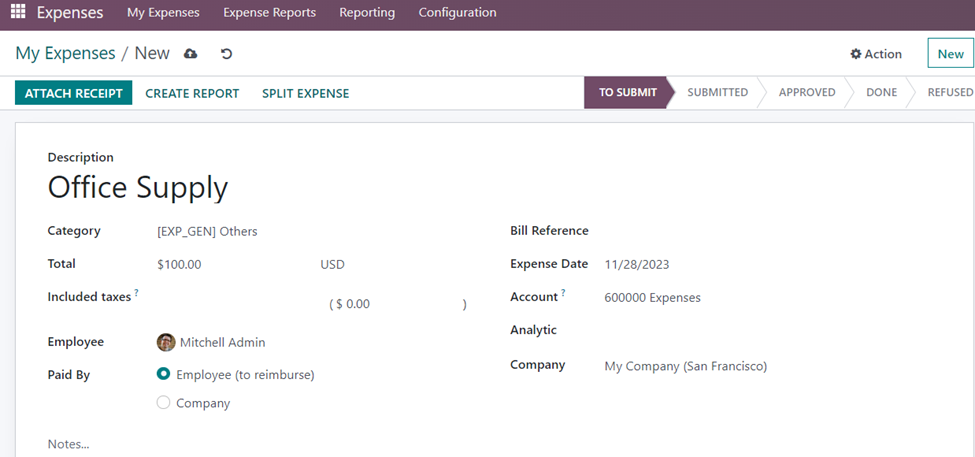
Select the ‘New’ button at the top-left corner of the ‘My Expenses’ dashboard to create a new employee expense.
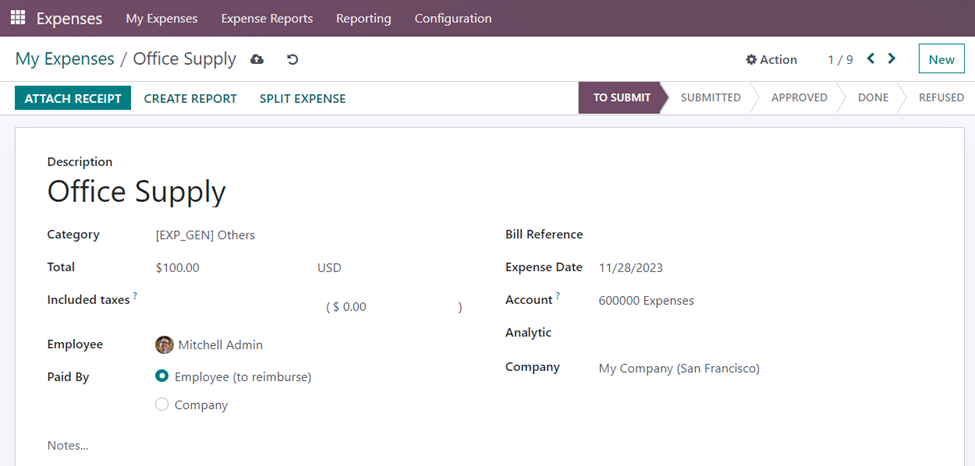
After providing a description of the employee expense, we have to select an Expense category from the drop-down in the Category field. You may observe that the unit price field is automatically entered and cannot be updated further. The unit price specified in the selected expense category is entered. All the other details specified in the expense category are also automatically entered in the expense form.
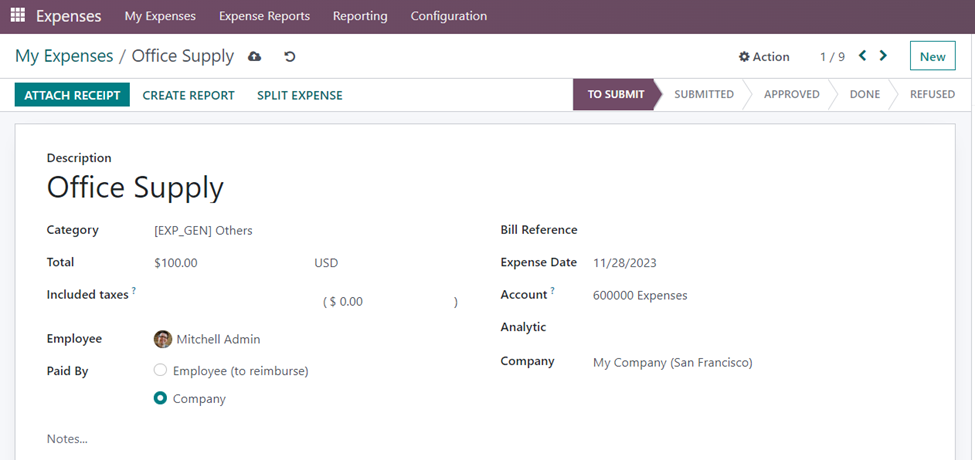
We can either select Employee (to reimburse) or Company in the ‘Paid By’ field. Let us see each case in detail.
When the Expense is paid by the Company:
Every transaction that the business pays for is documented in a certain journal. Additionally, the Configuration settings contain the journal setting.
Expenses module => Configuration menu => Settings => Default Journals section => Company Expense Journal => Specify the journal in which company expenses are recorded => Save
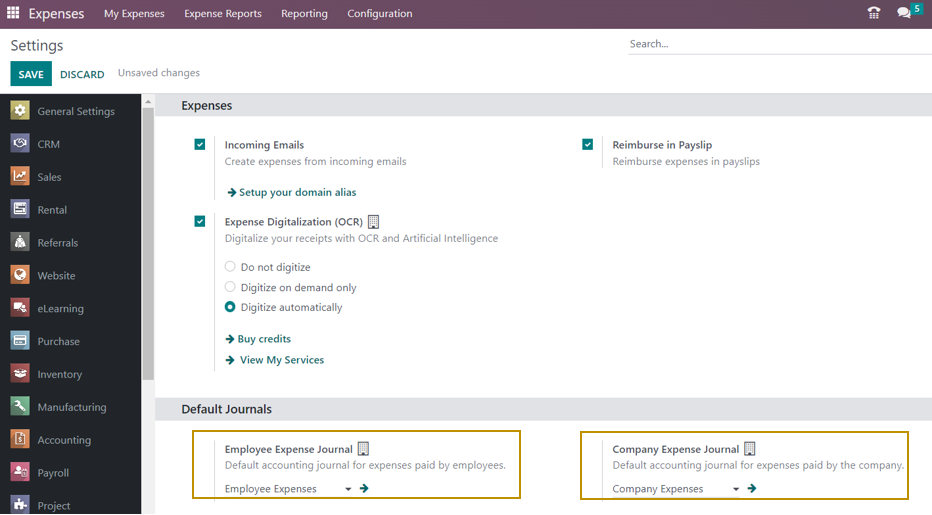
Here, we can also specify the journal to record the expenses paid by employees, and are subject to reimbursement.
Let us now go back to the expense form.
The ‘Attach Receipt’ button can be used by the user to upload any kind of document. Next, press the ‘Create Report’ button. The Expense Report is generated which can be viewed by selecting the My Expense menu and then clicking on the My Expense Report menu.
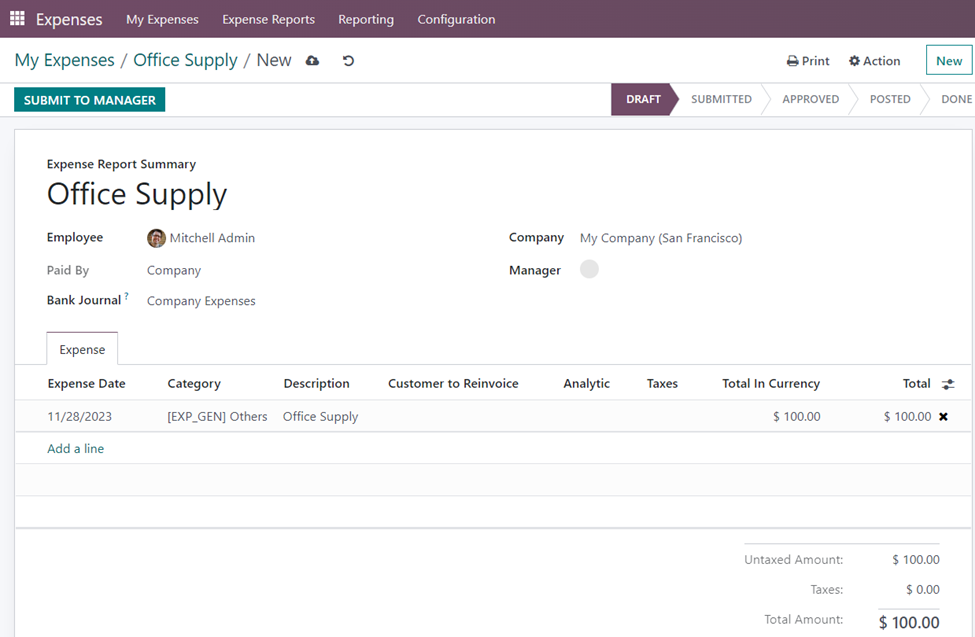
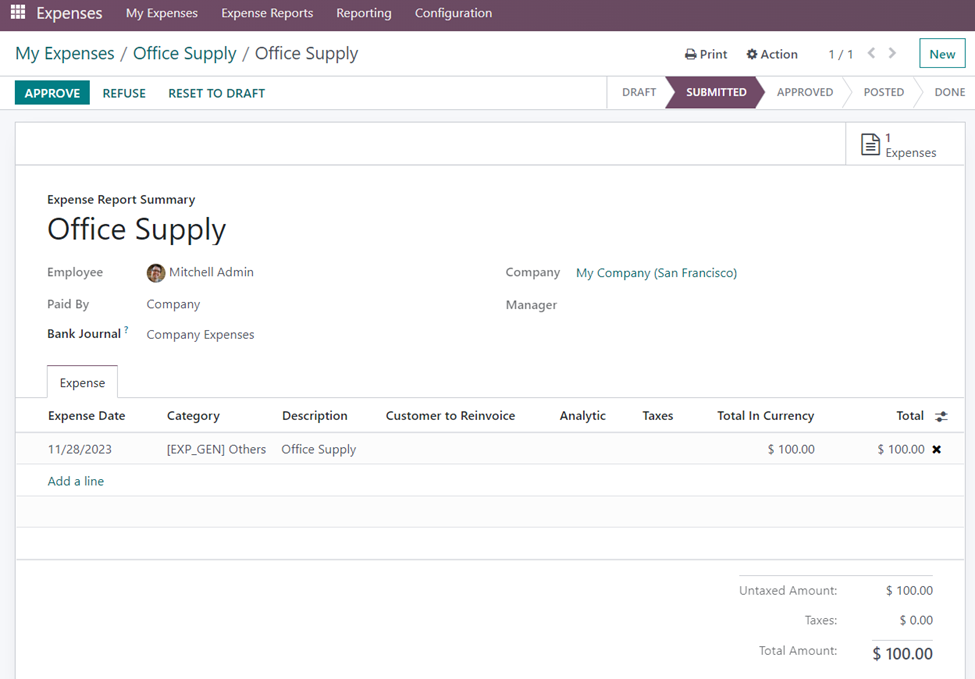
By selecting the ‘Submit To Manager’ button, the expense report can be sent for the manager’s approval. The status of the Expense changes from ‘Draft’ to ‘Submitted’ and an ‘Expenses’ smart button also appears in the form. The ‘Approve’ and ‘Refuse’ buttons will show up after submitting to the manager. The manager can verify the expense report and decide whether to accept it or reject it.
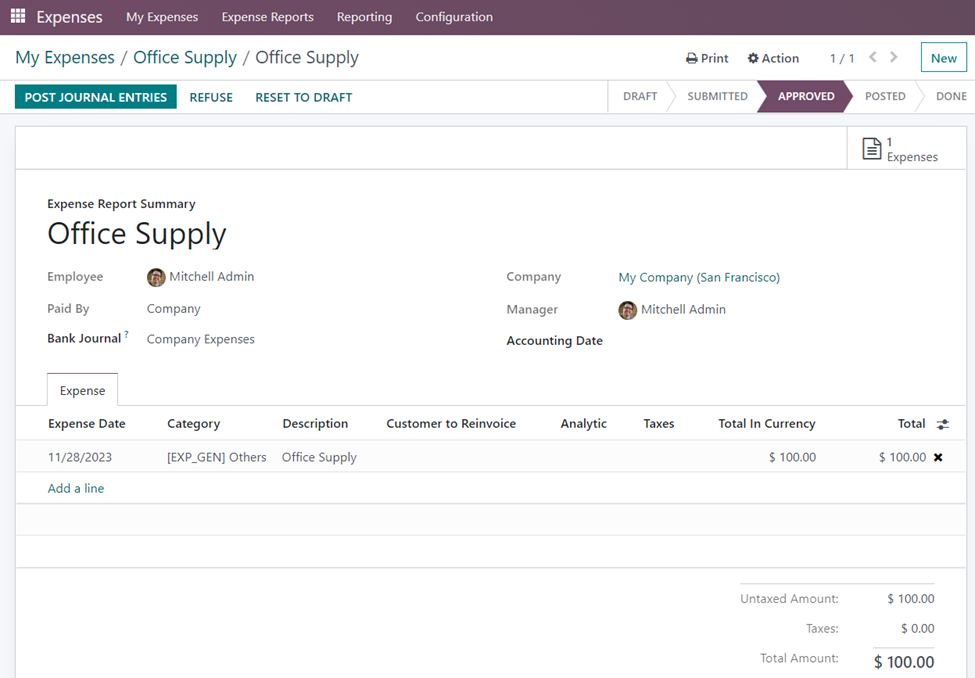
If the manager approves the Expense, we can post journal entries for the same. The status of the expense again changes to ‘Approved’.
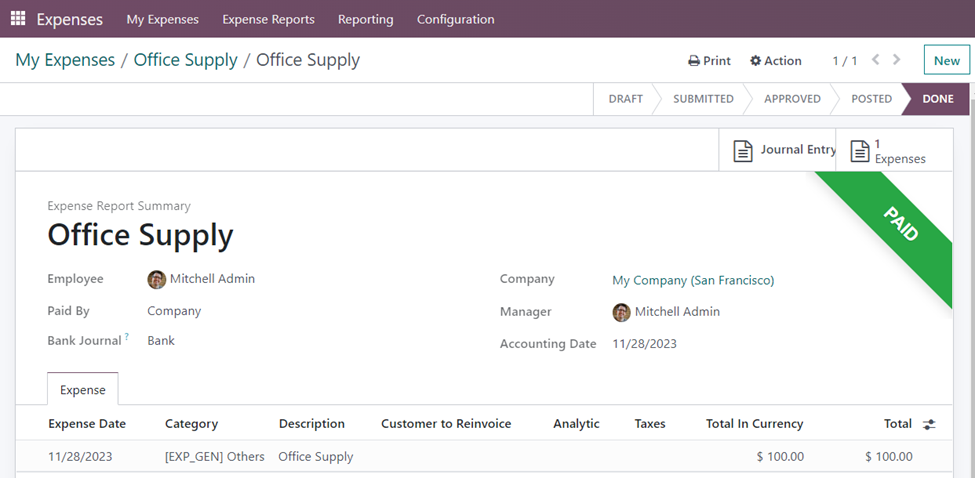
Once we post journal entries by selecting the ‘Post Journal Entries’ button, the expense report then advances to the ‘Done’ stage, whereupon a green colored ribbon ‘Paid’ will immediately show up. The ‘Journal Entry’ smart button also appears in the form from which we can view its journal Entries.
When the Expense is paid by the Employee (to reimburse):
The expense incurred by the employee for the activities done for the company needs to be paid back by the employer. The amount is to be refunded to the concerned employee for meeting expenses for the company. For this, we have to make sure that we have specified the journal concerning employee expenses to be reimbursed in the configuration settings of the Expenses module. We have already discussed it. Hope you can recall the same. Else check the first part of the blog.
Follow the same steps such as Create Report, Submit To Manager, Approve, and Post Journal Entries.

In this method, select the ‘Register Payment’ option for reimbursing the amount to the employee.
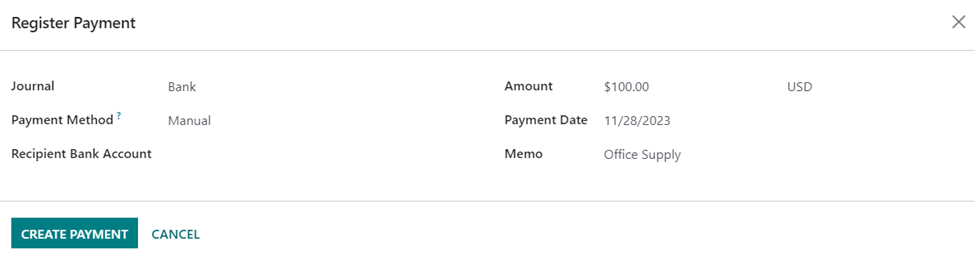
We can register the payment after specifying the Journal, Payment method, Recipient bank account, Amount, Payment date, and Memo by selecting the ‘Create Payment’ option. This will be auto-filled if already configured in the system.
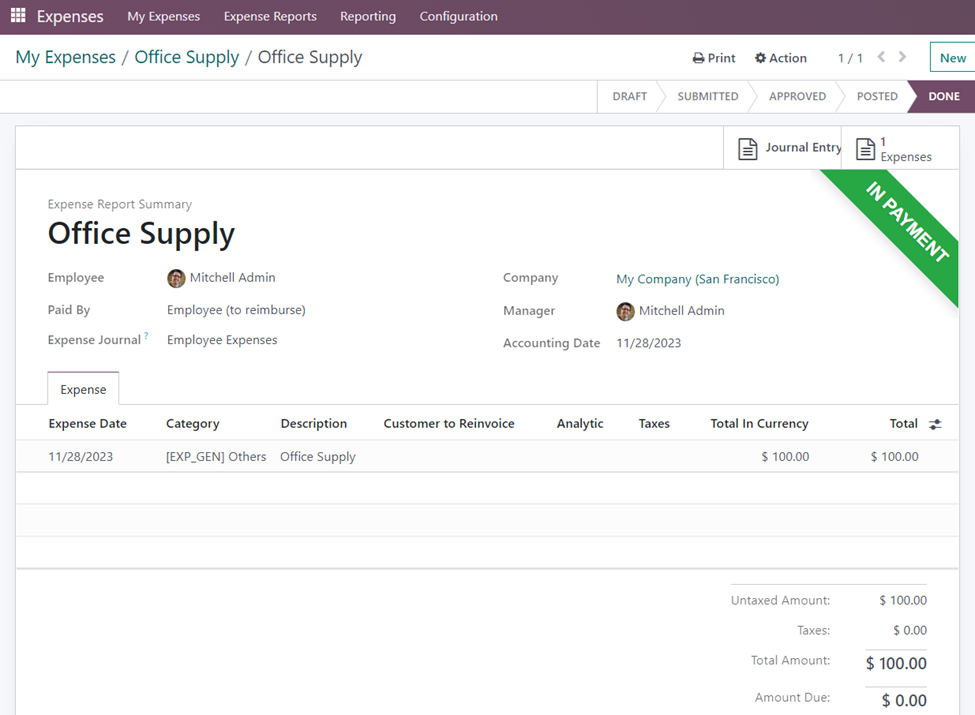
A green colored ribbon ‘In Payment’ is attached to the form and the status of the expense is set as ‘Done’.
By implementing these strategies, you can contribute to effective expense management within your organization, ensuring financial stability and resource optimization.