How to Set Up and Manage Invoicing Policies in
Odoo 17?
An invoicing policy is a set of guidelines and procedures that a business follows when creating and sending invoices to its customers. This policy helps ensure consistency, accuracy, and efficiency in the invoicing process. Businesses need to tailor their invoicing policies to align with their specific operations and industry requirements.
Odoo 17 Sales Application provides two different Invoicing policies for creating customer invoices and validating them. In this blog, we can see the difference between these two invoicing policies and how invoices can be created in the respective cases.
Setting Up Invoicing Policy
Before creating a sales order and its invoice, we have to set up an invoice policy in the Settings of the Sales Application.
Sales Application => Configuration Menu => Settings => Invoicing Section => Invoicing Policy => Save
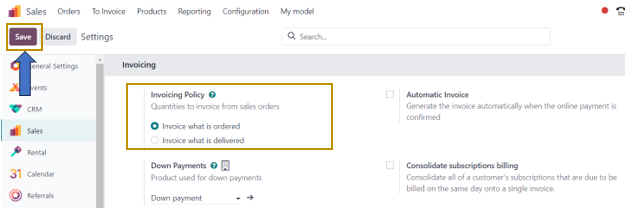
Here, there are two options to choose from the Invoicing Policy. These are ‘Invoice what is ordered’ and ‘Invoice what is delivered’. By default in Settings, ‘Invoice what is ordered’ is selected. Let us know the functionality of each of these options after selecting the option and saving the setting.
Case 1: When the Invoicing Policy is set to Ordered Quantity
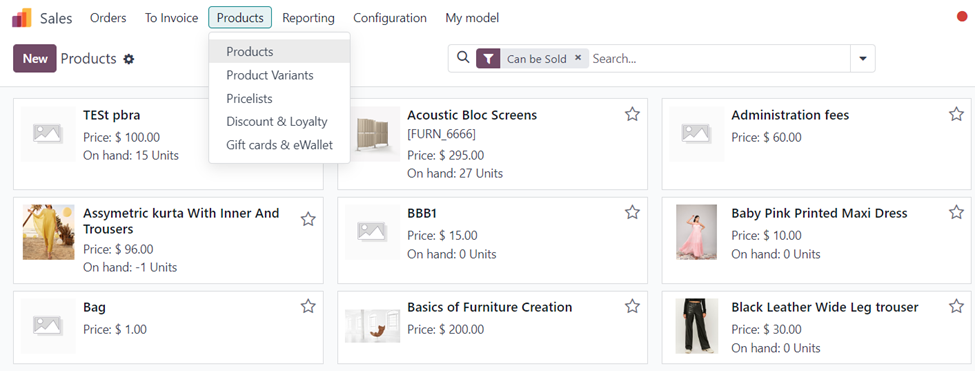
Before creating a sales order and Invoice, we need to specify the invoicing policy for the products. This is because according to the set invoicing policy of the products, the invoice will be created for that product in the order. Let us just select a product to be invoiced to specify the invoicing policy to be applied for that product.
Sales Application => Products Menu => Products => Select the Product
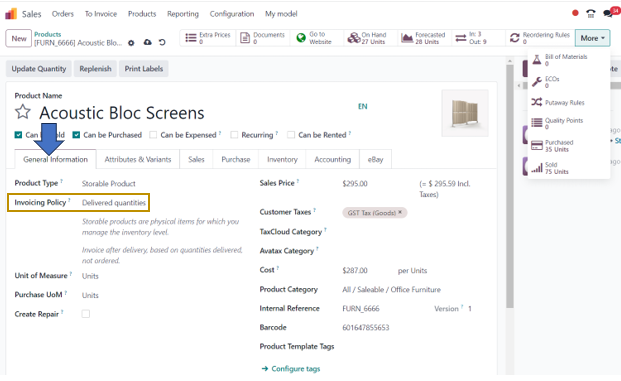
On going to the selected product form, you can find the ‘Invoicing Policy’ field in the ‘General Information’ tab. From there, we can select either ‘Delivered Quantities’ or ‘Ordered Quantities’.
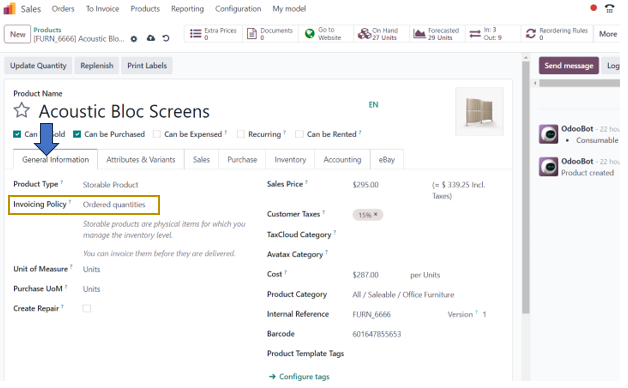
As we are discussing invoice policy based on Ordered Quantities, we can select that. In this case, we will be able to create an invoice for the customer’s order before the delivery of the product.
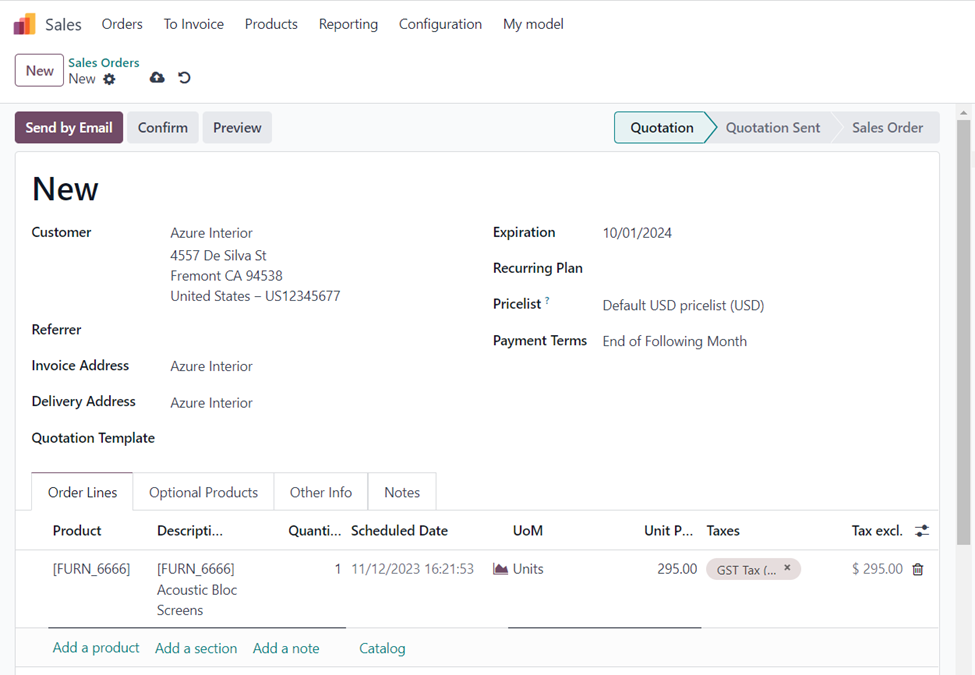
After saving the changes, we can create a Sales order for the product.
Sales Application => Orders Menu => Orders => New

We can add the Customer and other details along with the selected product for which we have specified its invoicing policy by selecting the ‘Add a Product’ option. After selecting the product ordered by the customer, we can confirm the order by selecting the ‘Confirm’ button.
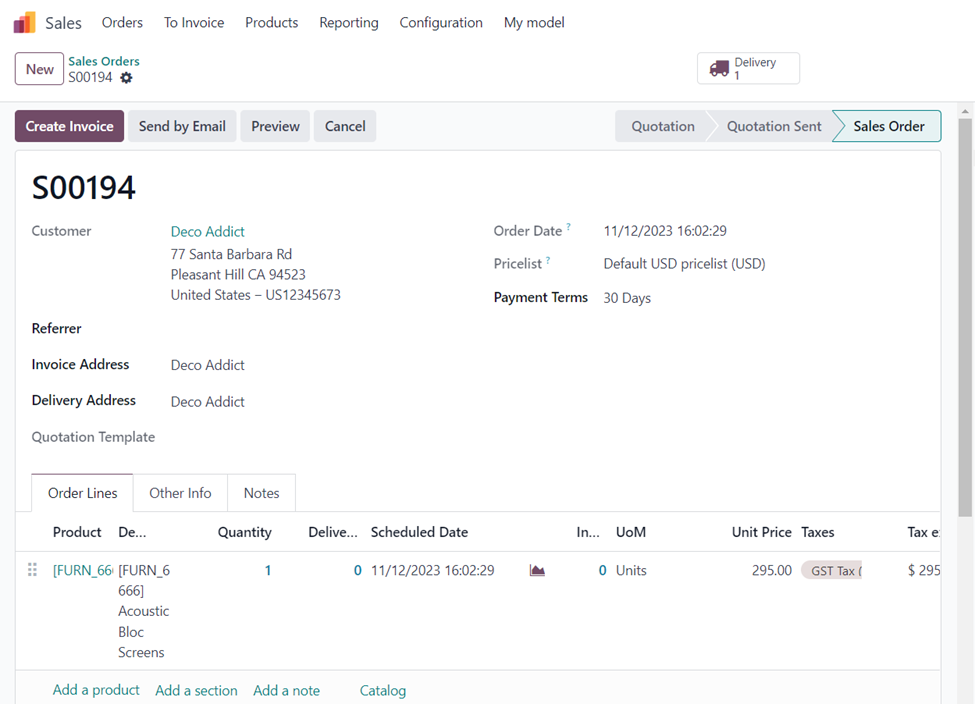
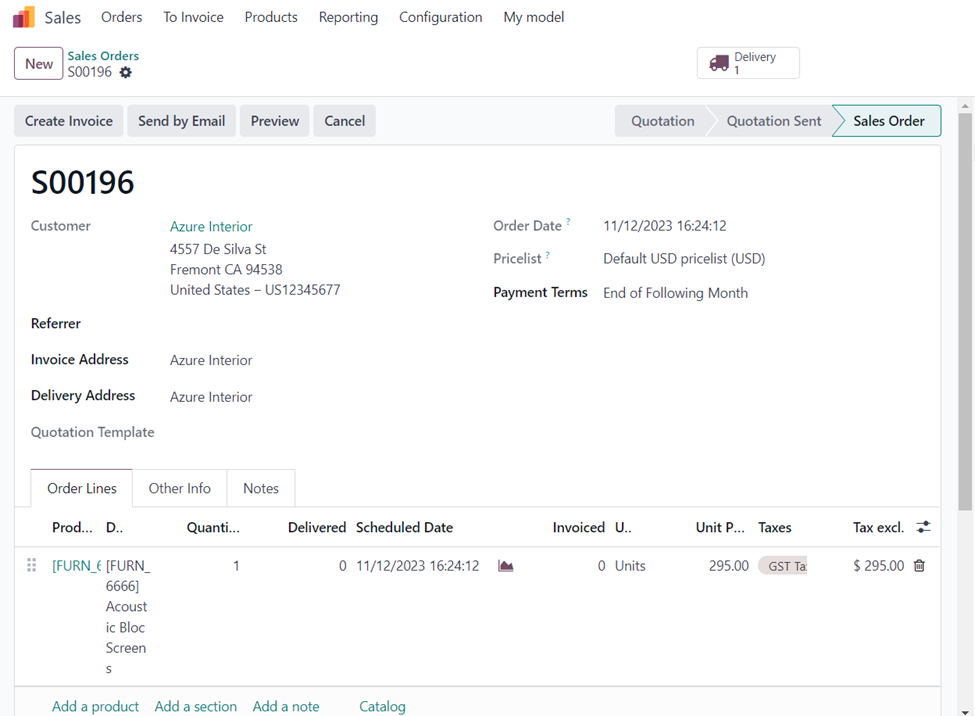
The delivery of the product to the customer is not yet done. But you may observe that the option to create an Invoice and the delivery order smart button appear at the top of the order. On selecting the ‘Create Invoice’ option, we can create an invoice for the order.
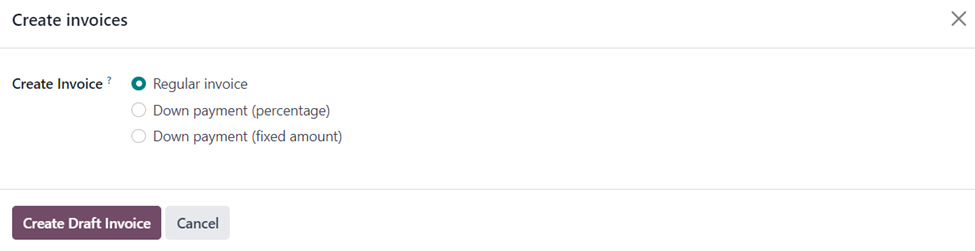
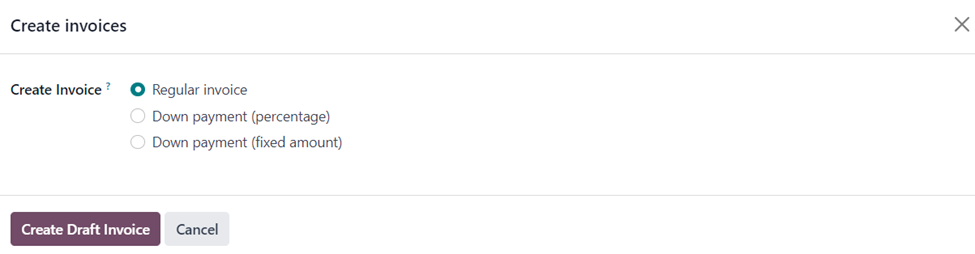
A pop-up window appears in which we need to specify its Invoice method by selecting the required method in the ‘Create Invoice?’ field and clicking on the ‘Create Draft Invoice’ option.
On Confirming the draft invoice created, we can register the payment for the order.
Case 2 :When the Invoicing Policy is set to Delivered Quantity
In this case, we can select ‘Delivered Quantities’ in the ‘Invoicing Policy’ field in the ‘General Information’ tab of the product and ‘Save’ the changes.
Let us follow the same process as that of the first case by creating an order for the product. Imagine, another customer has ordered the same product.
Select the customer and the product, Acoustic Bloc Screens in the ‘Order Lines’ tab of the order. By selecting the ‘Confirm’ button, we can confirm the order.
A button to create an Invoice appears as before.
Click on the ‘Create Draft Invoice’ button after choosing the Invoice method.
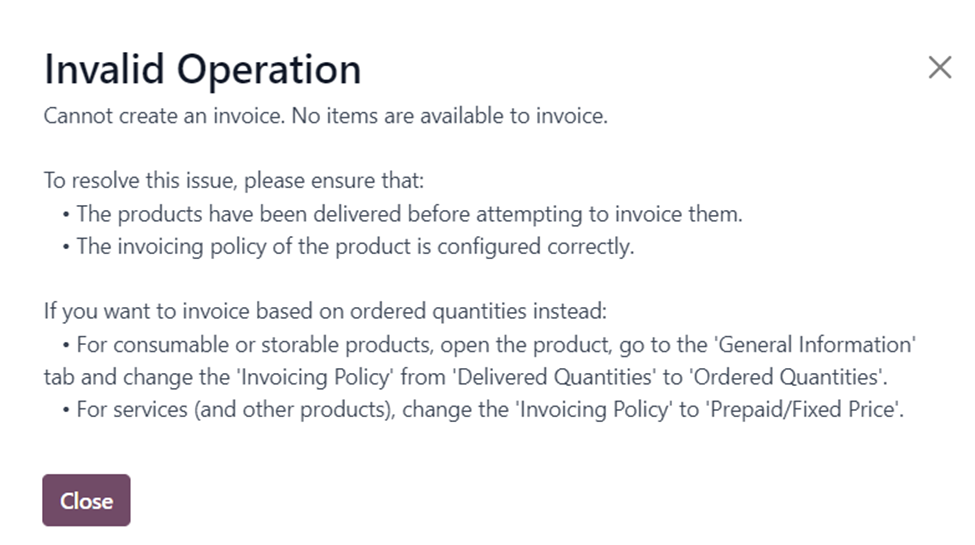
An error message appears. This is because we can only create an invoice after the product is delivered to the customer. For that, we need to go to the delivery order to validate and apply the quantity of the delivery order. So, select the ‘Delivery’ smart button on the top-right side of the order form to access the delivery order.
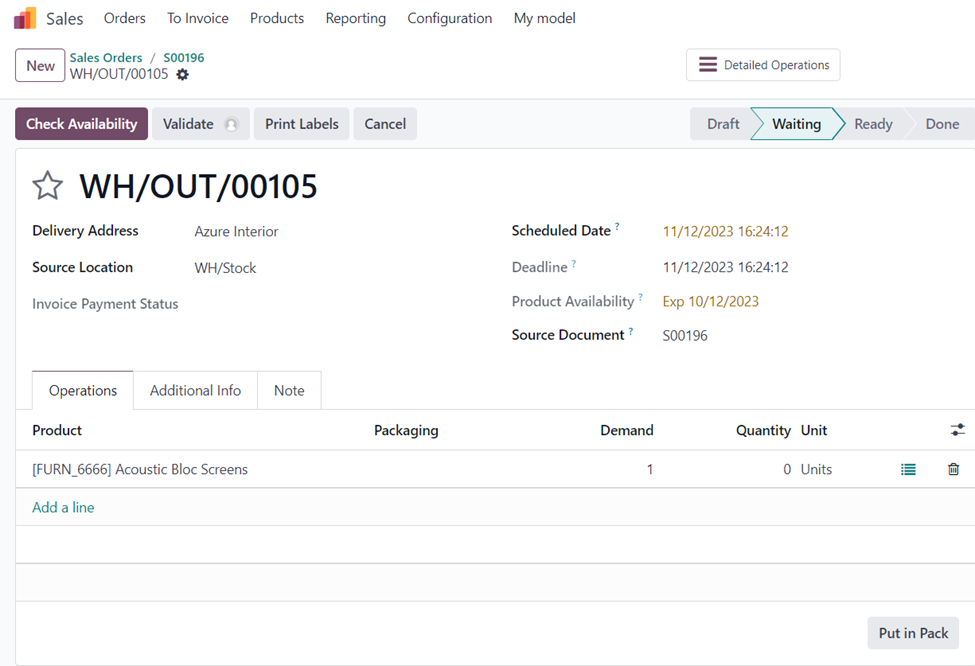
Now, validate the delivery order by selecting the ‘Validate’ option and applying the done quantities.
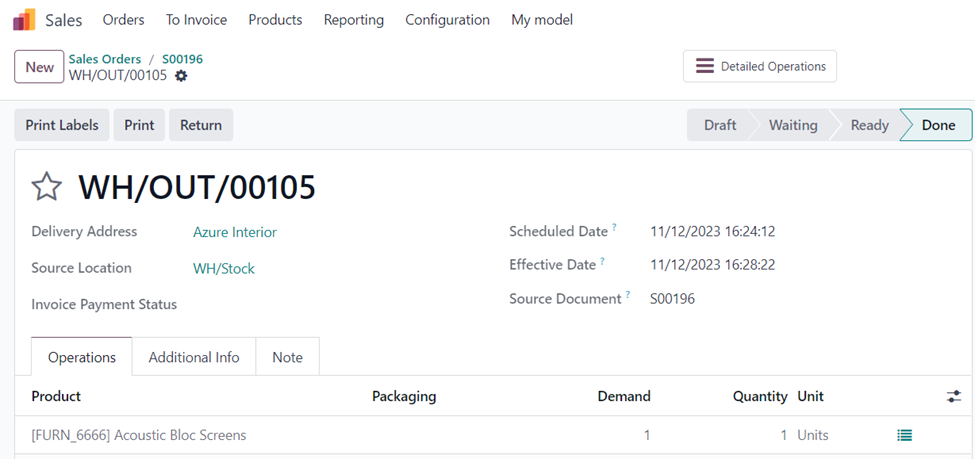
After applying the done quantity, you may note that the number in the ‘Demand’ column and the ‘Quantity’ column will be the same in the ‘Operations’ tab. On going back to the sales order, we can now create a new invoice for the order as the delivery order is in the ‘Done’ stage.

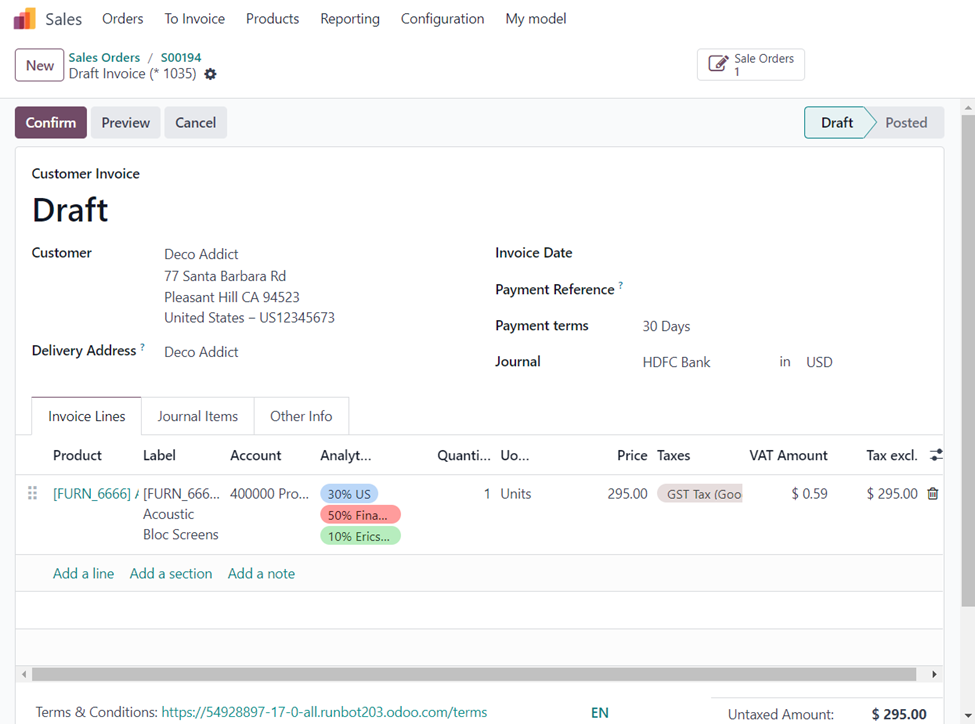
Follow the usual steps for creating an invoice for the order. The above screenshot shows the draft invoice created after the delivery of the product to the customer.
These are the basic differences between the two Invoicing policies in the Odoo 17 Sales Application. Hope you are clear with its respective workflows. Check out other blogs from Infintor Solutions, your trusted Odoo ERP Partner to gain more knowledge on Odoo 17 functionalities.