Expenses Module in Odoo
Every company when operated will have expenses to be met. These expenses can be expenses within the company like the salary of employees, cost of office supplies, or external expenses like taxes, bank interest. Managing the expenses of employees and other day-to-day expenses is easily done in Odoo.
When company expenses are handled by employees, they need to submit documents such as bills, invoices, or payslips that are to be approved or rejected for reimbursement. These expenses can be created through emails and can be reimbursed by making some changes in settings.
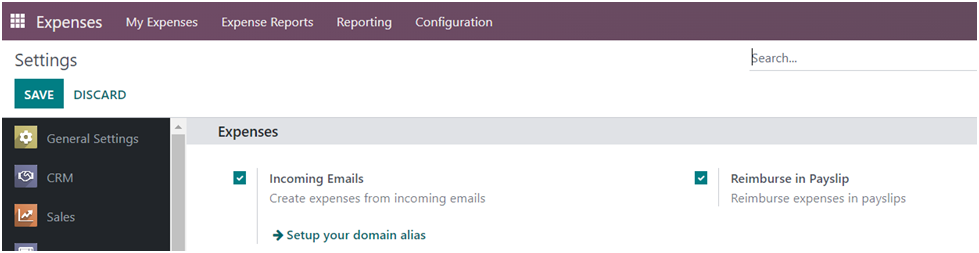
Let’s see how to enable the configuration in the Expense module in Odoo
Go to Inventory module > Configuration Go to Expenses module > Configuration menu > Settings > Select Incoming Emails > Select Reimburse in Payslip > Save > Settings
Expenses can be of different types for different purposes like expenses for food, travel, accommodation, and so on.
To create Expense Category > Go to Configuration menu > Expense Categories > New
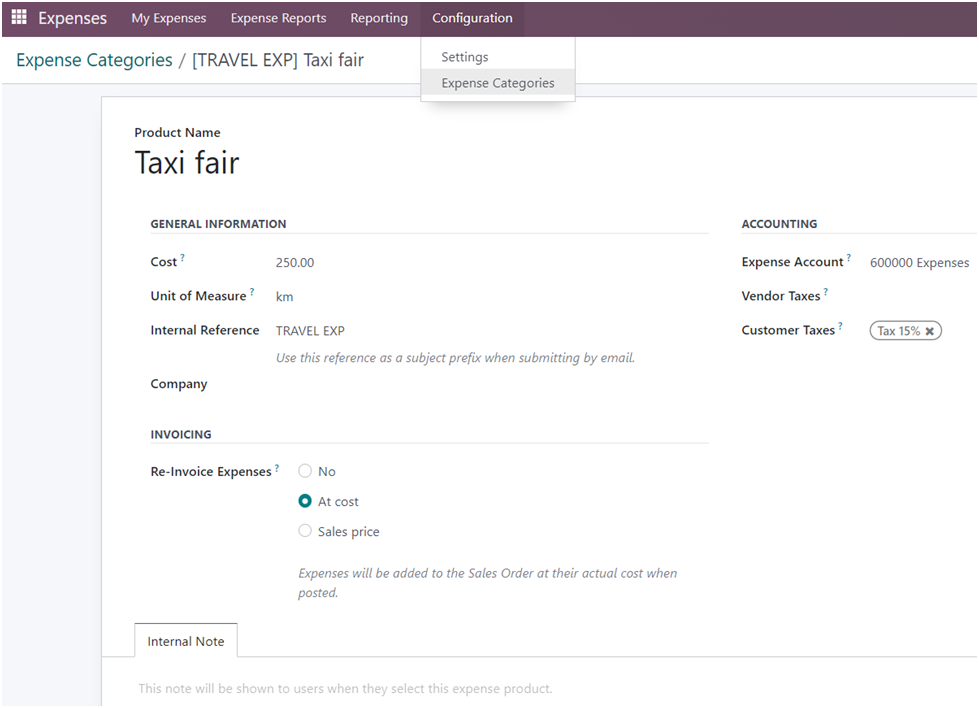
Here, we have created an expense for the payment of a taxi fair for reaching the location of a client for a meeting.
-> Cost: The cost related to the expense.
-> Unit of measure: The measure used to calculate the expense amount.
-> Re-Invoice Expenses: Expenses can be added to the cost of the original product or the sales price of the product.
-> Expense Account: The account related to that category of expenses of the company.
To view all Expenses

Employees can manage their expenses and submit them for approval by creating their expenses in My Expenses dashboard. Click on New to create a new expense.
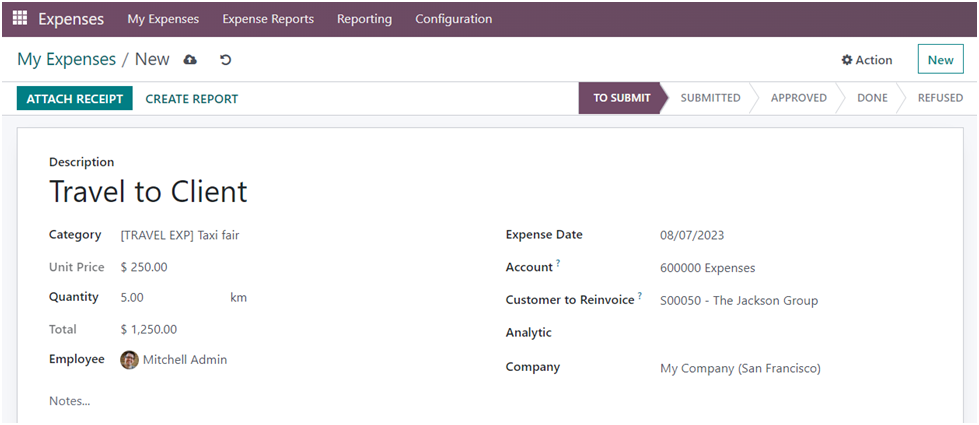
-> Description: A meaningful name for the expense
-> Category: The category related to that specific expense
-> Quantity: How much or how many is consumed to be considered as an expense
-> Employee: The employee of the company who is responsible for the payment of the expense
-> Expense Date: The date on which the expense is incurred
-> Account: The Account related to the expense
-> Customer to Reinvoice: The customer invoice associated with the expense
-> Note: Fields like Unit Price, Total, and Account are automatically filled when an expense category of that particular expense is selected.
We can attach payment receipts as proof to be submitted for reimbursement by selecting Attach Receipt option and uploading the same.
Creating Expense Report
Odoo creates reports for users to easily identify and process expenses related to specific purposes.
Go to Expense Reports menu > New or we can directly create a report for an expense by clicking on Create Report option of the created expense.
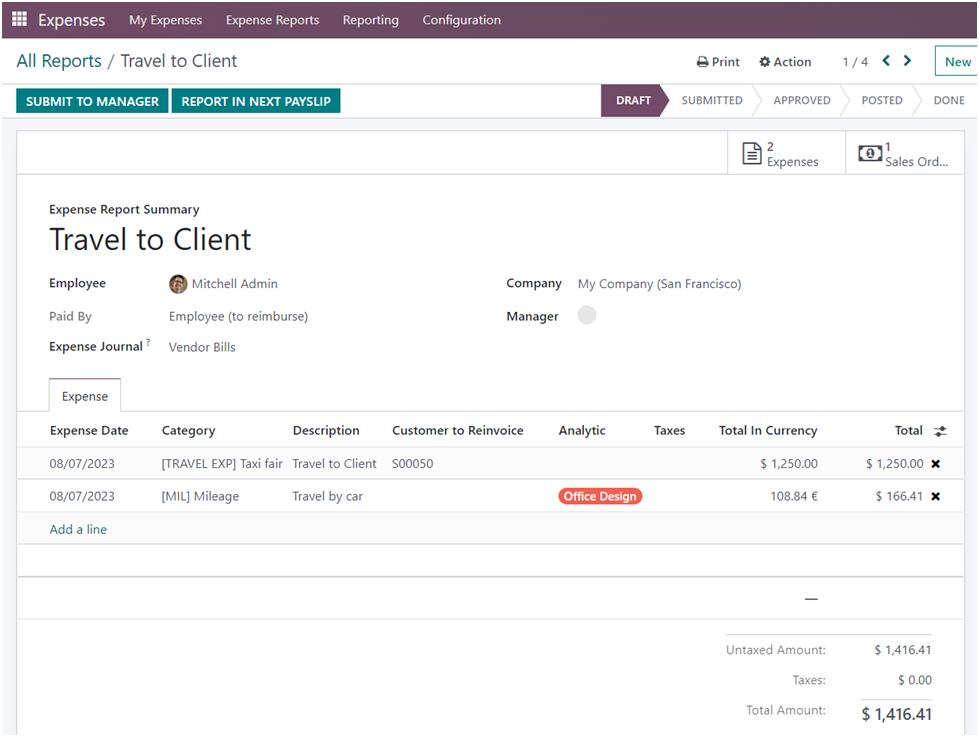
The above report shows the expenses related to traveling for different purposes by an employee. You can add multiple expenses in a report by clicking on Add a Line section. Click on Submit To Manager option to submit the report to the manager for reimbursement.
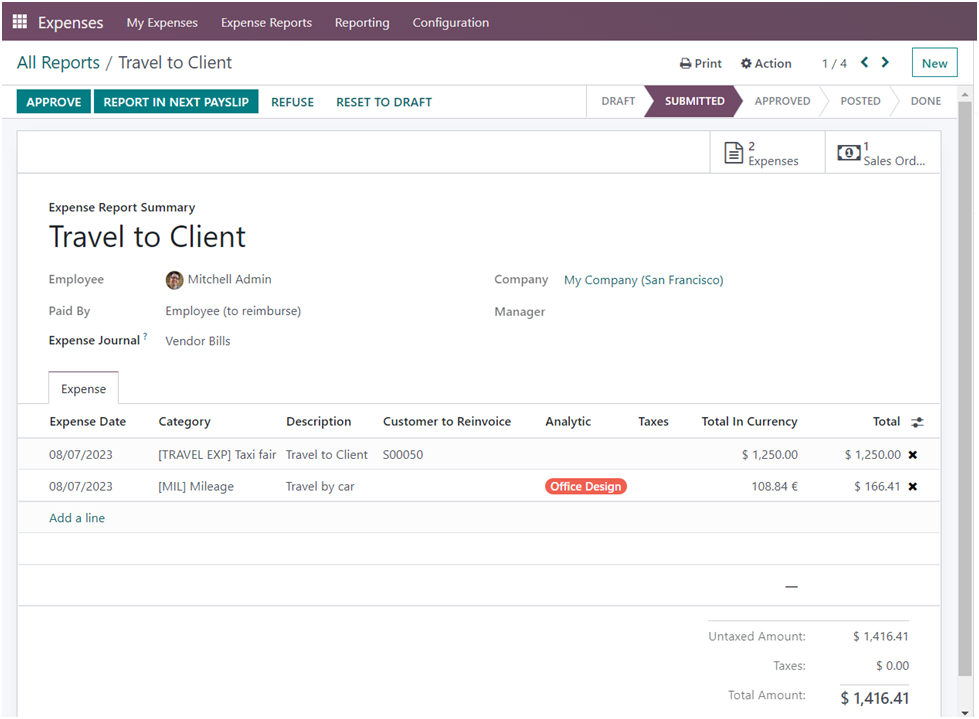
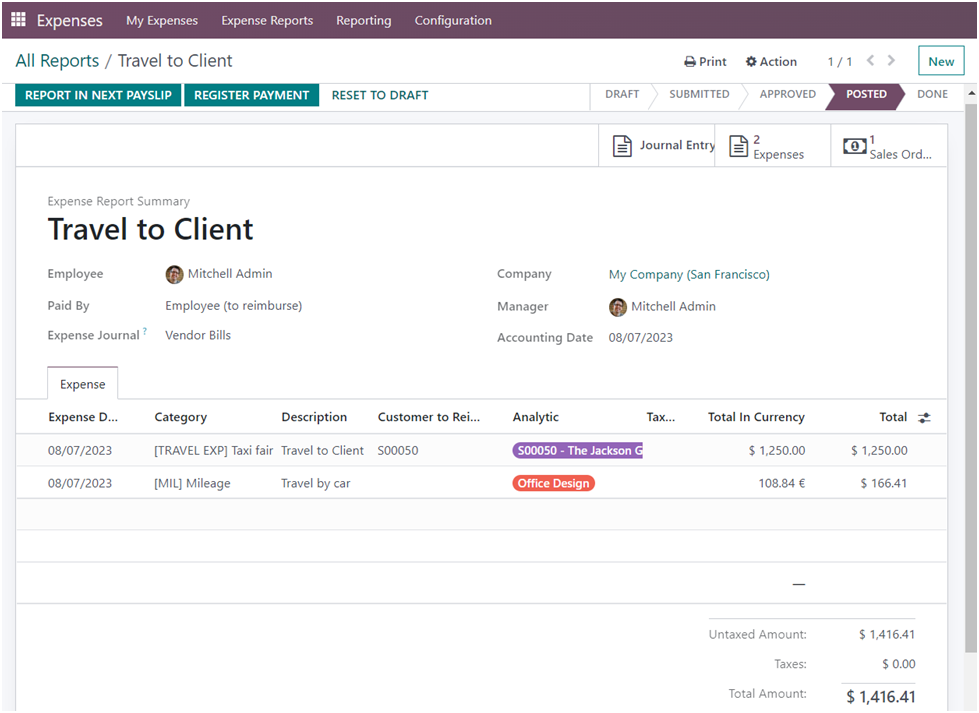
The manager may either approve the expenses or refuse after reviewing the report. If the expenses are refused to be reimbursed, you can specify the reason for refusal. If the expenses are approved, they can be posted as journal entries for reimbursement by selecting Post as Journal Entries option and registering the payment.
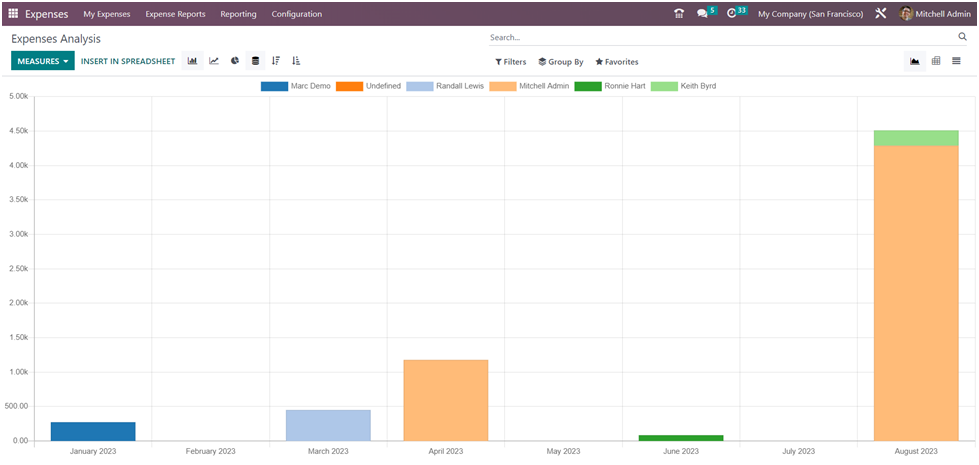
To get an overview of Expenses
You can get detailed information and analysis of expenses by going to the Expenses Analysis option in the Reporting menu. We can use filters to extract the required information on expenses.