Features of Odoo-15 Point of Sale
The sales department of a business plays a very important role. A business can handle sales either selling directly from the company or through their retail shops. Odoo’s Point of Sale module can be used in a retail outlet to handle large number of customers. As a result, a variety of strategies are implemented to attract clients. New Features of Odoo-15 Point of Sale:
- Gift Card
- Coupons & Promotions
- Quotation/Order
- Down Payment
- Limited Products Loading
- Limited Partner Loading
- Ship Later
- Customer Display
- Coins/Bills
- Open Product Info
Gift Card
During a Point of Sale session, a gift card is offered to attract customers. Customers can use this option to deduct the gift card’s value from their final purchase amount. We can create a gift card only after enabling the gift card option from the settings page. Then the gift card option will be available under the products tab. We can either configure the gift cards from the settings page or open the gift cards from the products menu.
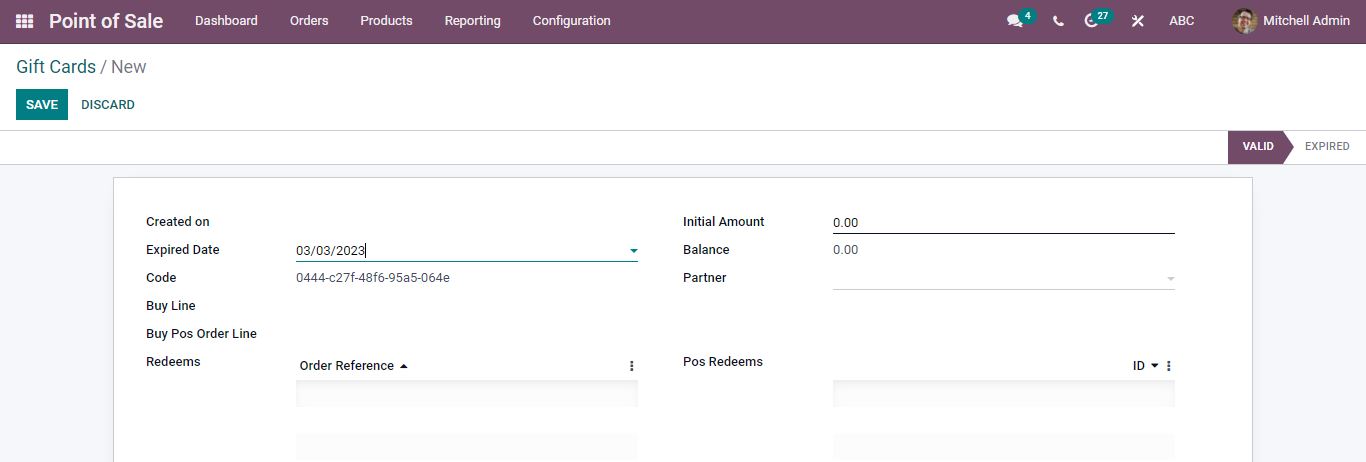
Here you can create new gift cards by entering the details.
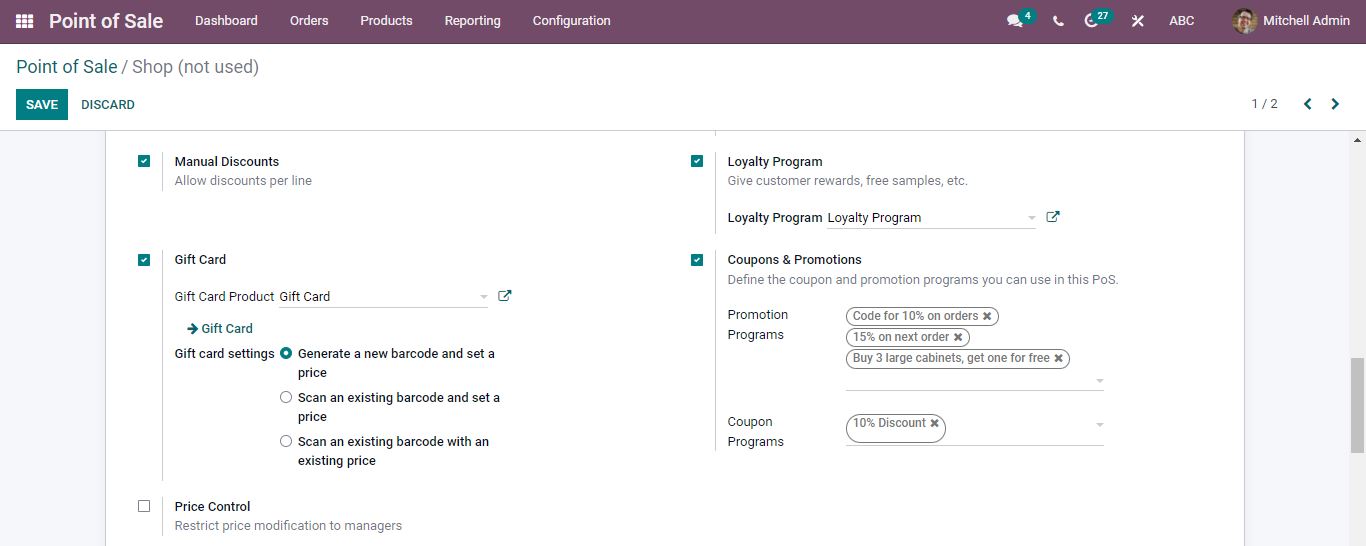
In the PoS settings activate the gift card, there are three gift card settings offered and you can choose the type and then save changes.
Start a Point-of-Sale session and choose the product and customer. Then click the Gift Card button and add the gift card barcode.
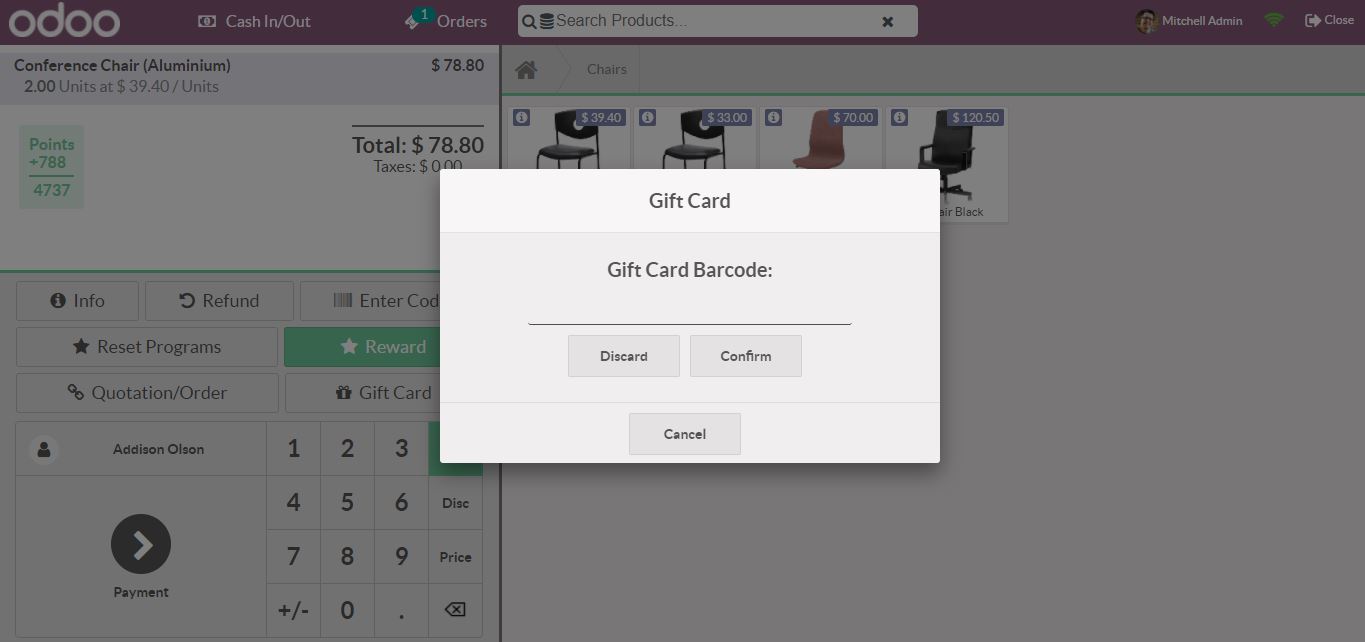
The amount will be deducted from the gift card value from the total purchase and you can pay the remaining balance.
Coupons & Promotions
A coupon and promotion scheme allows customers to save money. Promotions are used to advertise any product and the coupon has a code attached to it. When we use this code, we get the deal that is mentioned in the coupons. We can create Coupons and Promotions by enabling the option from the settings page then the promotion and coupon programs will be shown in the products menu.
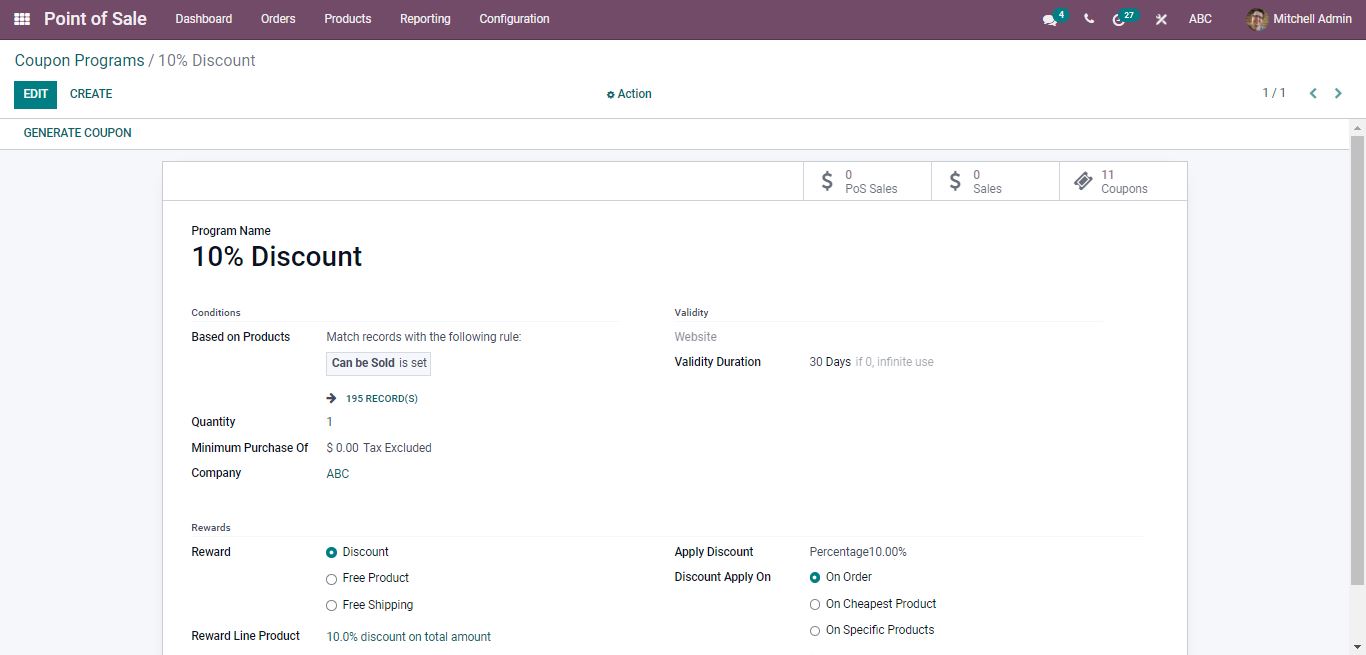
You can see the list of all coupons and promotion programs available and new programs can be created by clicking the create button.
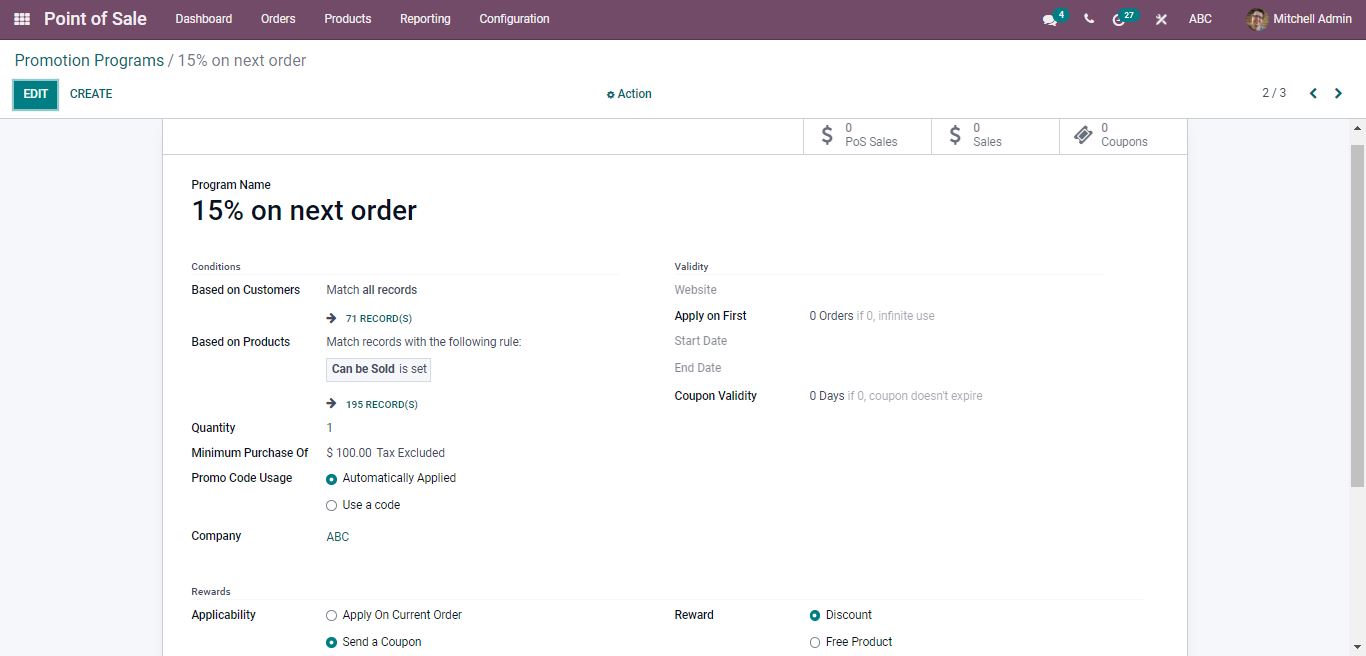
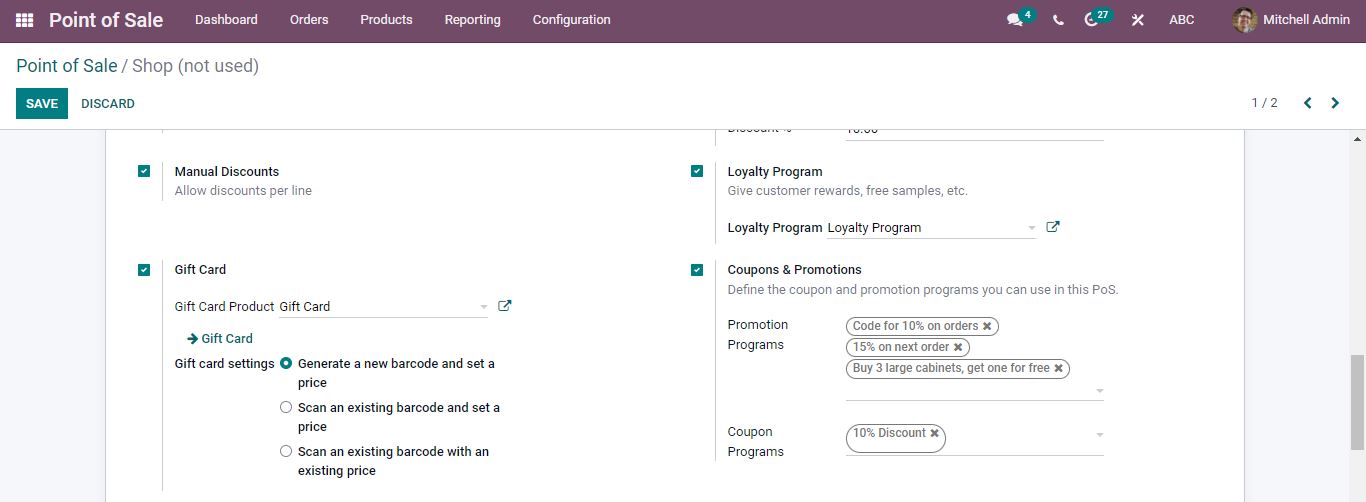
Open a PoS session and enable the promotions and coupon programs. Then select the coupon and promotion programs and save the changes that have been made.
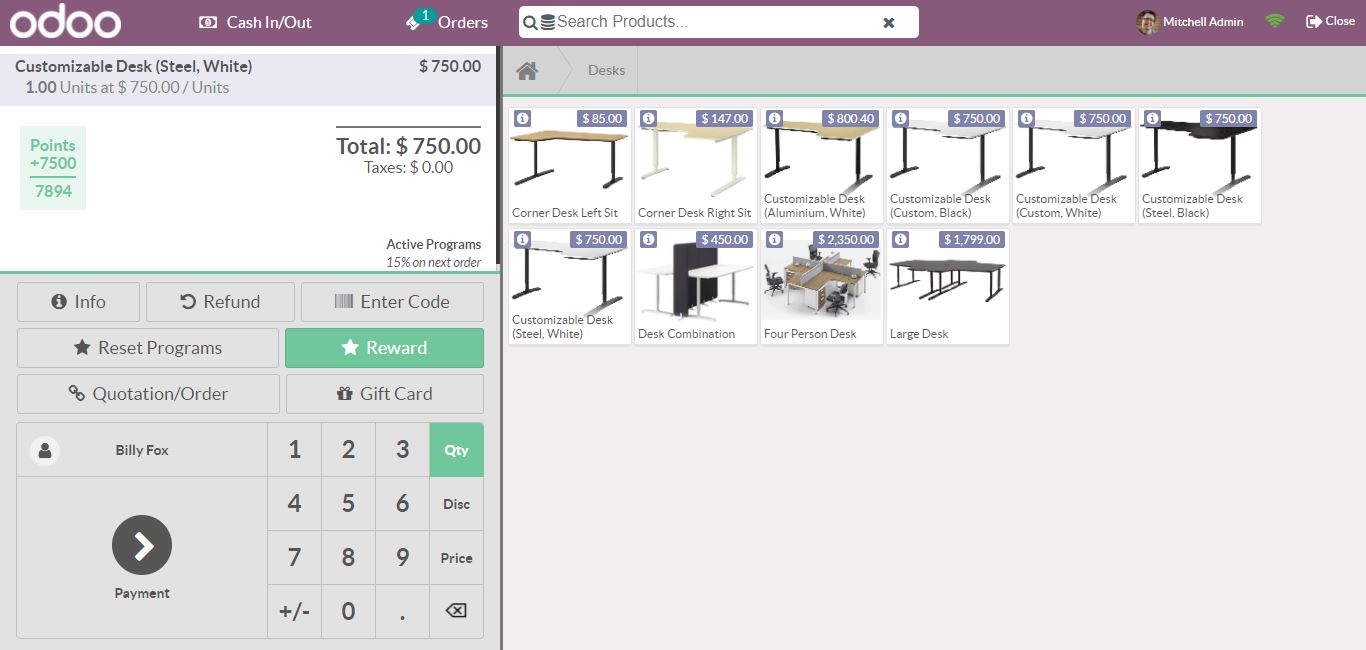
Start a Point-of-Sale session and choose the product and customer. The reward indicated on the coupon program has been automatically added to the order line. After that, make a payment.
Quotation/Order
If a customer places a sale order then goes to the retail outlet to pay the bill. Odoo introduced the Quotation/Order to the PoS Session so that you can access the quotations and orders of a company and the customers can make payments quickly from the Point of Sale Session.
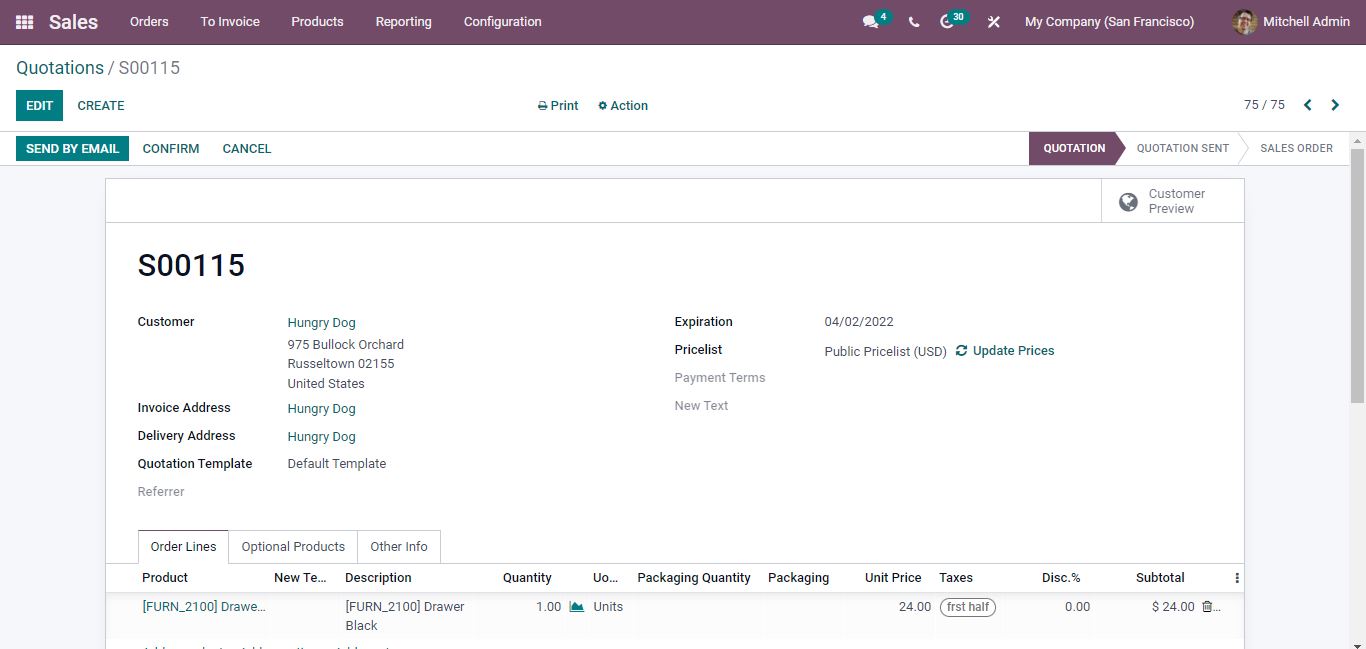
Create a sales order.
Back to the point of sale and start a point-of-sale session. Opening the Quotation/Order menu shows all quotations or orders that the company has generated.
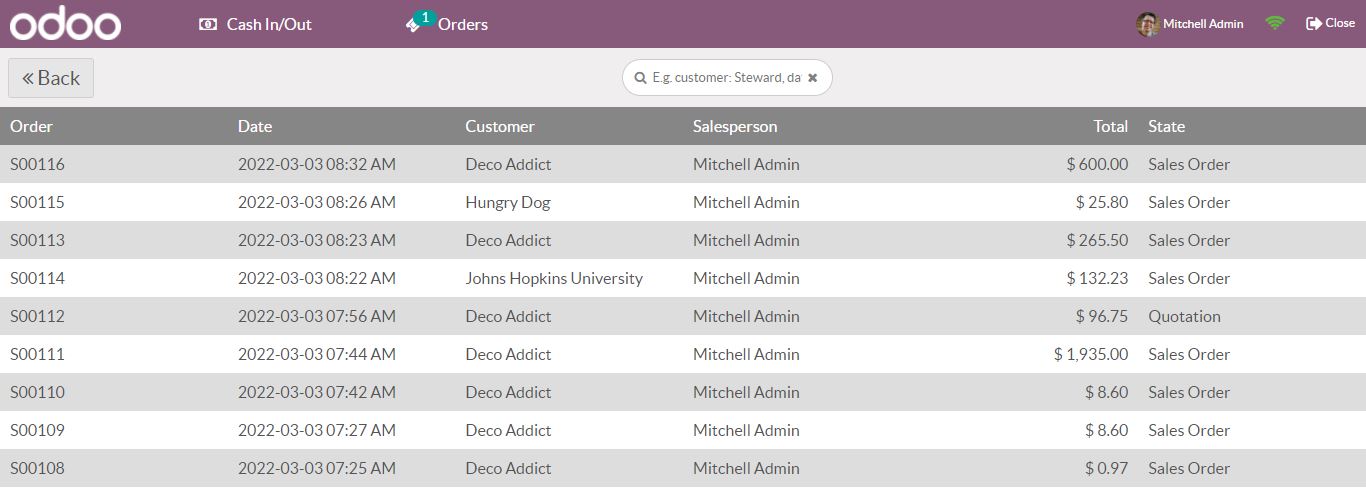
Select the sales order and make payment.
Down Payment
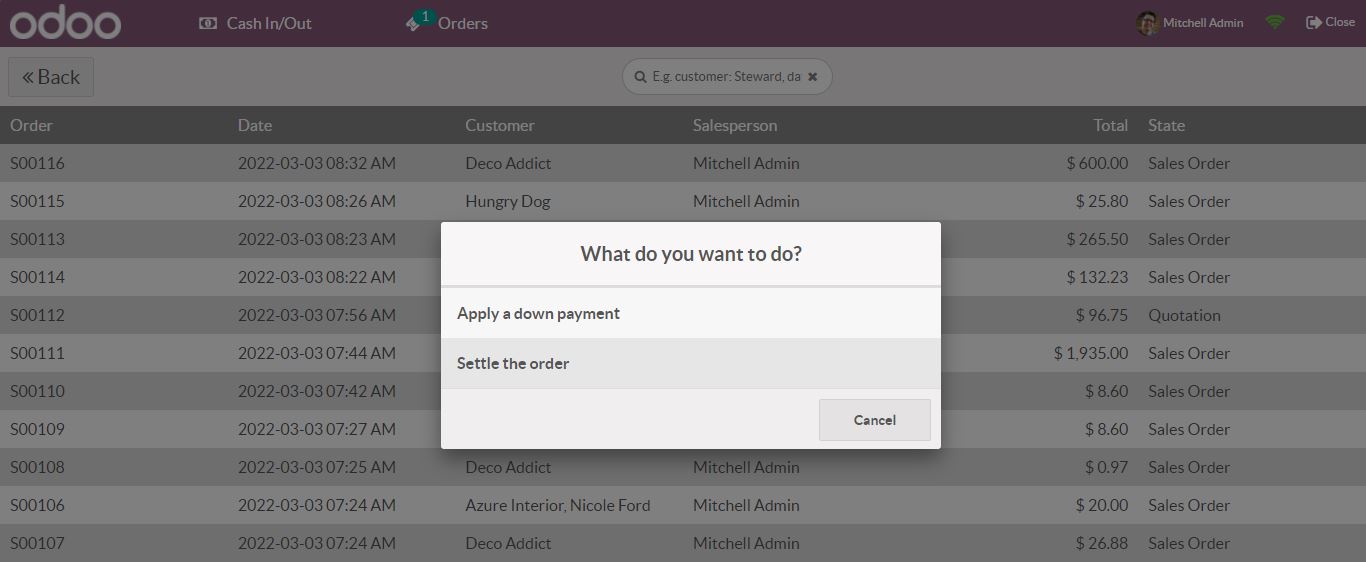
If a down payment is chosen, the buyer must agree to pay the balance in two or more installment payments. If the sale order is generated by the company, customers can add down payments via the retail shop. To do so, select the customer from the list under the Quotation/Order option. Then you can apply for a down payment or settle the order.
Limited Products Loading
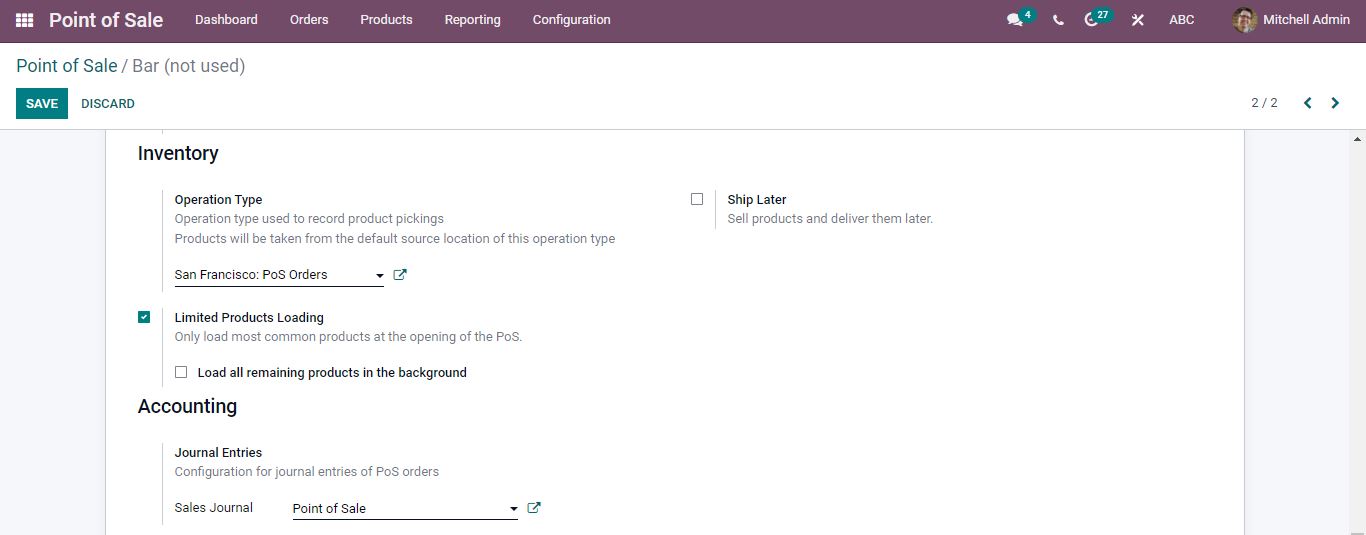
Sometimes we only need to show a limited number of products at a time. If the dealer prefers to show only popular items during a particular session you can use the Limited Products Loading option. Go to the Point of Sale Sessions Settings and under the Inventory section, enable Limited Products Loading. If you want to load all of the remaining products in the background you can enable it.
Opening a session only the most recently used products will be displayed.
Limited Partners Loading
Sometimes there may be a lot of customers and you need to keep all customer data saved. In certain cases, it is unnecessary and extremely difficult. In such situations, salesmen just want to keep their regular customer list. Open the Point of Sale Sessions and enable Limited Partners Loading. There is an option to load all of the remaining partners in the background.
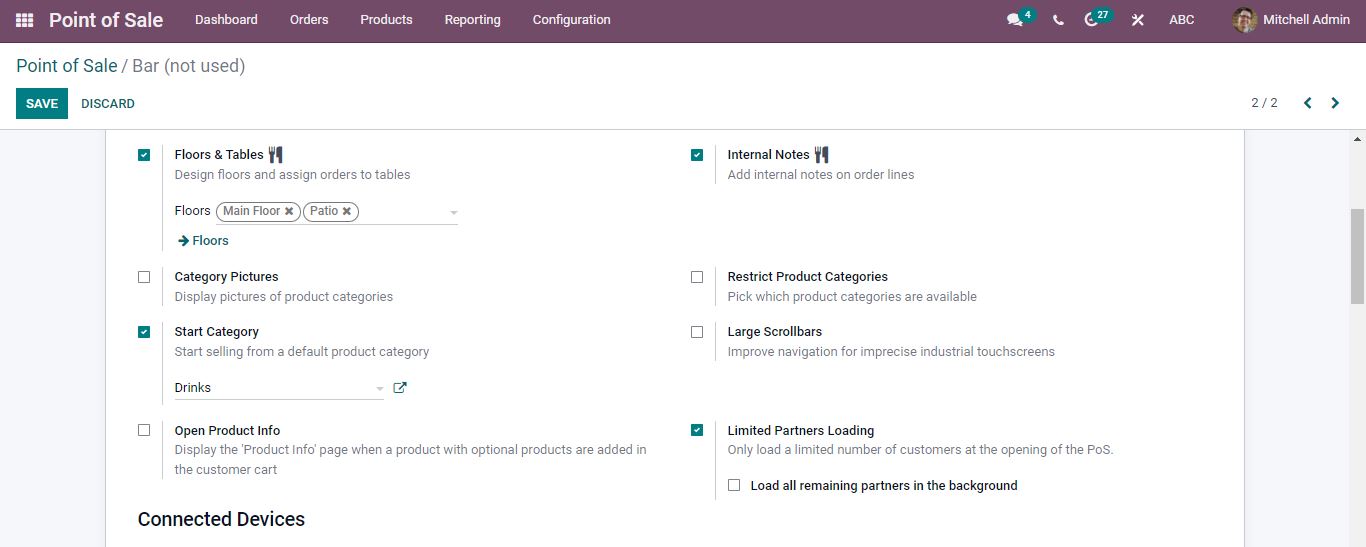
Now start a new session. When you open the Customer option, you will be able to see only the most recently used customers.
Ship Later
It is not always possible to ship things as soon as the order is confirmed or as soon as payment is received. If the seller needs more time to deliver after the payment is received. Then open the Point of sale session and enable the Ship Later option.

Then add the warehouse, specific route, and shipping policy. Now open a product and under the inventory tab set the lead time. The customer lead time is the same as the delivery lead time. The time it takes for the sale order to be confirmed and delivered. The customer lead time is the number of days the customer is assured of delivery.
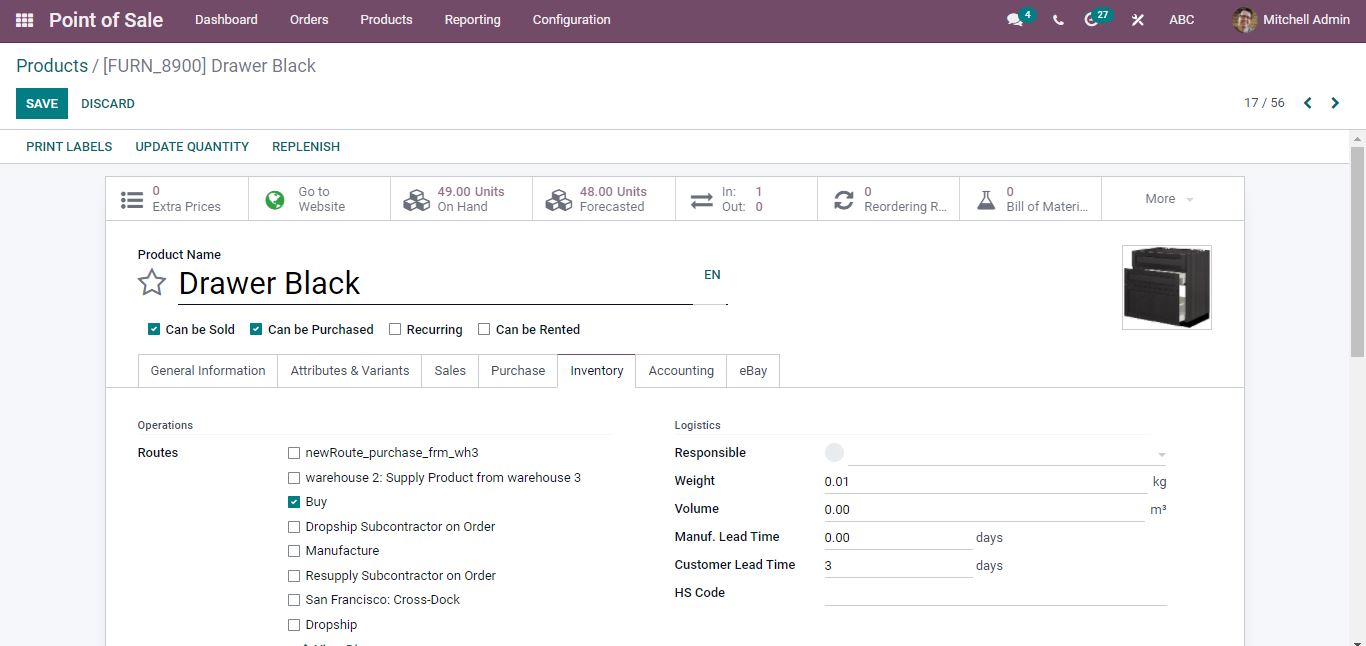
To analyze the execution of the ship later option while selling this product start a new session from the dashboard. After adding a customer and product click the payment button.
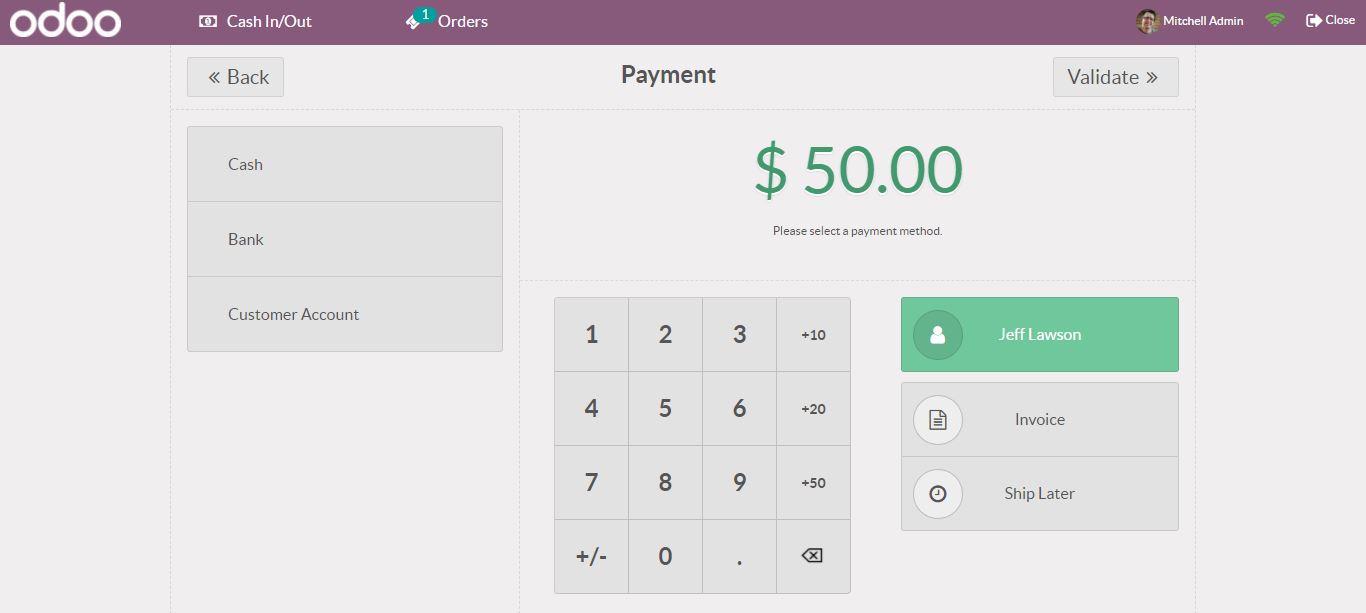
Select a payment method and there is a Ship Later option on the right side. Select this option if the order cannot be delivered at this time. After the payment has been made, a receipt is displayed.
After closing the session go to the orders tab and choose the customer’s created order from the list.
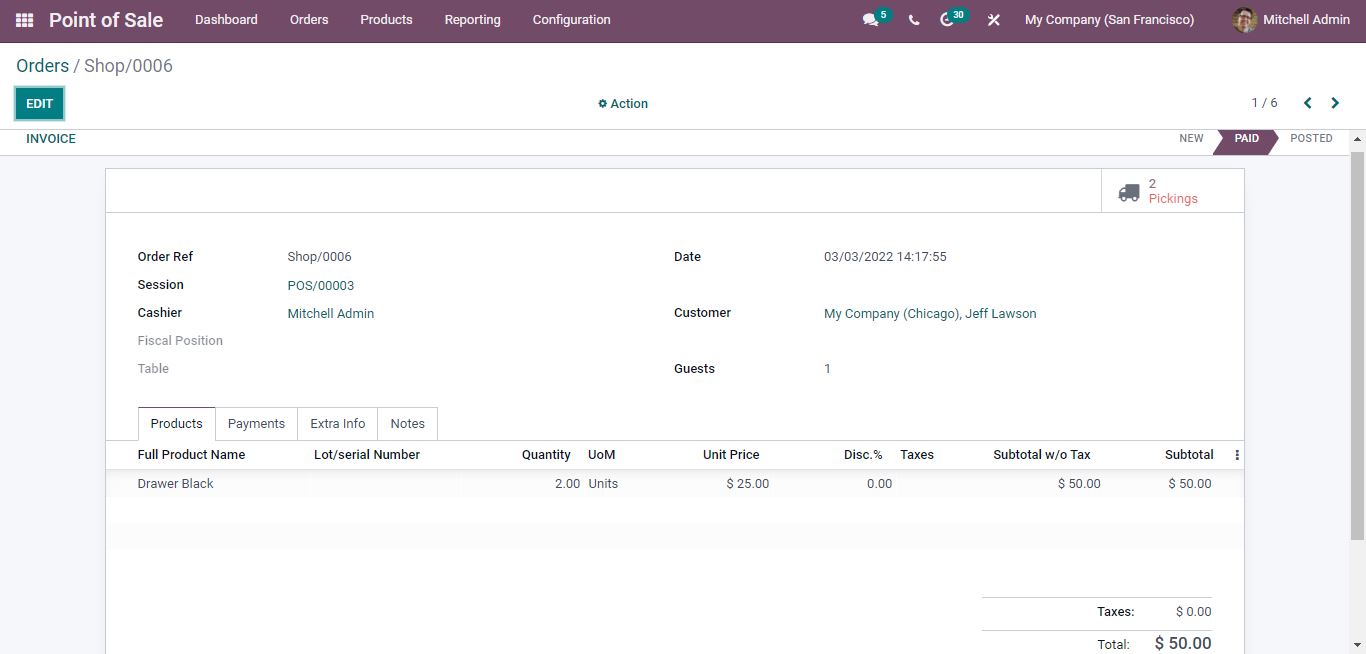
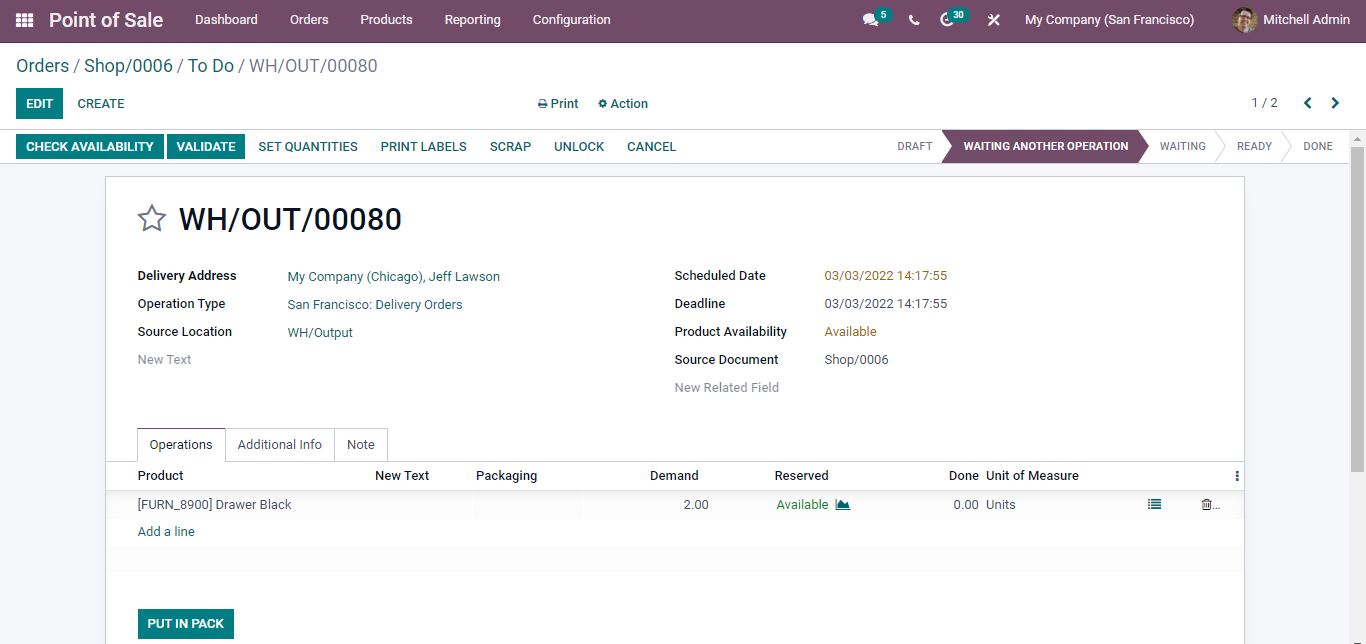
A smart tab Picking is available and when you open it a delivery order displays. The product can then be delivered to the customer on the designated date. To complete this delivery, click the Validate button.
Customer Display

A Customer Display option is available when opening a session’s settings. Save after activating the option.
Enter into the session. Add a customer and products to place an order, all of the order details are visible there. After that, make a payment. At the top right corner, you can find the client screen connected.
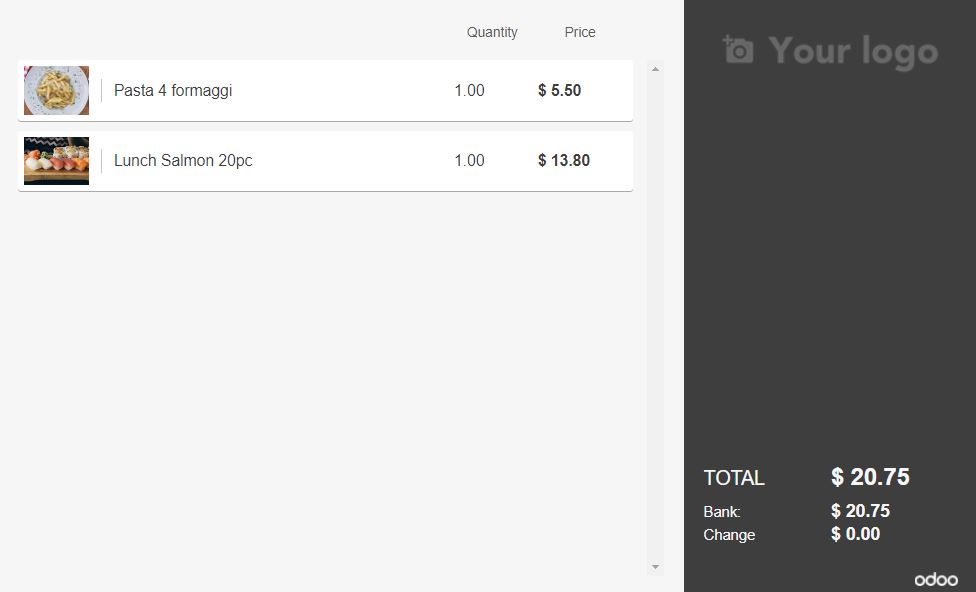
When you open the customer display the ordered products, along with their quantity and price are shown. The total amount, payment method as well as change, is also shown. After making payment a receipt is generated.
Coins/Bills
During a session, you may have the opportunity to use coins. The salesman can add some opening balance when starting a new session. Similarly, while closing a session enter the closing balance.
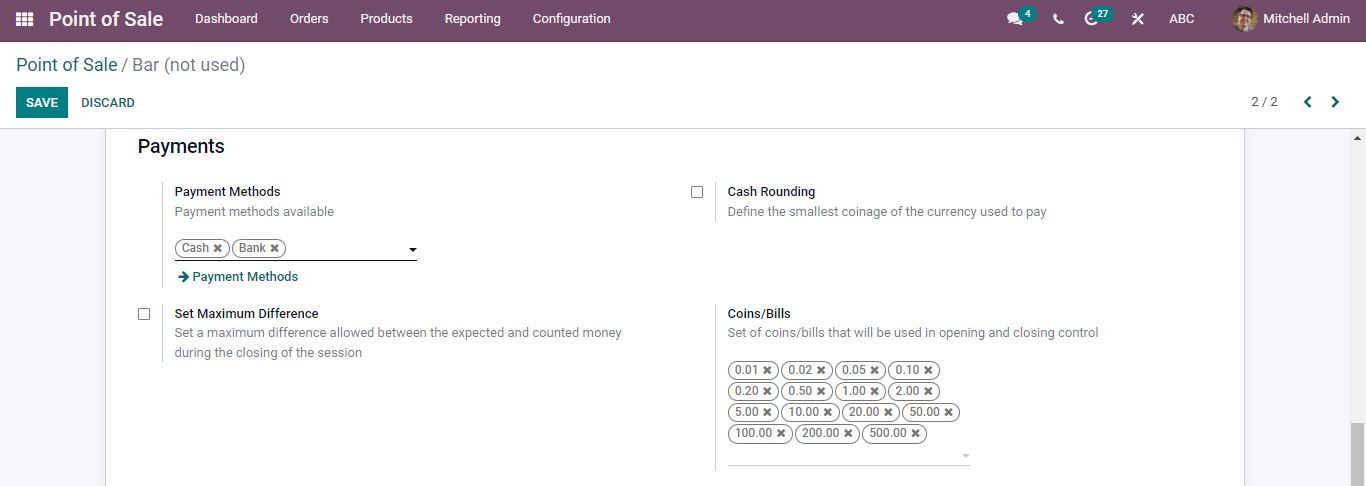
Open the PoS session and under the Coins/Bills option, you can set the coins/bills for using in opening and closing balance.
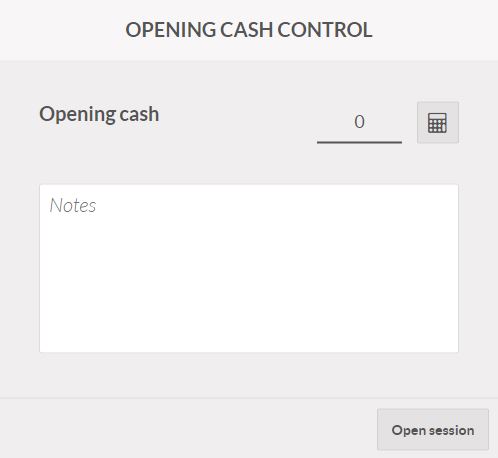
When you start a new session an opening cash control appears. You can add the opening balance. The selected coins will be shown when you open them.
The number of coins can be entered there. The total field below was then updated with the matching numbers. The new coins and numerals are also described in detail.
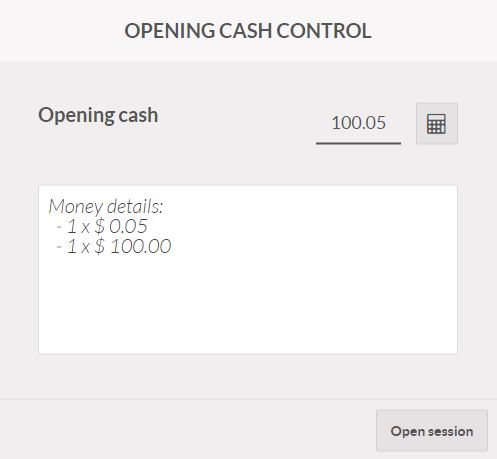
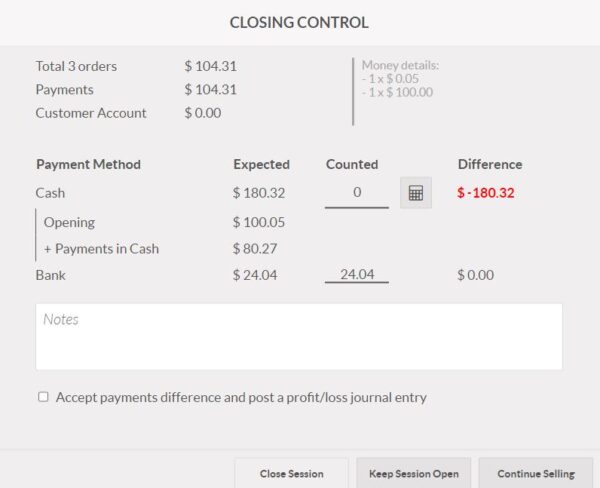
Then you can start the session by clicking Open session. Similarly, while closing a session update the closing balance amount. All the details can be seen in the closing control. Same way coins can then be used to add the closing balance. When you confirm the value in the counted field, it is updated and the financial information is shown.
Open Product Info
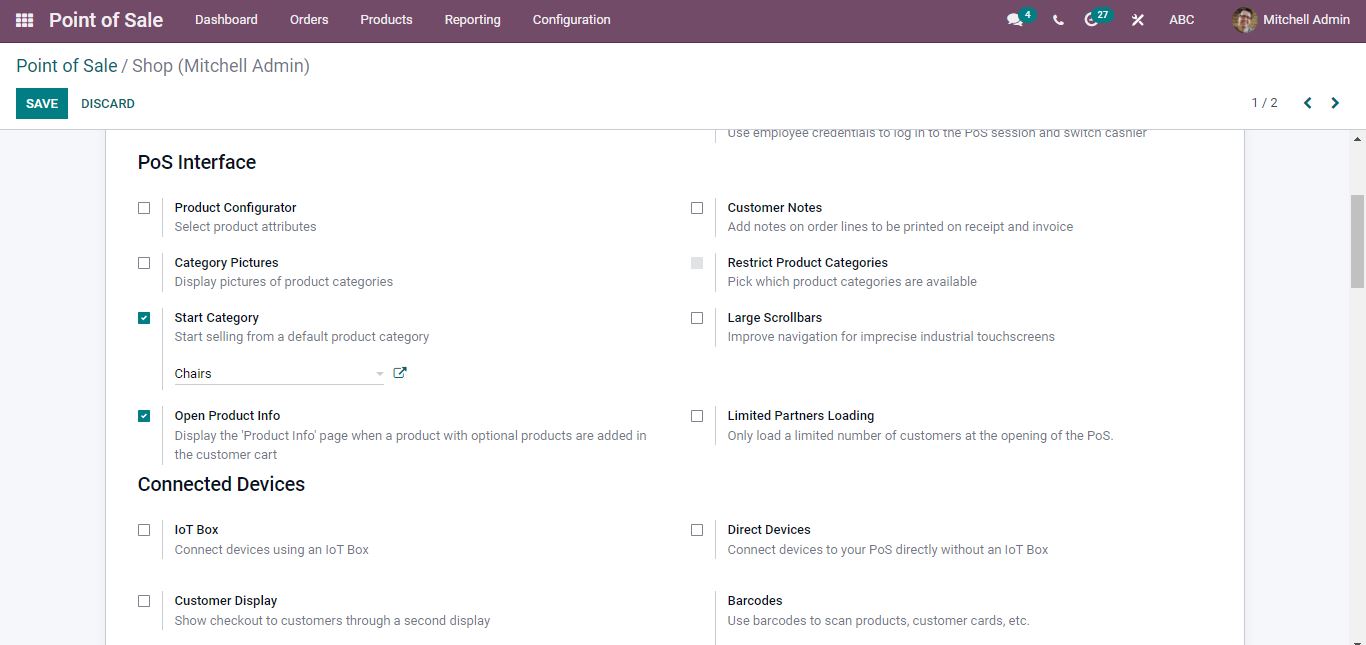
When a customer decides to buy a product, he may wish to learn more about it. Before placing an order, the customer receives entire product information if this option is enabled.
Activate the open product info option by opening a PoS session.
Start a new session from the dashboard. There you can find an Info tab. After adding the products click the Info button, then a product information window appears showing the details.
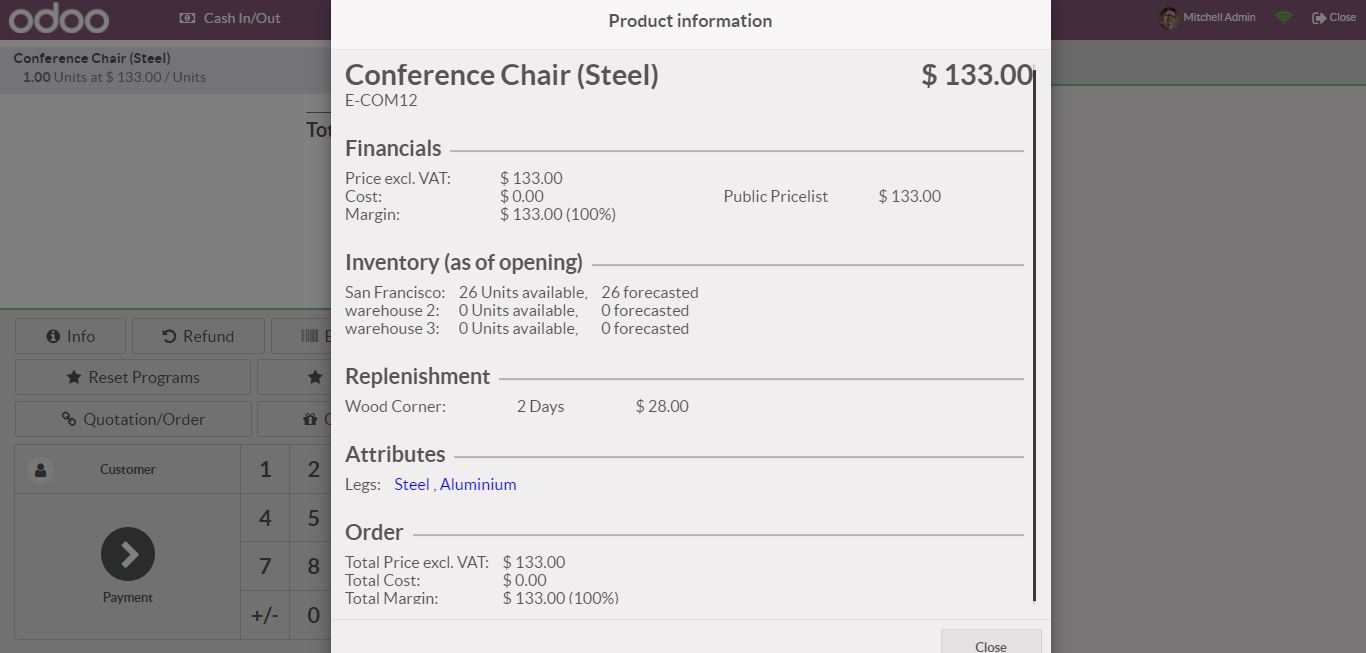
It contains financial data such as price, cost, price lists, and margin. Information regarding the inventory, such as the location of the warehouse, the quantity on hand, the number expected, and so on. This section also contains information about replenishment and attributes.
Are you ready to implement an effective ERP solution for a productive business? Reach out to us at www.infintor.com

