How to Create and Publish Products for Sale in the
Odoo 17 Website?
Compared to maintaining a brick-and-mortar store, setting up and running an online store is often more cost-effective. It reduces the need for physical space, utilities, and staff, especially if you are operating a small business. Customers prefer the convenience of shopping from their homes. A well-designed website provides an easy and efficient shopping experience, with features such as product search, secure payment options, and convenient shipping methods.
A website allows you to quickly update product information, prices, and other details. It also serves as a platform to share news, promotions, and other relevant information with your customers. Online marketing strategies such as search engine optimization (SEO), social media marketing, email marketing, and content marketing can be seamlessly integrated with a website. These strategies help increase visibility, attract potential customers, and drive sales.
Individuals can employ the versatile and user-centric Odoo website module for building their own e-commerce platform. To capture user interest, the e-commerce features and functionalities offer drag-and-drop capabilities, an extensive array of building blocks, and a variety of themes. These tools are exceptionally user-friendly and efficient. Users can effortlessly establish e-commerce entities in just a few simple steps.
In this blog, we can see how a business can sell its products using the Website Application of Odoo 17 ERP Suite.
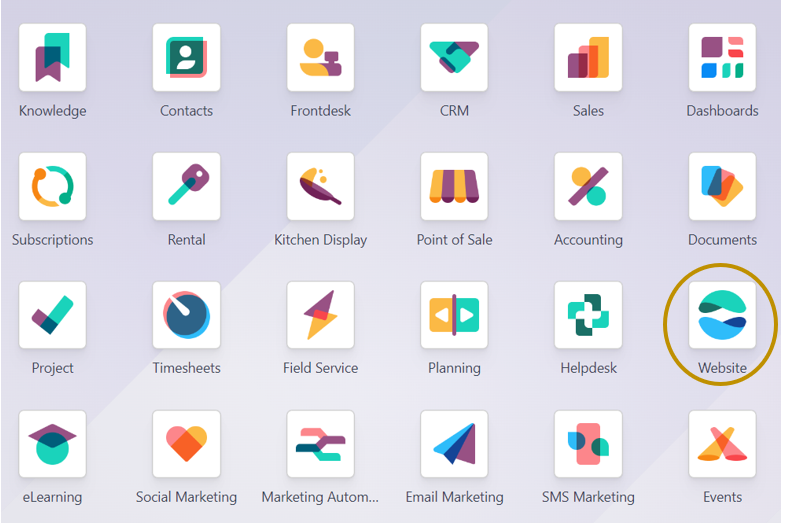
Firstly, we have to create and define the products that we sell in the Website application. For that, follow the path below to select the product to sell on your website.
Website Application =>eCommerce Menu =>Products Section => Products => Select the Product

In the ‘Products’ window, we can find all the products configured in the Odoo system. The screenshot above shows the Kanban view of all the products. This view can also be changed to a list view to get more details about the product in the Products window.
If you want to add a new product to sell on your Odoo website, select the ‘New’ option in the window to go to the new product form. Let us see the example of selling a Customizable Desk which is already created in the Odoo system.
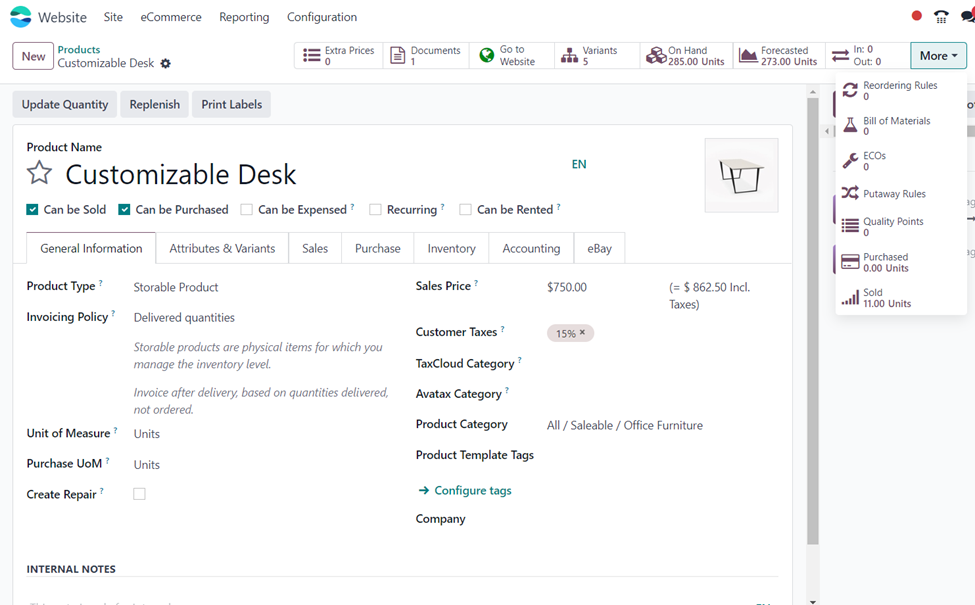
The screenshot above shows the product form of the Customizable desk. Here, we can enter the product name, and specify the operations related to the product by selecting corresponding checkboxes in the options such as Sold, Purchased, Expensed, Recurring, and Rented. There are different smart buttons available at the top of the form such as Extra Prices, Documents, Website, Variants, Current Stock, Forecasted Stock, Product Moves, Reordering Rules, Bill of Materials, and many more. On going to each smart button, we can access the corresponding details of that product directly from here.
There are various tabs in the product form.
General Information tab: In this tab, we can set the product type (Consumable, Service, Storable, etc.,), invoicing policy (either ordered quantity or delivered quantity), the unit of measure, purchase unit of measure, sales price, cost price, customer taxes, tax categories, product category, and company. We can also add any additional notes related to the product in the ‘INTERNAL NOTES’ section by just typing the details.
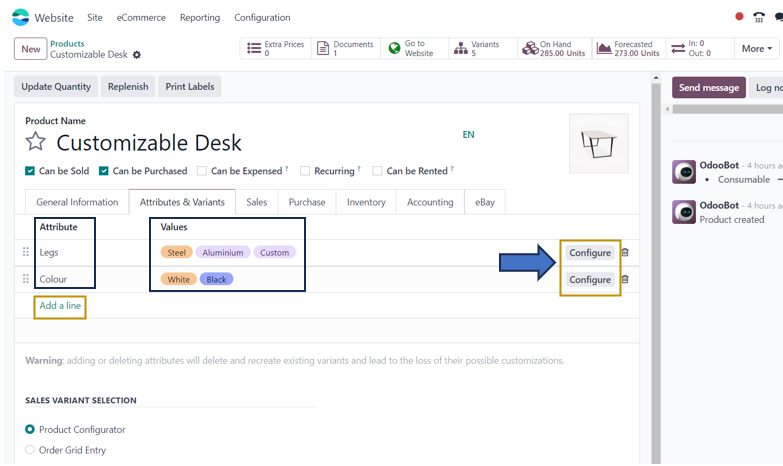
Attributes and Variants Tab: It allows us to add different attributes with their values available as the variants of that product by clicking the ‘Add a line’ option. After adding the attributes and their values, we can configure these variants with the product by selecting the ‘Configure’ button.
There is a ‘SALES VARIANT SELECTION’ section which allows the user to select the method to select the variants of that product. It can either be a Product Configurator or an Order Grid Entry.
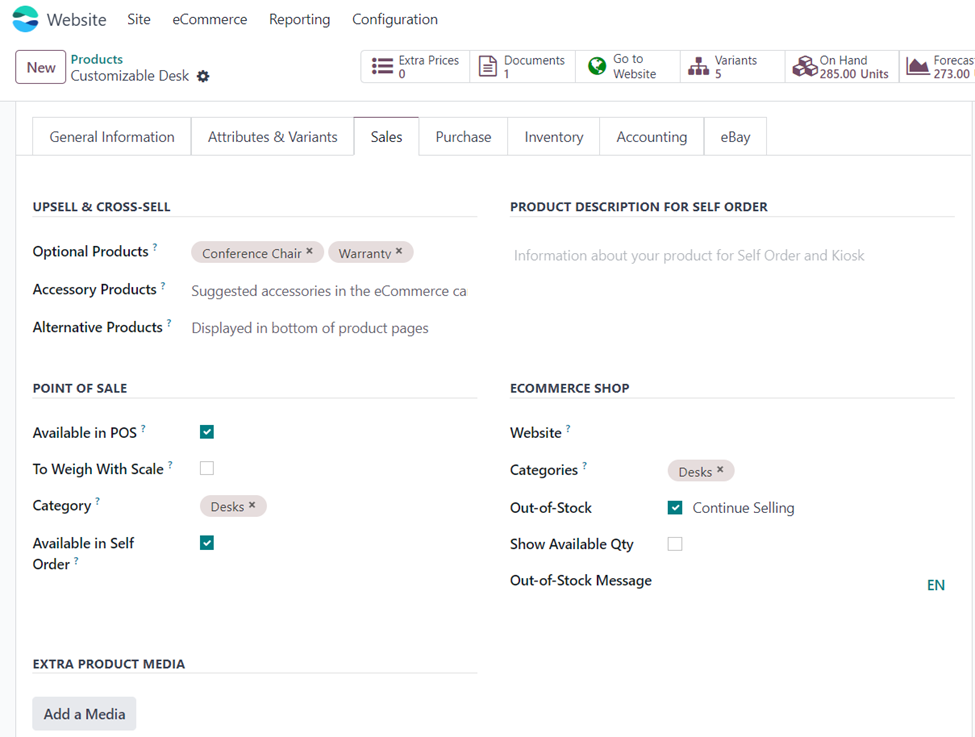
Sales Tab: The Sales tab provides the users the option to add optional and alternative products to customers for enhancing upselling and cross-selling opportunities for your business. The tab contains a ‘POINT OF SALE’ section to enable the product in POS, weigh with a scale, categorize, and avail in self-orders. In the ‘E-COMMERCE SHOP’ section, we can add the e-commerce website, product sub-category, policy when out-of-stock, and options to display the available quantity and out-of-stock message. Additionally, we can add extra Product Media, Product descriptions for self-orders, Sales description, and Pricer Store.
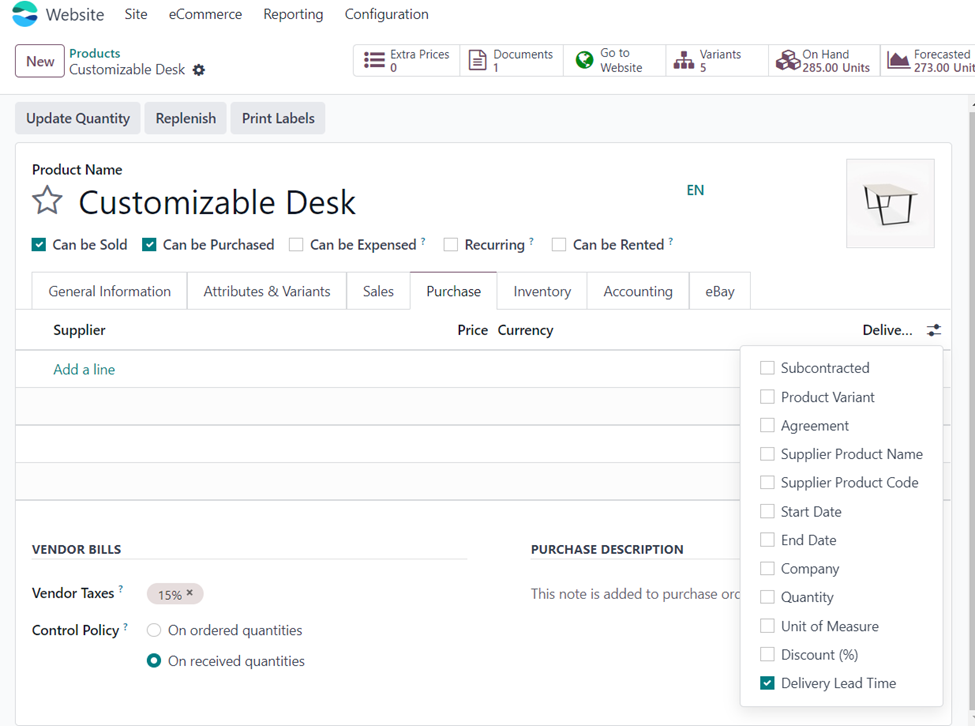
Purchase Tab: In this tab, we can add the Suppliers of that product along with its price, currency, delivery lead time, and many more by using the ‘Add a line’ option so that we can compare vendors and select the most feasible supplier for our business from all possible suppliers of that product. Users can also specify vendor taxes, purchase descriptions, and the control policy for purchasing the product.
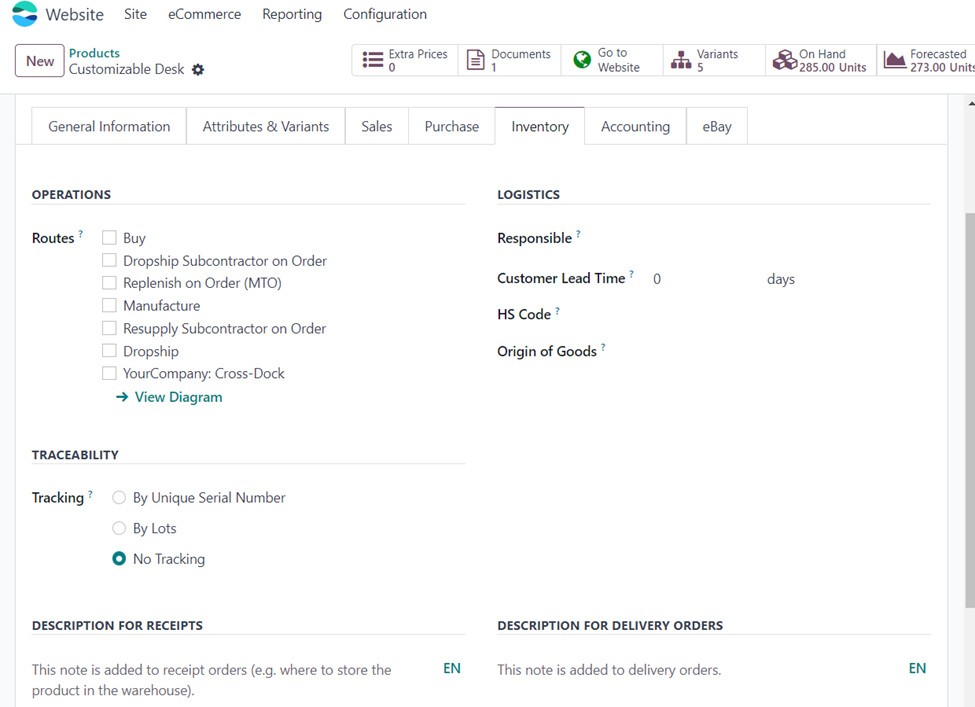
Inventory Tab: If you go to the Inventory tab, you can define the routes according to the operations related to the product. In the ‘Logistics’ Section, specify the responsible person handling the product, customer lead time, HS code, and origin of goods. We have the option to uniquely track the movement of that product by using Serial numbers or Lot numbers in the ‘Traceability’ section. Apart from that, we can add descriptions for receipts, delivery orders, and internal transfers from here which are automatically displayed in the corresponding orders.
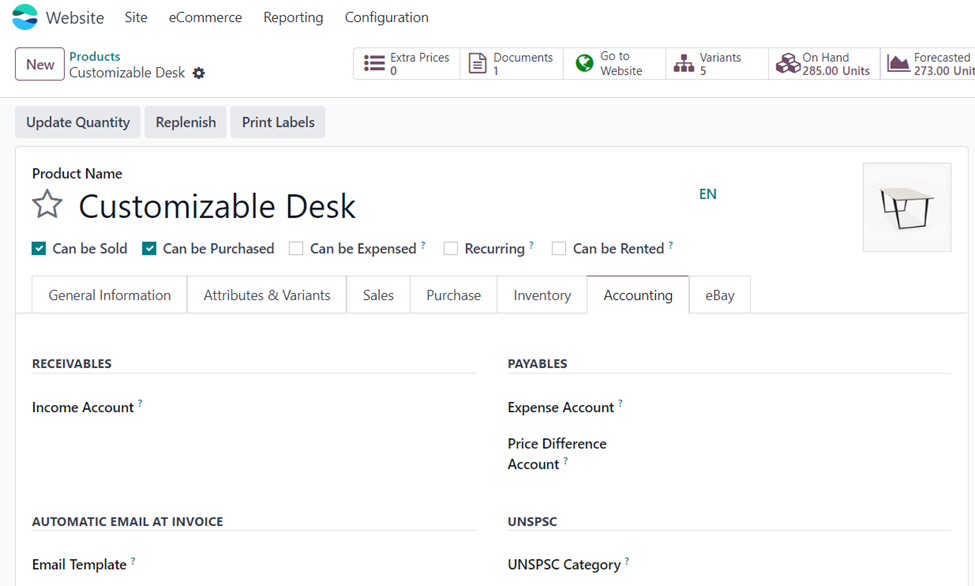
Accounting Tab: In this tab, we can add the accounting information related to the product such as Income Account, Expense Account, Price Difference Account, Email template for Invoices, and UNSPSC category.
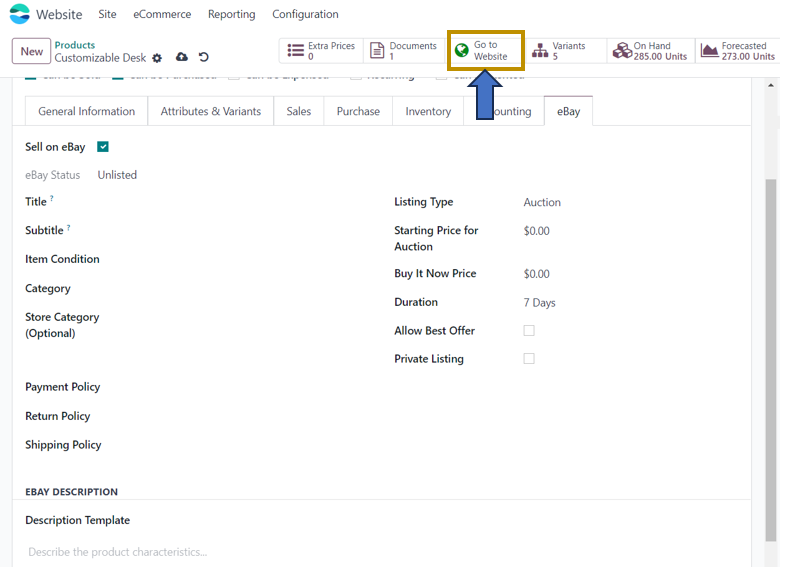
eBay Tab: The eBay tab allows us to sell the product on eBay by selecting the checkbox. Here, we need to specify the Title, Subtitle, Item condition, Category, Store category, Payment policy, Shipping policy, Listing Type, and all other details as shown in the screenshot above.
As we have specified all the required details for the product ‘Customizable Desk’ in their respective tabs, let us now publish the product on the website.
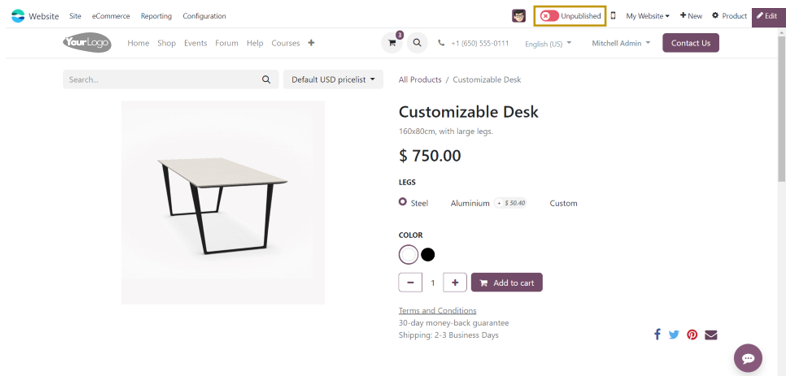
The screenshot above indicates that the product is not published on the website. Let us now publish the product by changing the pointer to the right so that customers can make the purchase of that product from the e-commerce site.
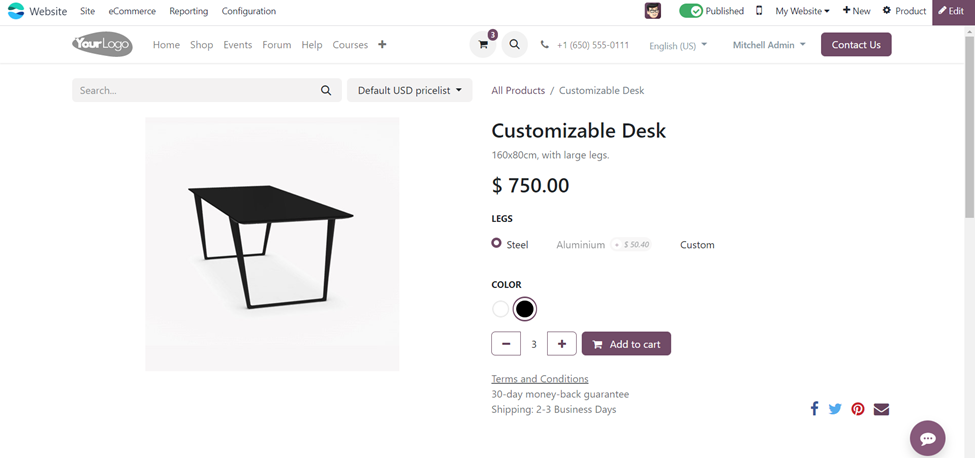
The customers can select the required variants of the product that are configured in the product form of the Customizable desk. They can add the desired quantity of the product and add to cart for shopping.
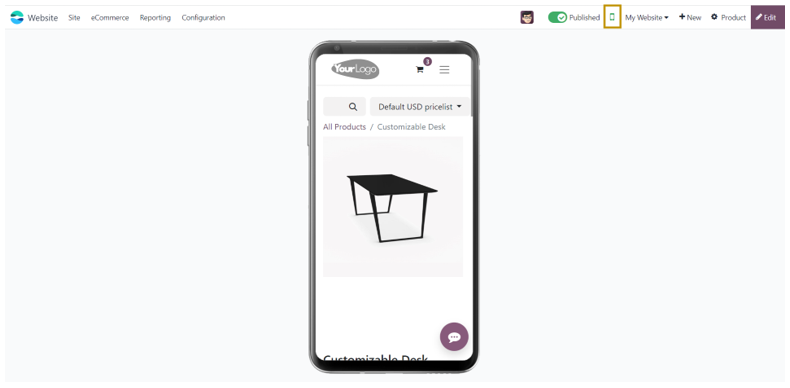
We also have the option to view the e-commerce site in Mobile view. For that, select the icon next to the Publish icon. Thus, Odoo offers both a desktop view and a mobile view to preview your online e-commerce website.
The product is ready for sale and the customers can easily buy it from your website.