How to Perform Quality Checks for Transfer Operations in Odoo 17 Inventory?
Quality control measures ensure that products transferred meet standards and specifications, maintaining product integrity and preventing damage, contamination, or deterioration during the transfer process. Transferring defective products can result in customer dissatisfaction, making quality control crucial to identifying and rectifying issues before reaching end-users. This process, aligned with strict industry regulations, helps ensure compliance, preventing legal problems and fines. Performing Quality Checks in Odoo 17 further enhances this comprehensive approach.
Quality control in the Odoo 17 Quality module contributes to efficient inventory management by ensuring that the inventory levels accurately reflect the quality and condition of the products. This helps prevent inaccuracies in stock levels and minimizes the chances of overstocking or understocking.
The Quality control in the Odoo ERP Software can be used in checking the quality of products received from suppliers, transferring the product to other locations in inventory to ensure no damages occurred, when manufacturing the product or at the time of delivering the products to the customer to ensure that the product with the desired quantity is delivered to the customer.
Quality Control in Odoo 17
We can understand the procedure of performing Quality checks for Inventory in Odoo 17 using the ‘Quality’ Module.
Firstly, we can define the Quality Control Points to specify the points of the transfer operations in which Quality checks are needed to be done.
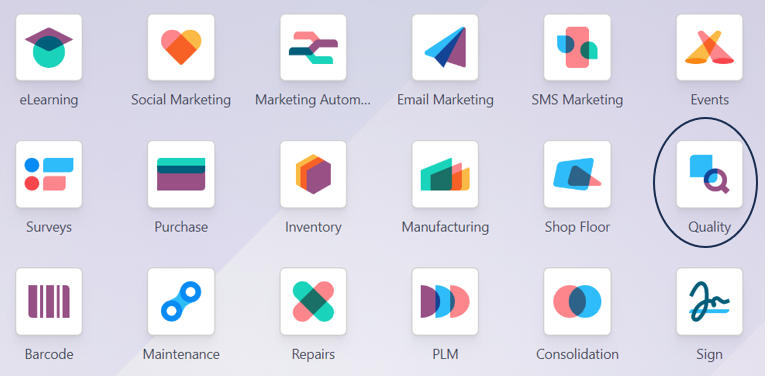
Quality App => Quality Control Menu => Control Points

The Quality Control Point window shows all the Control Points configured in the Odoo system. Let us select the ‘New’ option to define a new Quality Control Point. For Instance, we want to set up a control point for the two variants of the product ‘Customizable Desk’ at the time of validation of the delivery order.
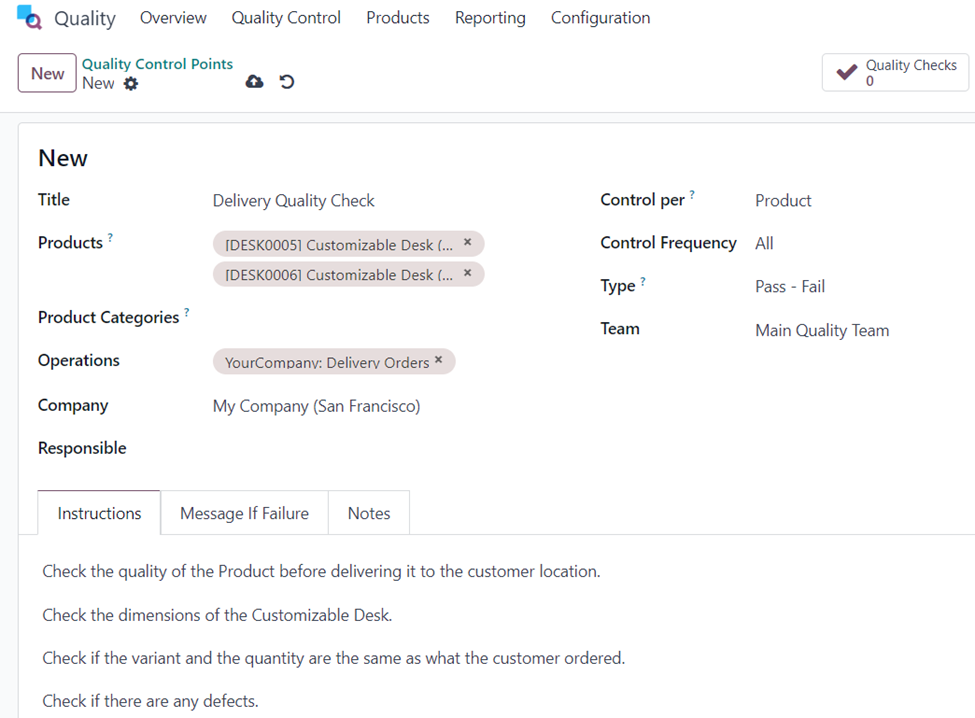
In the new Quality Control Point form, we have to give a title for the control point. We can specify the Products or the Product Categories in which this Control Point is applicable. There are fields to define the inventory operation in which quality control needs to be performed. Here, we can select the Delivery Orders. We can define the method of control to be done that is, per Product, per Operation, or Quantity. The frequency of the quality check can be all, randomly, or periodically. There are different types of Quality Control we can select from such as Instructions, Take a Picture, Pass-Fail, Measure, Worksheet, and so on. We can also assign the Team as well as the Responsible person to carry out the Quality checks in their corresponding fields.
There are tabs such as ‘Instructions’, ‘Message If Failure’, and ‘Notes’ in the Control Point form that can be used to give instructions, quality failure messages, and other extra notes respectively during the quality check.
As the next step, we can create a sales order and perform a quality check in Odoo 17 for the delivery of the Customizable Desk to the customer.
Sales Application => Orders Menu => Orders => New
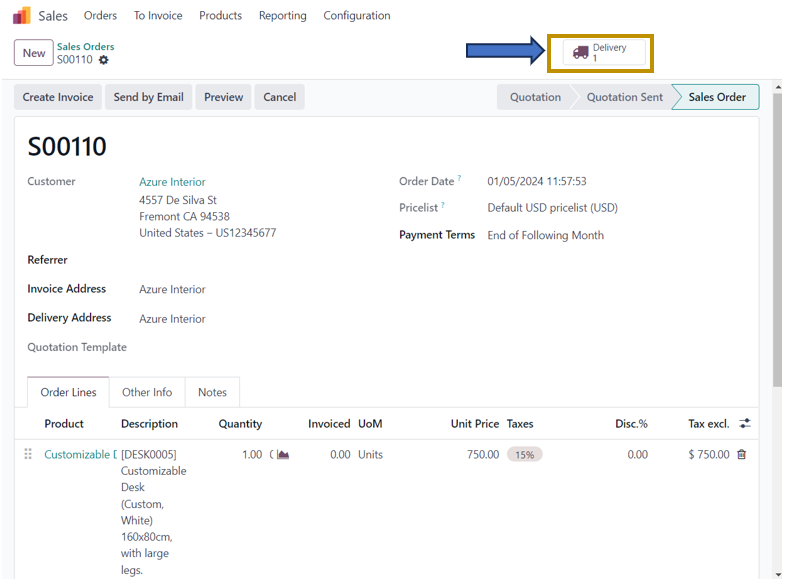
In the sales order, add the customer and the product ‘Customizable Desk’, select the required variant of the product, and ‘Confirm’ the order. A ‘Delivery’ smart button is generated and go to the delivery order by selecting the smart button.
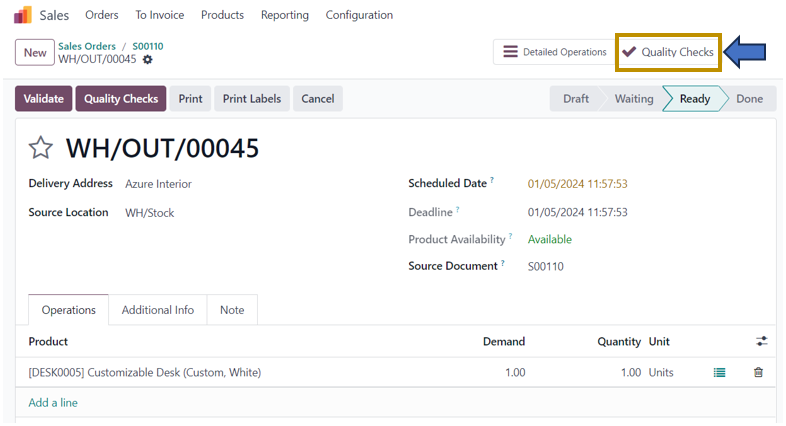
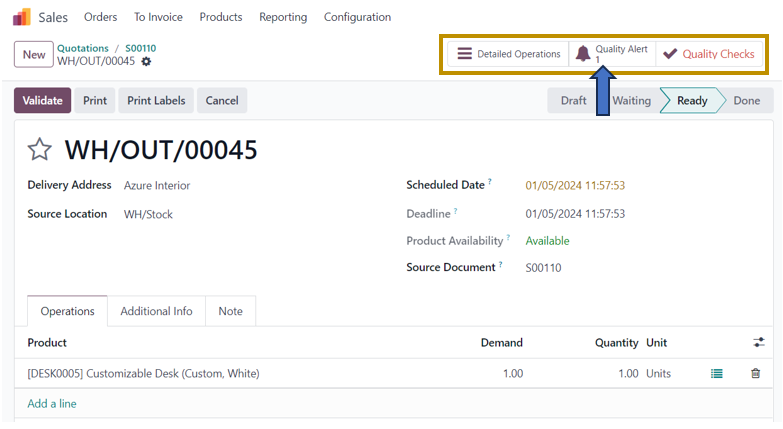
We can see the ‘Quality Checks’ button at the top of the delivery order. This is because we have configured a quality control point for the delivery of the product, Customizable Desk. On selecting the option, a pop-up appears as below.
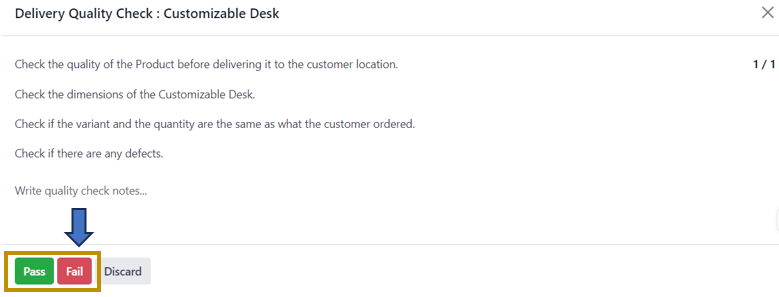
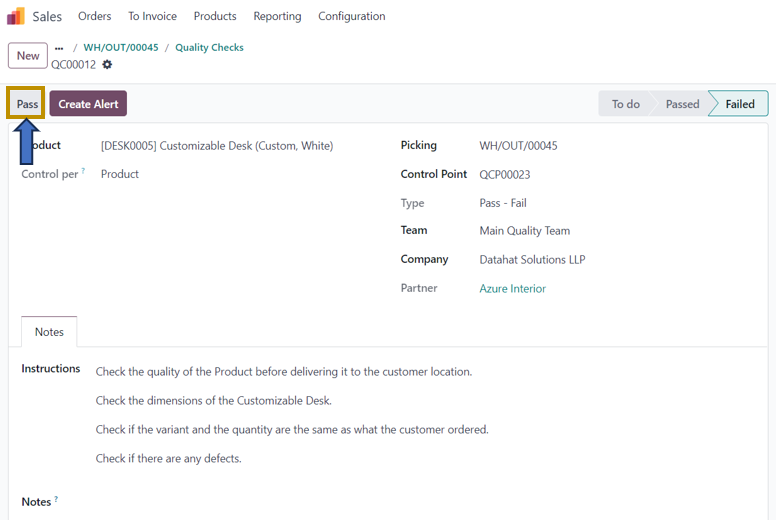
The Instructions specified in the Quality Control form are displayed. We also have the option to input the details of the quality check done for the product. We can select the ‘Pass’ option if the product meets the specified quality criteria else can select the ‘Fail’ option.
Let us see what happens when the Quality check fails!
Quality Alerts in Odoo 17
The ‘Quality Checks’ smart button in the delivery order appears in red if the quality check fails.
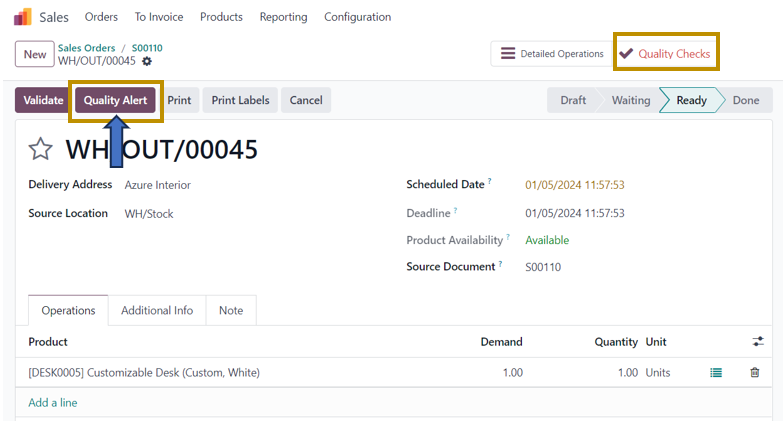
In this case, we need to create a Quality Alert to rectify the faults in the quality of the product. For that, select the ‘Quality Alert’ button at the top of the order.
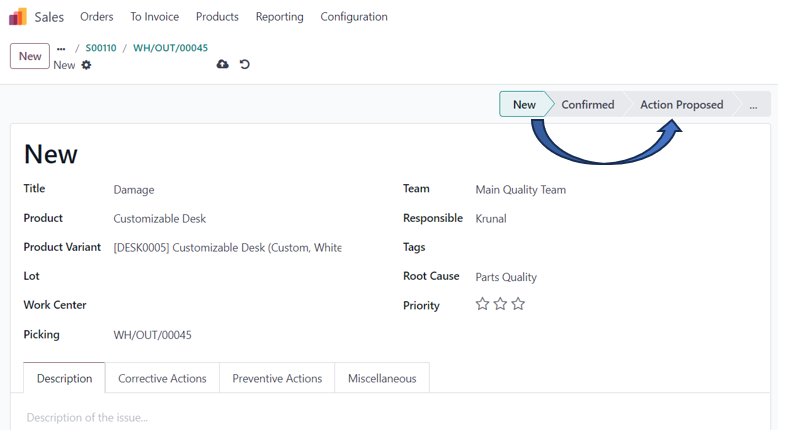
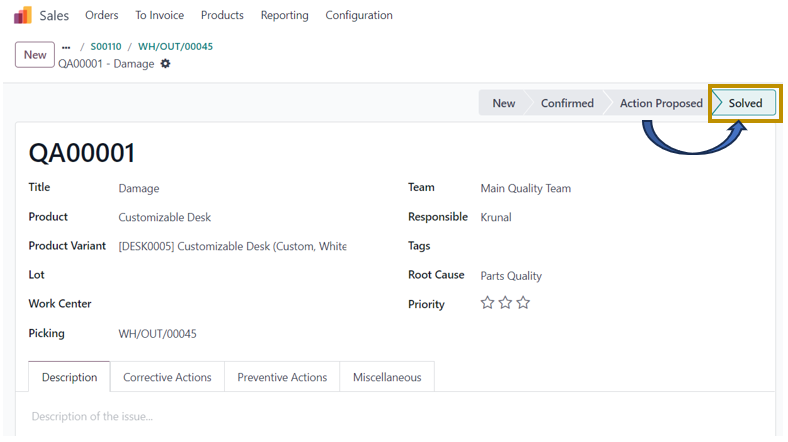
In the Quality Alert form, enter the Title, Root Cause, Work Center, Lot, and other necessary details. The Product, Product Variant, Team, Responsible, and Picking are automatically entered as it is preconfigured in the Odoo system.
In the ‘Description’ tab of the form, we can state the details of the issue found in the product. We can specify the corrective measures to be taken as an instruction in the ‘Corrective Actions’ tab. One can suggest preventive actions to be taken to avoid such occurrences of defects in the future by stating it in the ‘Preventive Actions’ tab. In the ‘Miscellaneous’ tab, we can specify the Vendor, Company, Date Assigned, and Date Closed.
We can change the stages of the Quality Alert according to the progress of the rectification done.
If you go to the Quality Module, you can find the new Quality Alert created.
Quality App => Quality Control Menu => Quality Alerts
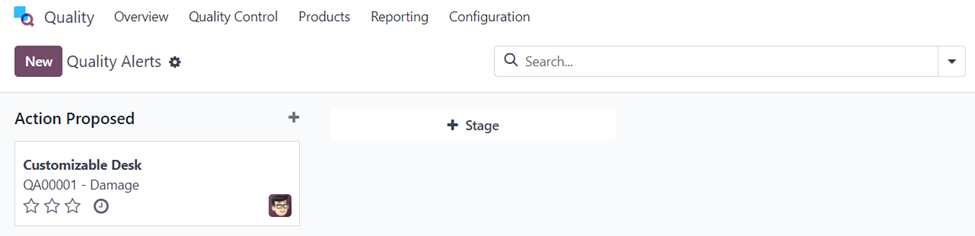
The Quality Alert is found under its current stage (Here, Action Proposed) in the Quality Alerts dashboard.
On returning the delivery order, we can find the new smart button created that is, ‘Quality Alert’.
After taking all the necessary corrective actions, go to the Quality Alert smart button and we can mark the Quality Alert as ‘Solved’ by editing the stage as shown below.
After solving the current quality issue, let us once again return to the delivery order to choose the ‘Quality Checks’ smart button. We can now mark the failed Quality Check as ‘Pass’ by selecting the ‘Pass’ button.
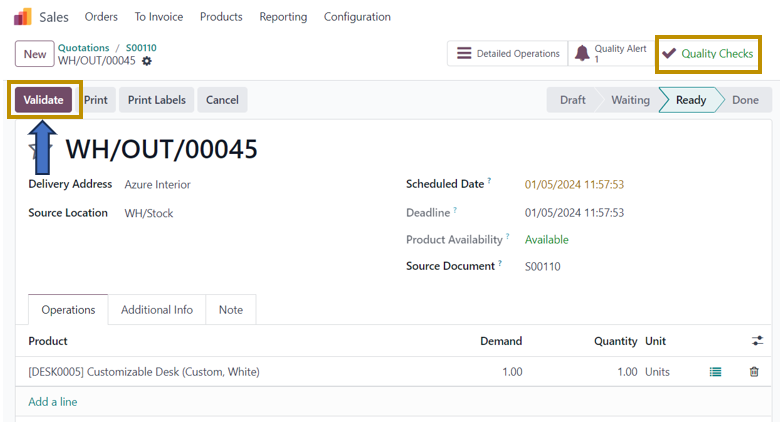
Now, the Quality Checks smart button appears in Green color as shown below. This indicates that the Quality check is passed and hence, satisfactory. We can now proceed with the further process of the delivery operations by Validating the delivery order.
Return Operation in Odoo 17
Odoo ERP Software also provides an option when the quality of the product is disrupted when the customer receives it.
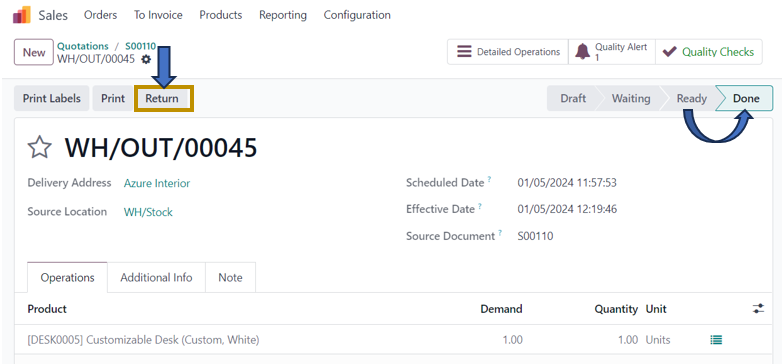
Let us see another case when the customer wants to return the product as they are not satisfied with the product. For Instance, the legs of the Customizable Desk are broken while transporting them to the customer. The customer wants to return the product. For that, select the ‘Return’ button which appears after the validation of the delivery order. A Reverse Transfer occurs on selecting the ‘Return’ option.
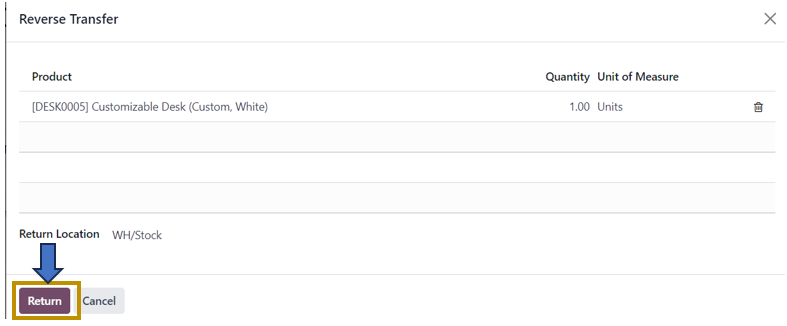
In the Reverse Transfer operation in Odoo 17, the products that are once transferred to the customer location are returned to the company stock. The Source Location in the delivery order becomes the Return Location. A reverse transfer pop-up appears in which we have to select the ‘Return’ option.
We can now validate the return operation of the product back to its stock from the customer by selecting the ‘Validate’ option in the screenshot below.
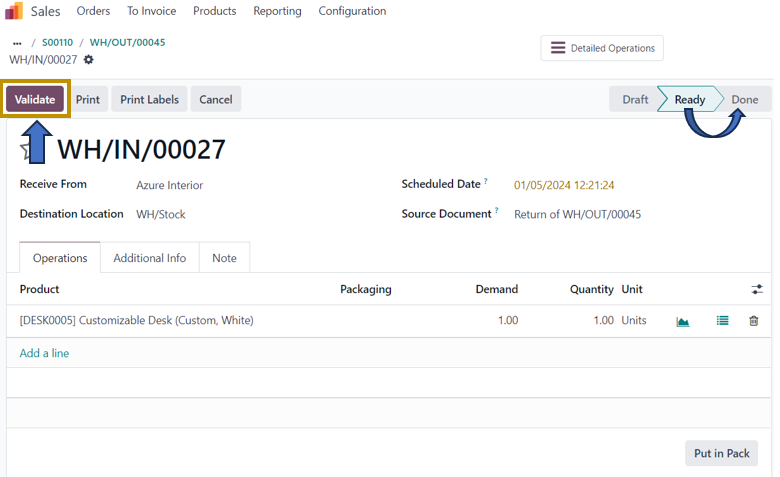
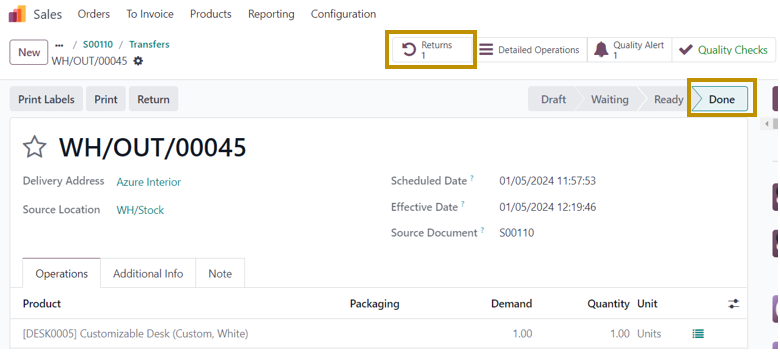
On validating the return operation, the status of the receipt changes from ‘Ready’ to ‘Done’.
When we return to the delivery order, we can find another smart button that is, ‘Returns’. This indicates that the product is returned to stock.
This is how we can manage the Quality Control procedures in our organization. It is very essential to ensure the quality of the products that we deliver to the customers. If we provide quality products, the customers will be satisfied and thus, our company gets more revenue through increased sales.