How to Set Up Multiple Companies and Its Users in
Odoo 17 Accounting?
As organizations expand, the ability to add new companies or expand existing ones within the same ERP system is crucial for scalability. Odoo 17 Accounting Company Setup provides this flexibility, allowing businesses to adapt to changing requirements. Odoo ERP features robust user access controls, enabling organizations to define roles and permissions for each user. This ensures that users access only relevant data and functionalities, enhancing security and confidentiality. For businesses with global operations, Odoo software supports multiple companies in different geographical locations, each with its currency, language, and regulatory requirements.
Setting up corporate data in Odoo Accounting is essential for several reasons, including the fact that it creates the framework for precise financial management and effective business operations. Ensuring that the system appropriately reflects your firm’s financial transactions and positions is contingent upon proper configuration. Accurate financial reports—such as cash flow, income, and balance sheets—are necessary for compliance and decision-making and must be generated as a result. Determining a company’s initial setup is essential to the correct upkeep of all accounting activities.
Before setting up a company’s financial data, we need to define the company in general settings. Let us see how that can be done in Odoo 17.
Settings => Companies Section => Update Info
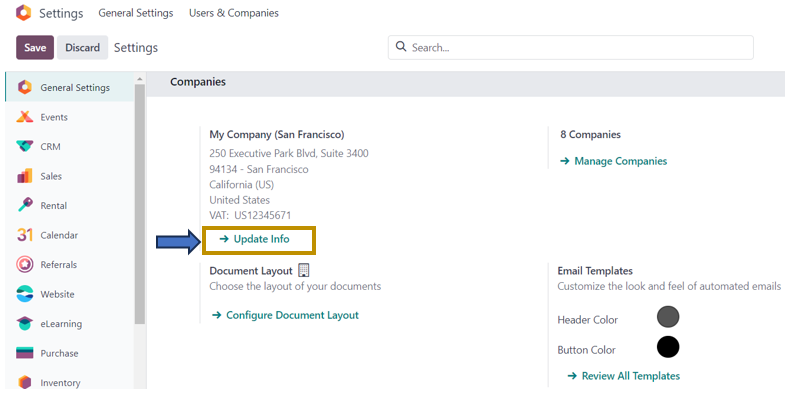
We can also update the details of our companies by following the path below:
Settings => Users and Companies => Companies
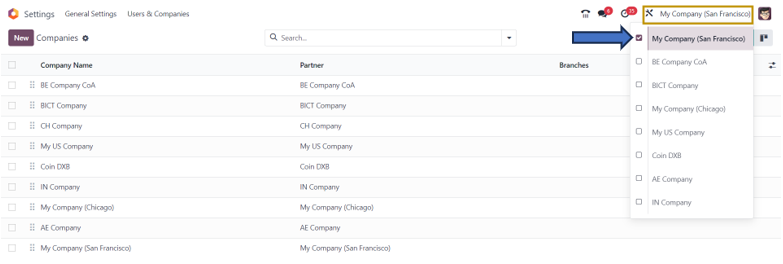
All the companies along with details such as Partner and Branches are shown in the list view. If you want to access the data of a particular company, select the checkbox of that company as shown above from the drop-down in the top right corner of the window. To configure a new company in the Odoo system, select the ‘New’ option. Here, let us select one of the companies to view its details.
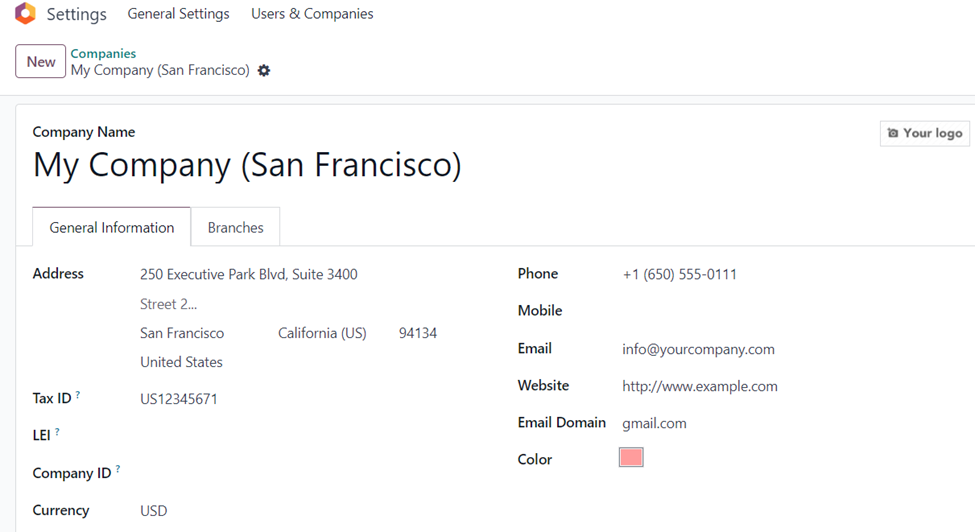
In the Company form, we can define Address, Phone, Mobile, Tax ID, Email, LEI, Company ID, Currency, Website, Email Domain, and Color in the ‘General Information’ tab. In the ‘Branches’ tab, we can define the company name, Partners, and Branches associated with the parent company. Select the ‘Add a line’ option in the ‘Branches’ tab to add branches of that company to the system.
We can now create accounting entries, reports, and transactions of the company ‘My Company (San Francisco)’ in the Odoo Accounting application. As we want to set up a Chart of Accounts for the company ‘My Company (San Francisco)’, we can select the ‘Review’ option just below the ‘Chart of Accounts’ section as shown in the screenshot below.
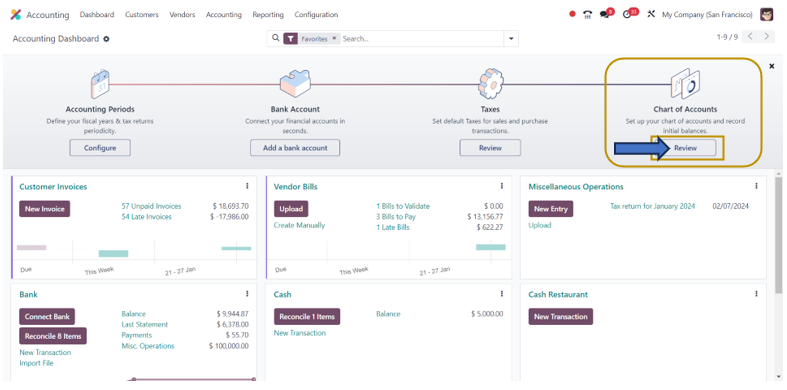
By selecting the option, you can add and access details of different accounts associated with that company.
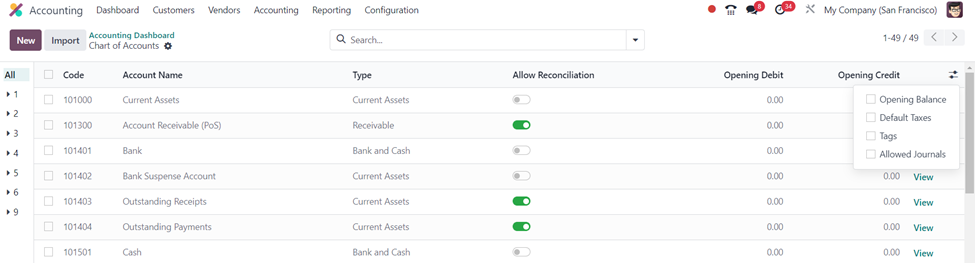
In the Chart of Accounts window, details such as Code, Account Name, Type, Allow Reconciliation, Opening Debit, and so on are displayed. You can add all the accounts to facilitate the accounting operations of that company here by selecting the ‘New’ option.
We can also configure the Users of the company in the Odoo System. For that, follow the path below:
Settings => Users and Companies => Users
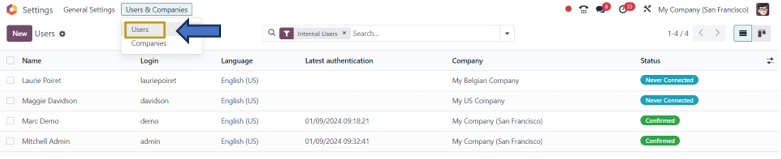
Here, we can create and define new users of the company. The details such as Name, Login, Language, Latest authentication, Company, and Status are shown in the Users window. To create a new user, click on the ‘New’ option in the window.
Let us view the form of one of the users configured in the system.
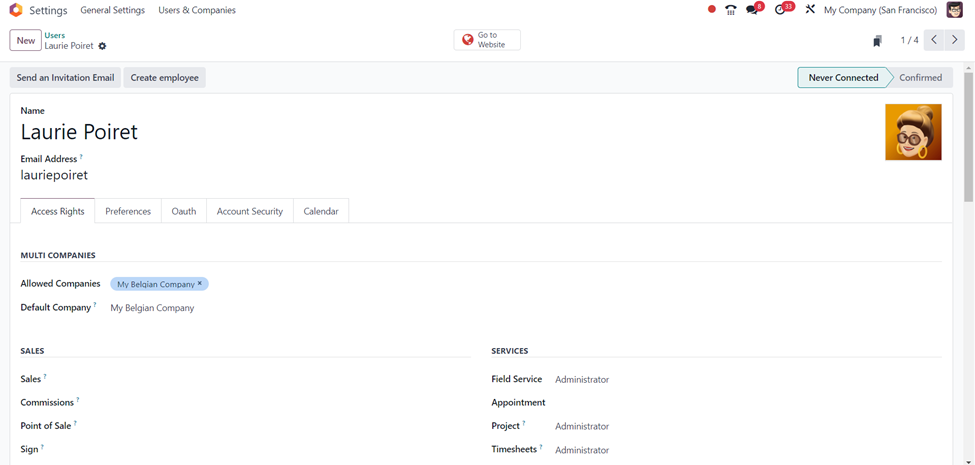
In the ‘Users’ form, we can set the name, photo, and email address of the user. There are different tabs available in the user form such as Access Rights, Preferences, Oauth, Account Security, and Calendar.
Access Rights in Odoo User form
This is the tab in which we define the permissions and access rights for that particular user for different operations of that company. In this tab, we can define the access of that user for operations such as Sales, Services, Accounting, Inventory, Manufacturing, Website, Marketing, Human Resources, Productivity, Administration, and others by specifying it in the corresponding fields of that section.
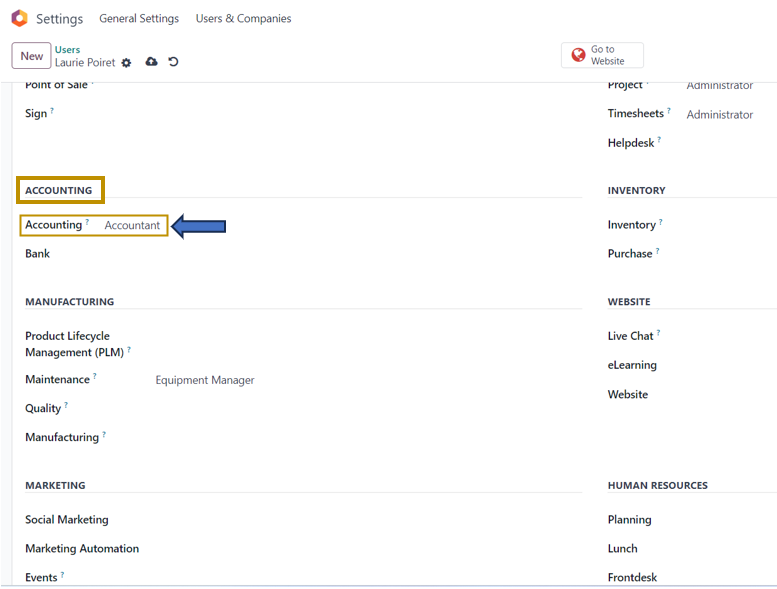
As we have been discussing the Accounting operations, let me show you how to set access rights for the Accounting section. In the Accounting section of the User form, we can define the access rights of the user by selecting the user rights as Billing, Read-Only, Bookkeeper, Accountant, or Consolidation user. According to that, the user can access and perform operations in the Accounting Application of the Odoo 17 ERP system. Similarly, we can set access rights under other sections of the form to manage different operations.
In the ‘Preferences’ tab in the Odoo User form, we can add the preferred language, timezone, notification, email signature, digital signature, default warehouse, and VoIP details of the user.
We can define Oauth Provider, Oauth User ID, and Oauth Access Token in the ‘Oauth’ Tab in the Odoo User form.
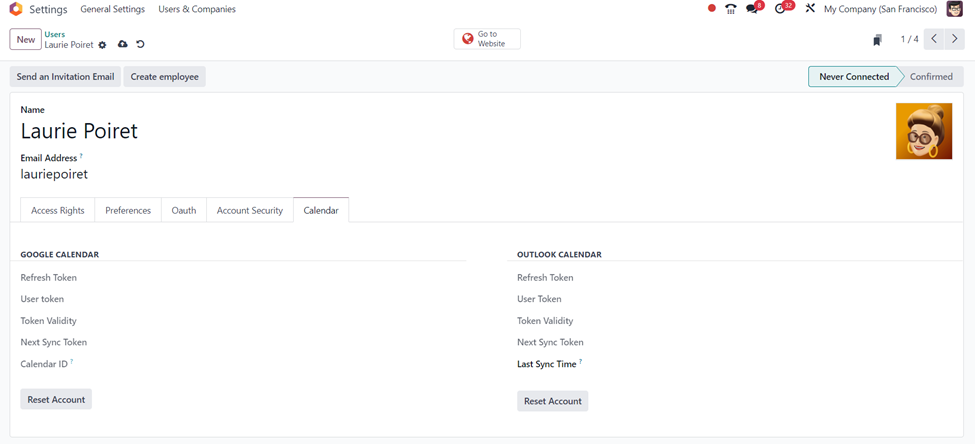
The ‘Account Security’ tab in the form is used to set the Two-factor Authentication system. The ‘Calendar’ tab is used to define the details of the Google Calendar and Outlook Calendar accounts.
This is how we can manage multiple Companies and their Users by setting Access Rights for each user for the operations they perform by defining their rights for each operation in Odoo 17 Software. Odoo helps businesses to scale up their businesses to new horizons through its effective solutions. As the trusted Partner of Odoo, Infintor Solutions can help you manage your multiple businesses in a single ERP system in the most effective way.