Managing Leads and Opportunity in CRM
Customer Relationship Management is the process of managing the relationship with the customers. The main purpose of CRM is to improve customer relationships, encourage client retention, and increase sales. The primary goal of CRM is to make interactions and communication more effective and productive.
Odoo CRM helps to track leads, opportunities and obtain accurate forecasts. It helps to grow business by organizing sales activities. A CRM system collects and organizes data from a variety of sources. CRM systems provide detailed information on customers’ data, purchasing history, buying preferences. By knowing their preferences, you can understand their requirements and ultimately give them what they need. Thus it helps customer support representatives to provide better and faster customer service to improve customer satisfaction.
Lead
A lead is a person or a company who has the potential to become a customer or client. Advertising, direct marketing, networking, outbound calls, website enquiries, email marketing, and social media marketing are just some of the strategies used by businesses to create leads. A prospect is another term for a lead. Lead is a qualification step before creating an opportunity or a customer.
Opportunity
Qualified leads are converted to an opportunity. Opportunity increases the possibility of a sale. A lead becomes an opportunity once it has a budget, a schedule, and the product or service can help them solve a problem. It marks the start of your sales process with a potential or current customer.
Pipeline
Opportunities are organized with the pipeline and you can see exactly which deal needs your immediate attention, which is due, overdue and the activities can also be managed.
CRM => Configuration => Settings
If you want to add lead into the menu you have to enable the Leads in the settings.
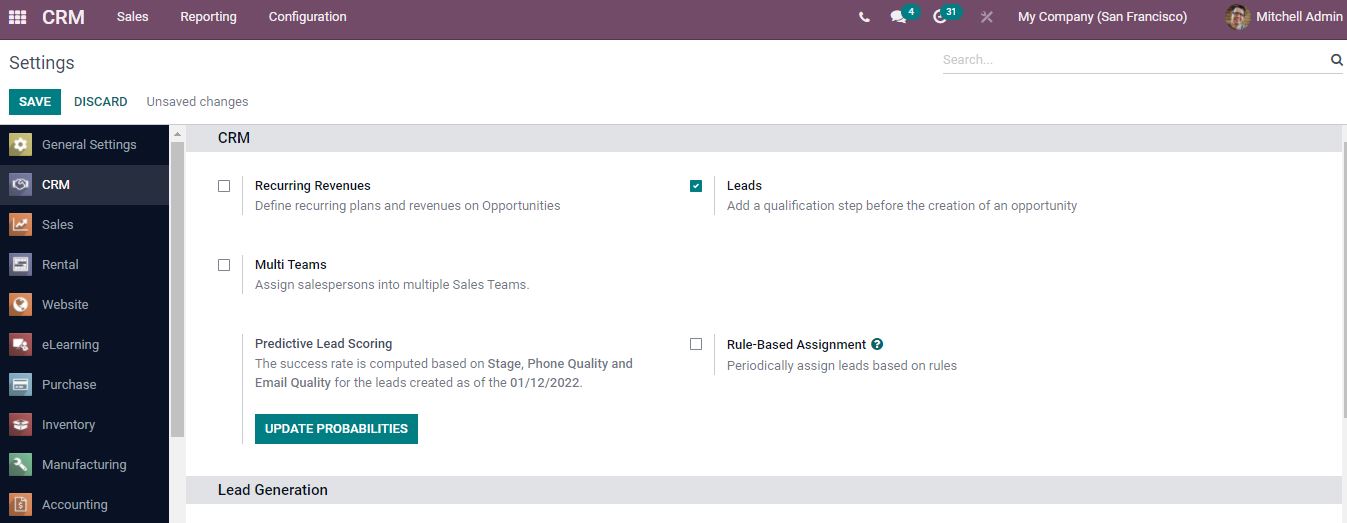
After activating leads you can find a leads menu displayed. Opening the leads, the list of leads created will be shown.
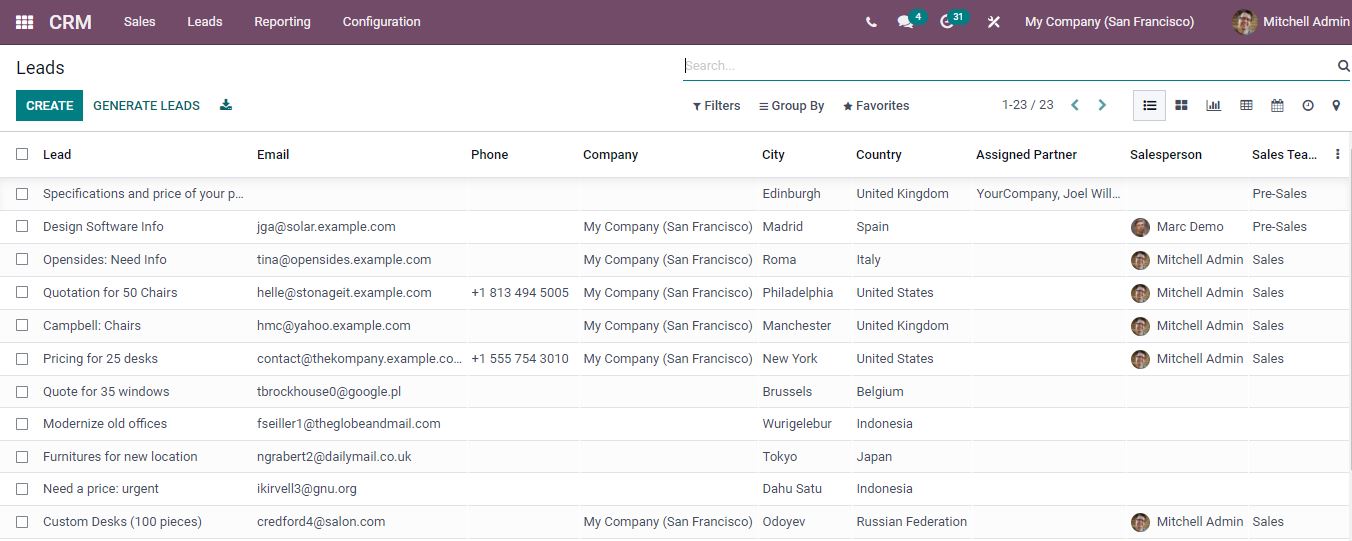
Leads
New leads can be created by clicking on the “create” button.
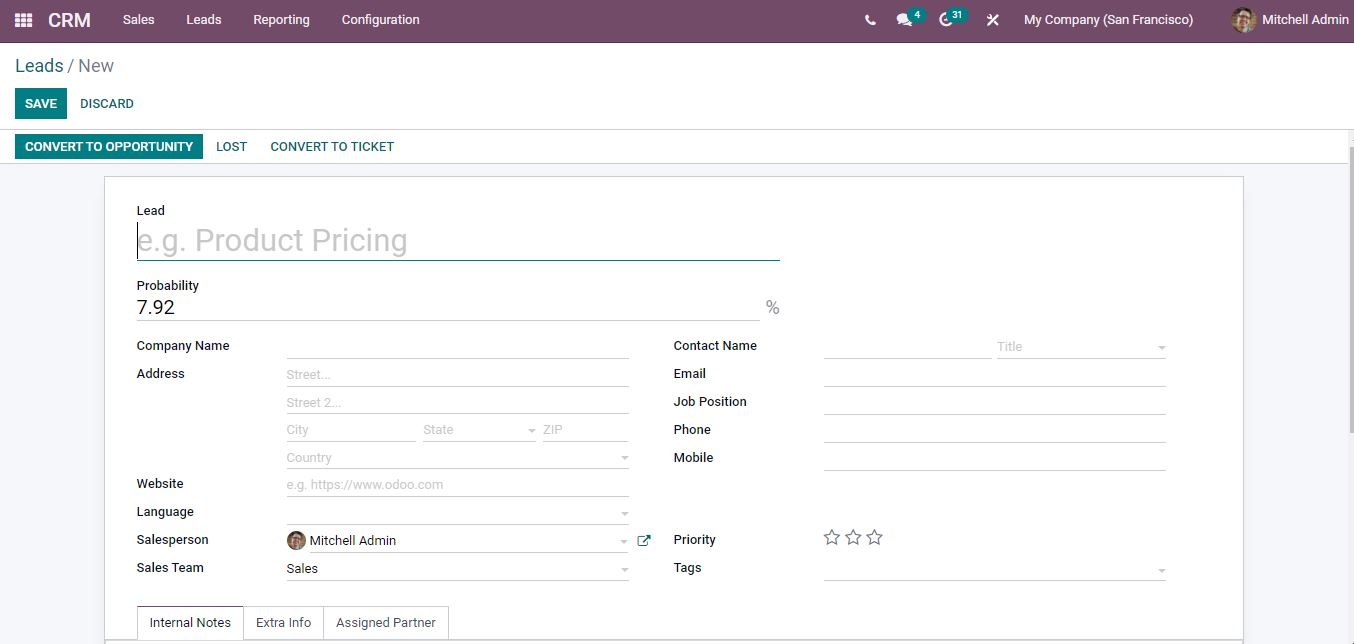
Fill in all details. After creating the lead if it is ready to become an opportunity you can click on the “Convert to opportunity” button.
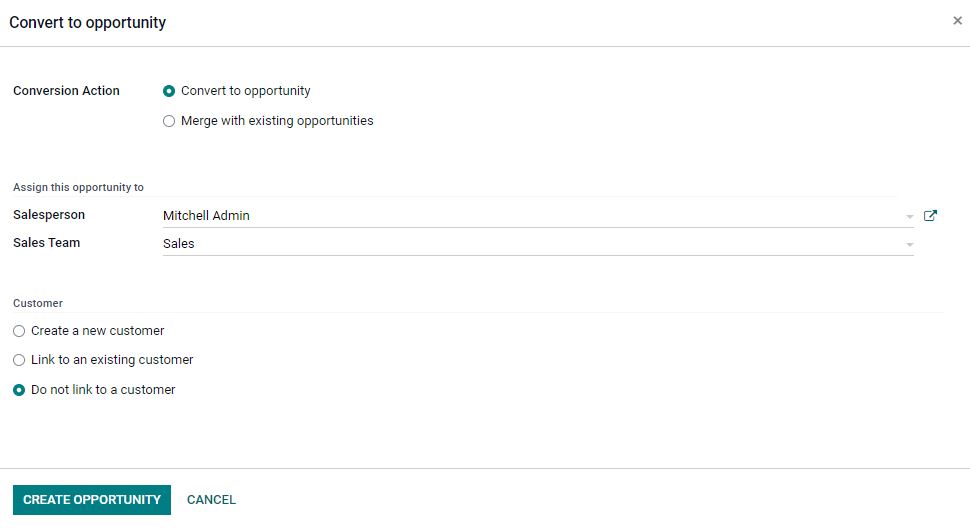
Conversion actions can be specified, whether to convert to a new opportunity or to merge with the existing ones, as there may be an existing opportunity with this address. You have the option to add the salesperson, sales team, and customer.
After clicking the “create opportunity” option, it gets added to the pipeline.
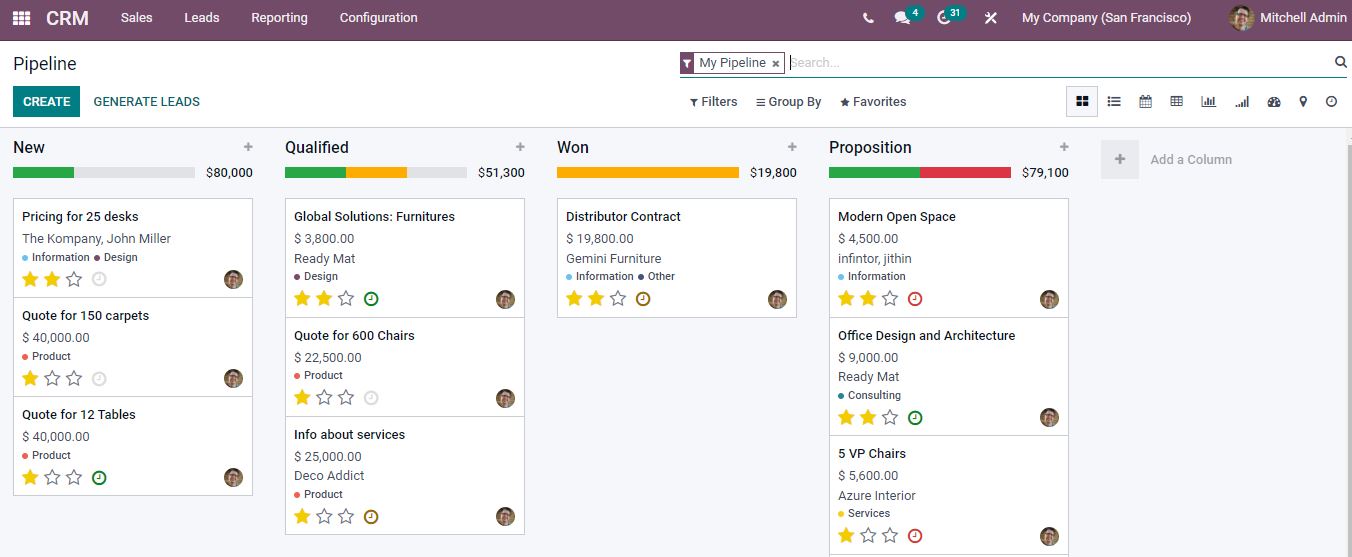
You can use various filters and group by option to view the suitable opportunities.
If the opportunity is ready to move to another stage you can drag and drop the opportunity to the next stage in the pipeline. Adding new stages can be done by selecting add a column and by entering the title.
You can set priority, schedule an activity and a chat box is generated by clicking on the image.
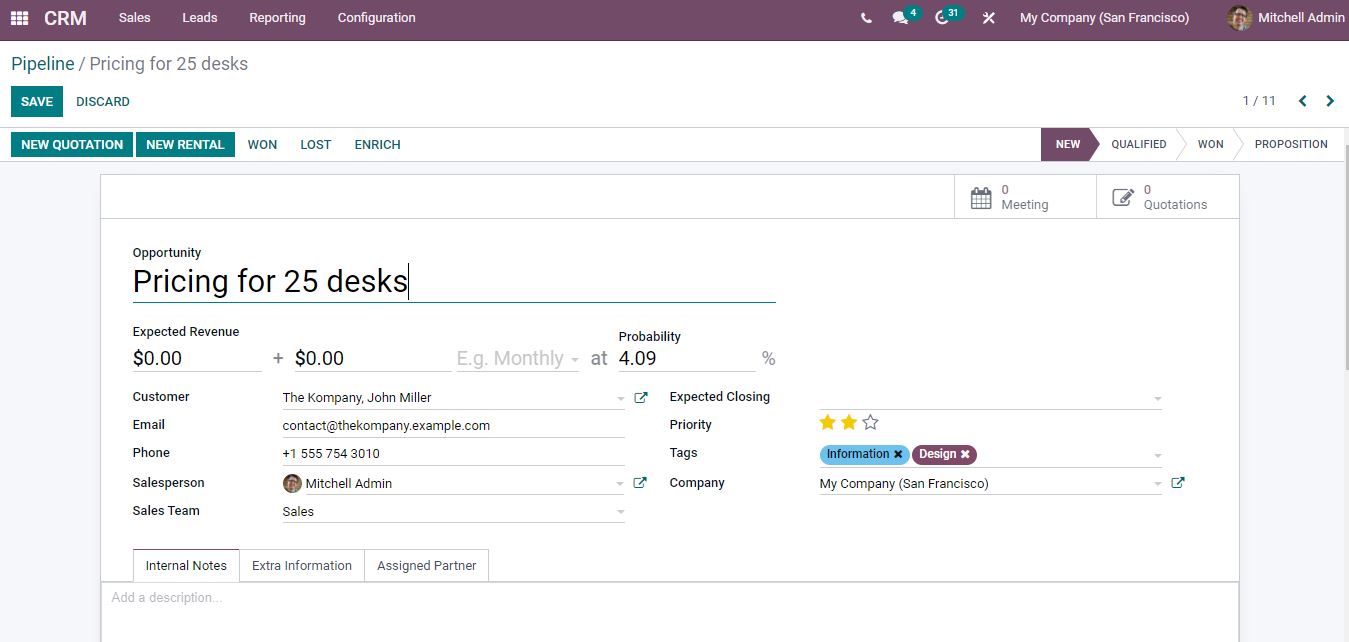
Opening the respective opportunity changes can be made and from here you can move to another stage and it gets updated in the pipeline. You can add more information like Email, phone, expected closing date and priority can be marked directly from here.
Lost
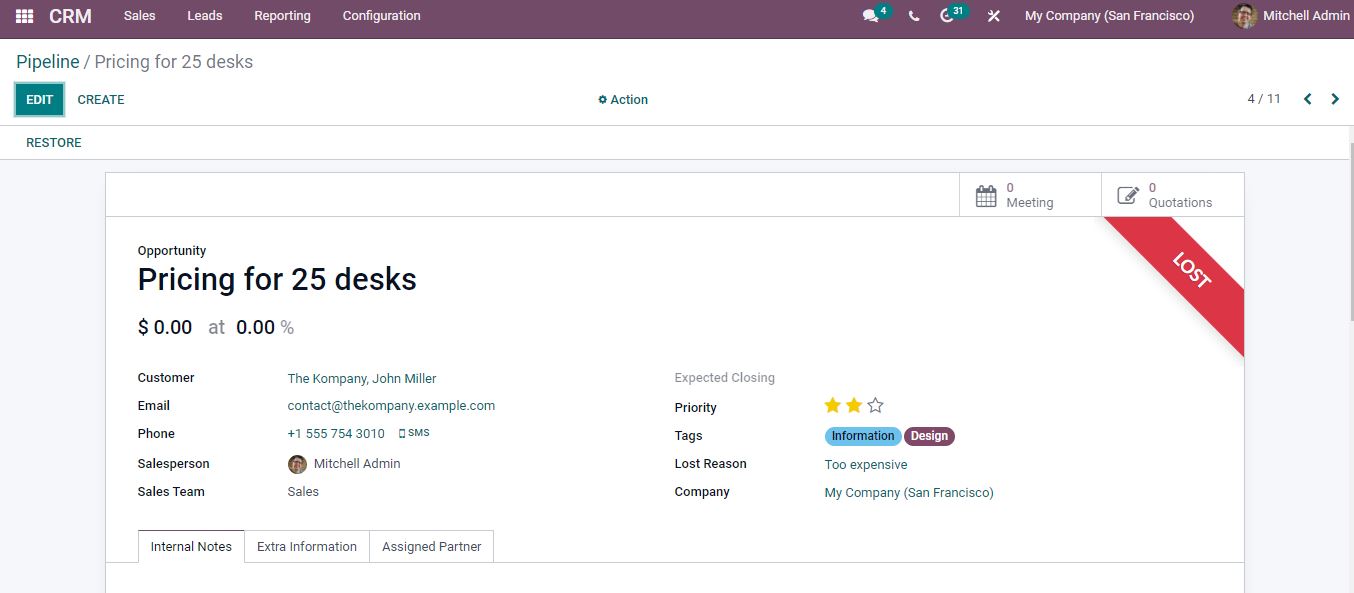
There may be a probability of losing the chance when the opportunities didn’t convert to sales. In such a case mark it as lost.

Specify the lost reason from the list. If the appropriate lost reason is not available in the list, you can create the suitable lost reasons by opening Configuration => Lost reason.
After submitting, the opportunity will show a lost label on the right side.
Directly from the pipeline, you can create an opportunity by clicking on the plus sign or the quick add button of any stage.
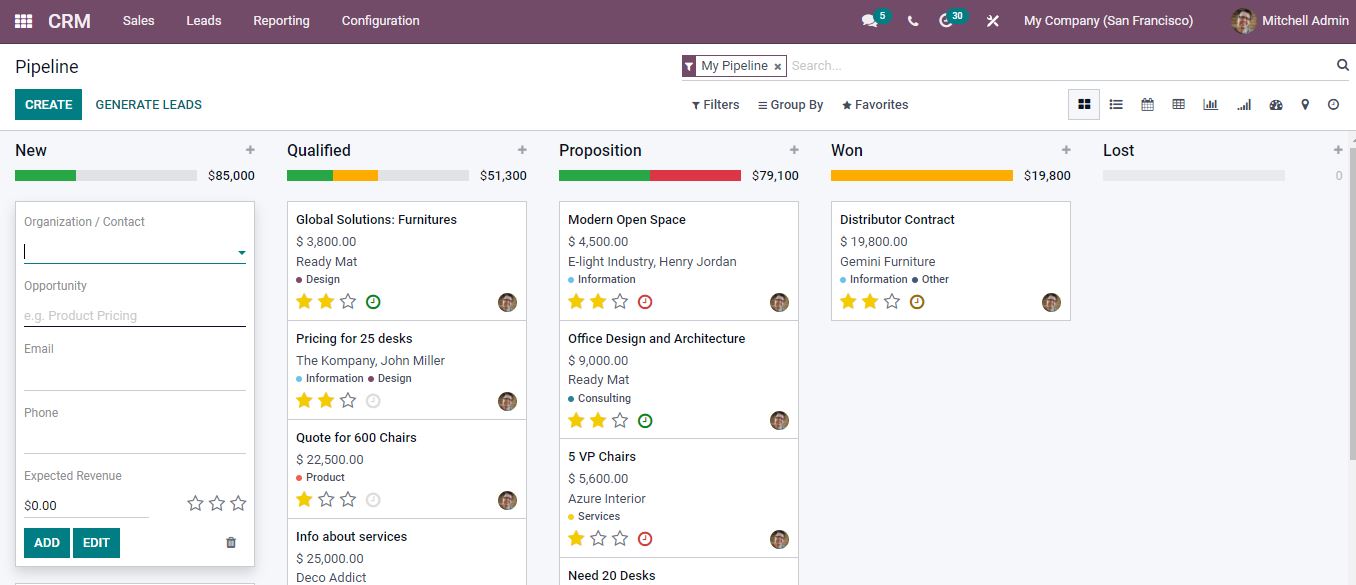
Add a new customer or an existing customer from the list. If an existing customer is chosen then the other details will be generated automatically. You can use the edit option to add some extra information. When the opportunity qualifies to the next stage you can drag and drop, then the expected revenue for the entire stage gets updated.
Create quotation
Once opportunities are qualified, you can easily send quotations directly from here by clicking on “New Quotation”
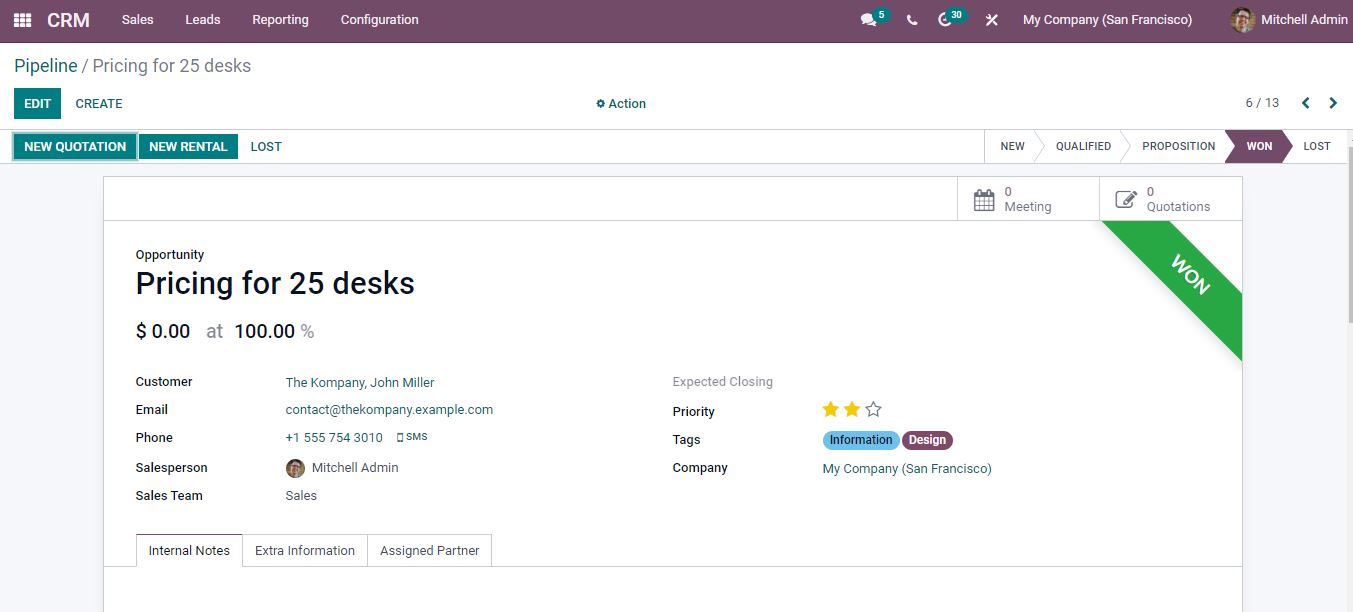
You will be directed to this page after clicking the new quotation option.
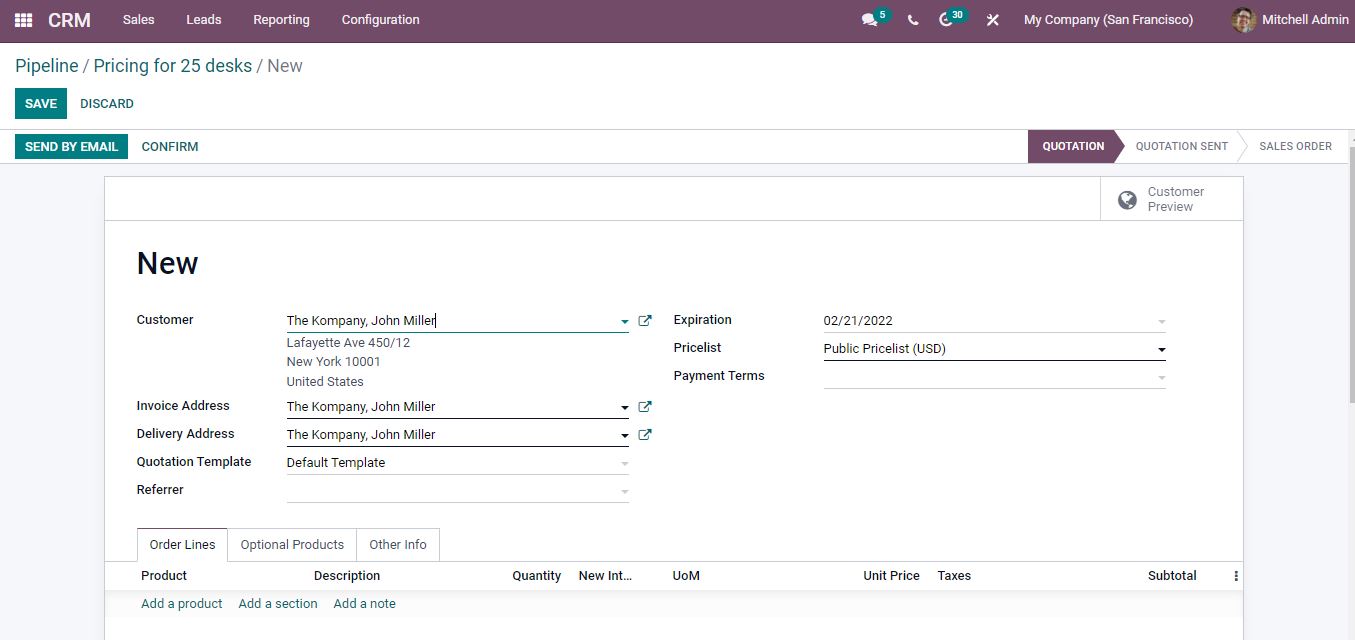
After filling in all the details you can confirm the quotation or send it by email to the concerned person.
Planning to implement an effective ERP solution at your organization? Reach out to us at www.infintor.com

