Creating Rental Products and Rental Periods in Odoo
The rental industry encompasses a wide range of businesses and sectors that provide goods, equipment, properties, or services for temporary use or access in exchange for a fee or rental payment. This industry has evolved and expanded over the years, driven by changing consumer and business preferences, technological advancements, and economic factors. When a company manages rental products, they have to track and provide the products available to the customers at the right time.
In the ‘Rental’ module in Odoo, we can easily create rental products and manage them by setting price-based and time-based rental periods, upselling and cross-selling rentals, online rentals, and so on. Without much explanation, we can pop into the practical side of the Rental module in Odoo.
Creating and Configuring a new rental product
Rental Application => Products menu => New
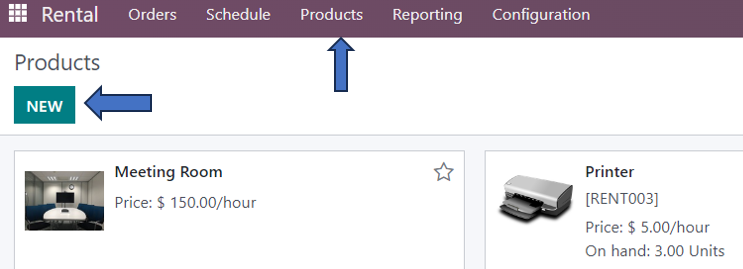
On going to the Products page in the rental application, we can see all the rental products of our company. The page provides details such as the rental product name, model number, description, quantity on hand, price, and so on. If you want to know more about that specific rental product, click on that product.
In the image above, we can see that the option ‘Can be Rented’ is automatically activated just below the product name since this is a rental product. The other options are ‘Can be Sold’, ‘Can be Purchased’, ‘Can be Expensed’, and ‘Recurring’ which can also be activated according to the policies of that rental product.
The General Information Tab
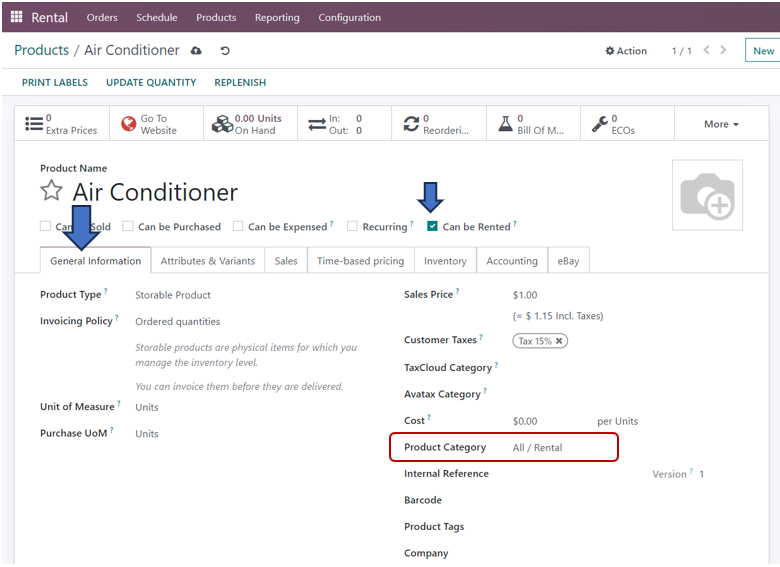
The tab provides details such as Product type, Invoicing policy, Unit of measure, Purchase unit of measure, Sales price, Customer taxes, Taxclod category, Avatax category, Cost, Product category, Internal reference, Barcode, Product tags, Company and internal notes section where we can enter these details. Remember to select the Rental category in the Product Category field.
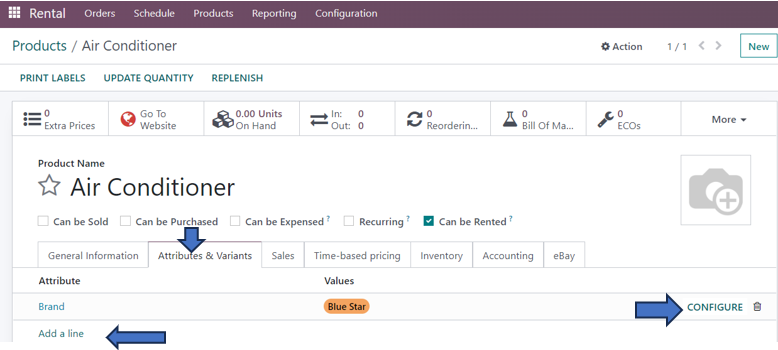
The Attributes and Variants tab
This is the tab in which we can configure different variants of the rental product such as brand, model, etc. After adding the variants, save it and select the ‘Configure’ button. We can also add prices for these variants by going to the Product Variant values after configuration.
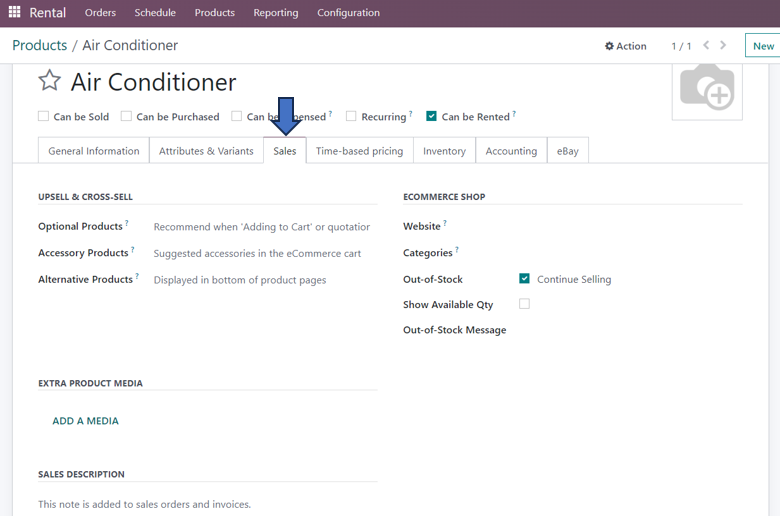
The Sales Tab
In the Sales tab, you have the option to upsell and cross-sell your rental product, provide product recommendations, enable an e-commerce shopping facility, and add media for selling the product. There are details such as Optional products, Accessory products, Alternative products, Website, Categories, Continue selling or not when out of stock, Show available quantity or not, Out-of-Stock message and add a media which is to be entered. You can also add a description to your sales orders and invoices.
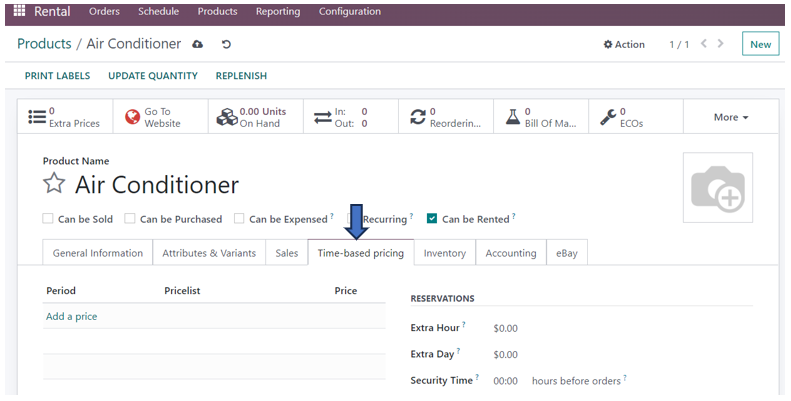
The Time-Based Pricing tab
This tab is used to add extra fees for the rental products that are returned after the ending time of their rental period. You can add Period, Pricelist, and Price, and also can add reservations for extra hours, extra days, and security time.
The Inventory tab
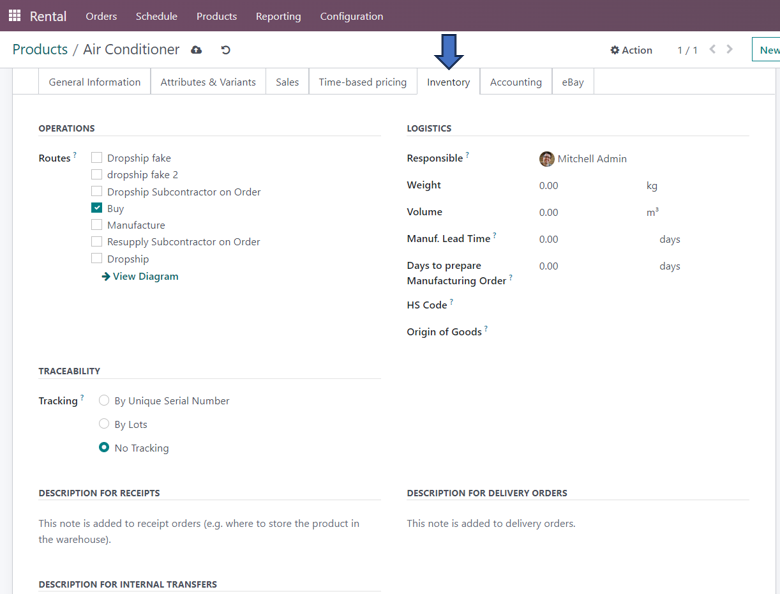
In this tab, we can specify the routes, enable tracking of the rental product by lots or serial numbers, specify the responsible person, weight of the product, volume, manufacturing lead time, Days to prepare manufacturing order, HS code, the origin of goods, and also the descriptions for receipts, delivery orders, and internal transfers.
Accounting tab
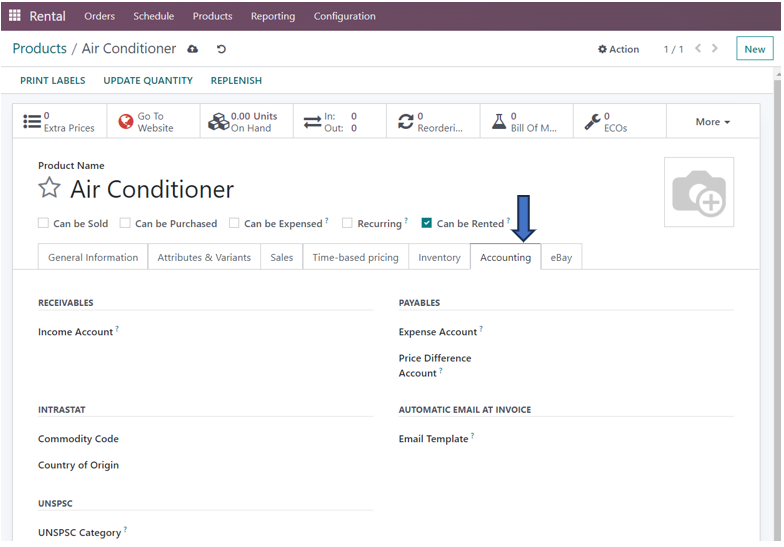
This tab contains information such as Income account, Expense account, Price difference account, Commodity code, email template for automatic email at invoice, Country of origin, and UNSPSC Category. ( The UNSPSC code is a four-level e-commerce taxonomy for accurately recording products and services.
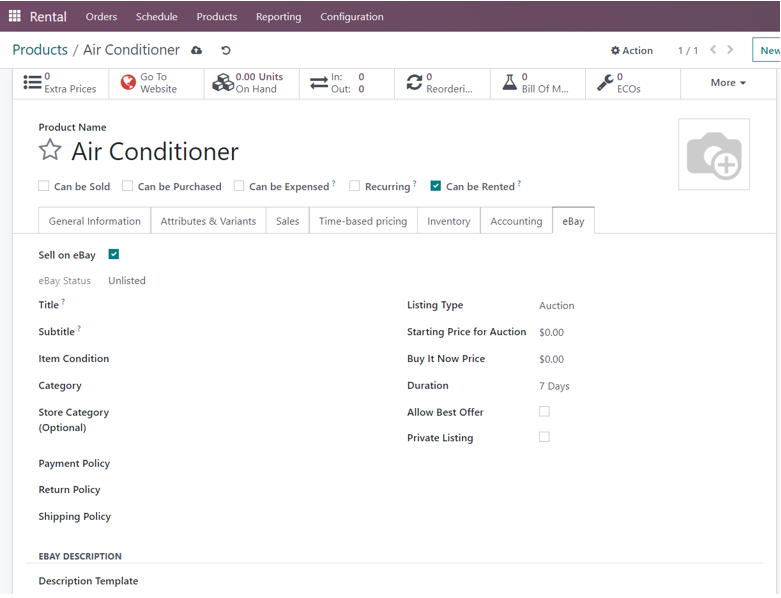
eBay tab

On activating this tab by selecting the ‘Sell on eBay’ option, you can add other details such as Title, Subtitle, Category, Subcategory, Payment policy, return policy, shipping policy, listing type, Starting price for the auction, Buy it now price, duration, allow best offer or not, private listing, item condition, and description template. Thus, in this section, we can add offers, prices, and policies for the product.
PubChem tab
This is the tab that allows us to specify the chemical composition or ingredients of the rental product. We can add the details by adding a line in the Chemical data section under the Description field.
After entering all the relevant details of the rental product, click on the ‘Save’ button so that these changes are updated in the Odoo database.
You can select ‘Print Labels’ to print multiple labels for your product. If you want to update the quantity of that product in stock, click on the ‘Update quantity’ button. You can also replenish the quantity of the product if the product is not in stock by selecting the ‘Replenish’ button. This may result in creating new requests for quotation, transfer, or manufacturing order as per the configuration of that product.
Creating a new Rental period
The products are rented for a certain time. These periods can be created and configured for a rental product.
Rental application => Configuration menu => Rental periods => New
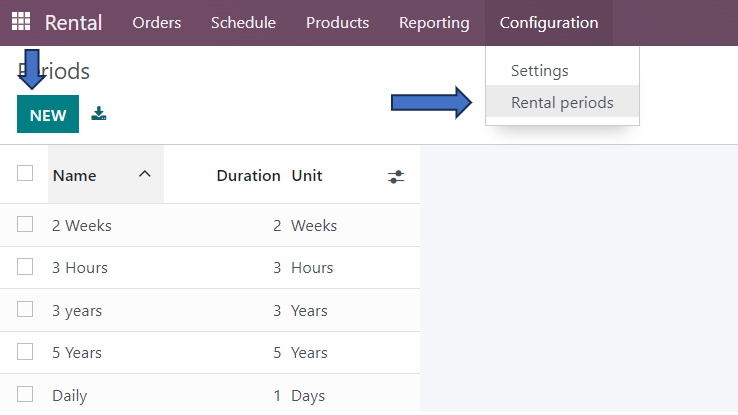
Here, we need to enter the name of the period, duration, and unit. Is this that simple to create new rental products and rental periods in Odoo? Hope you got relevant information on rental products in this blog.